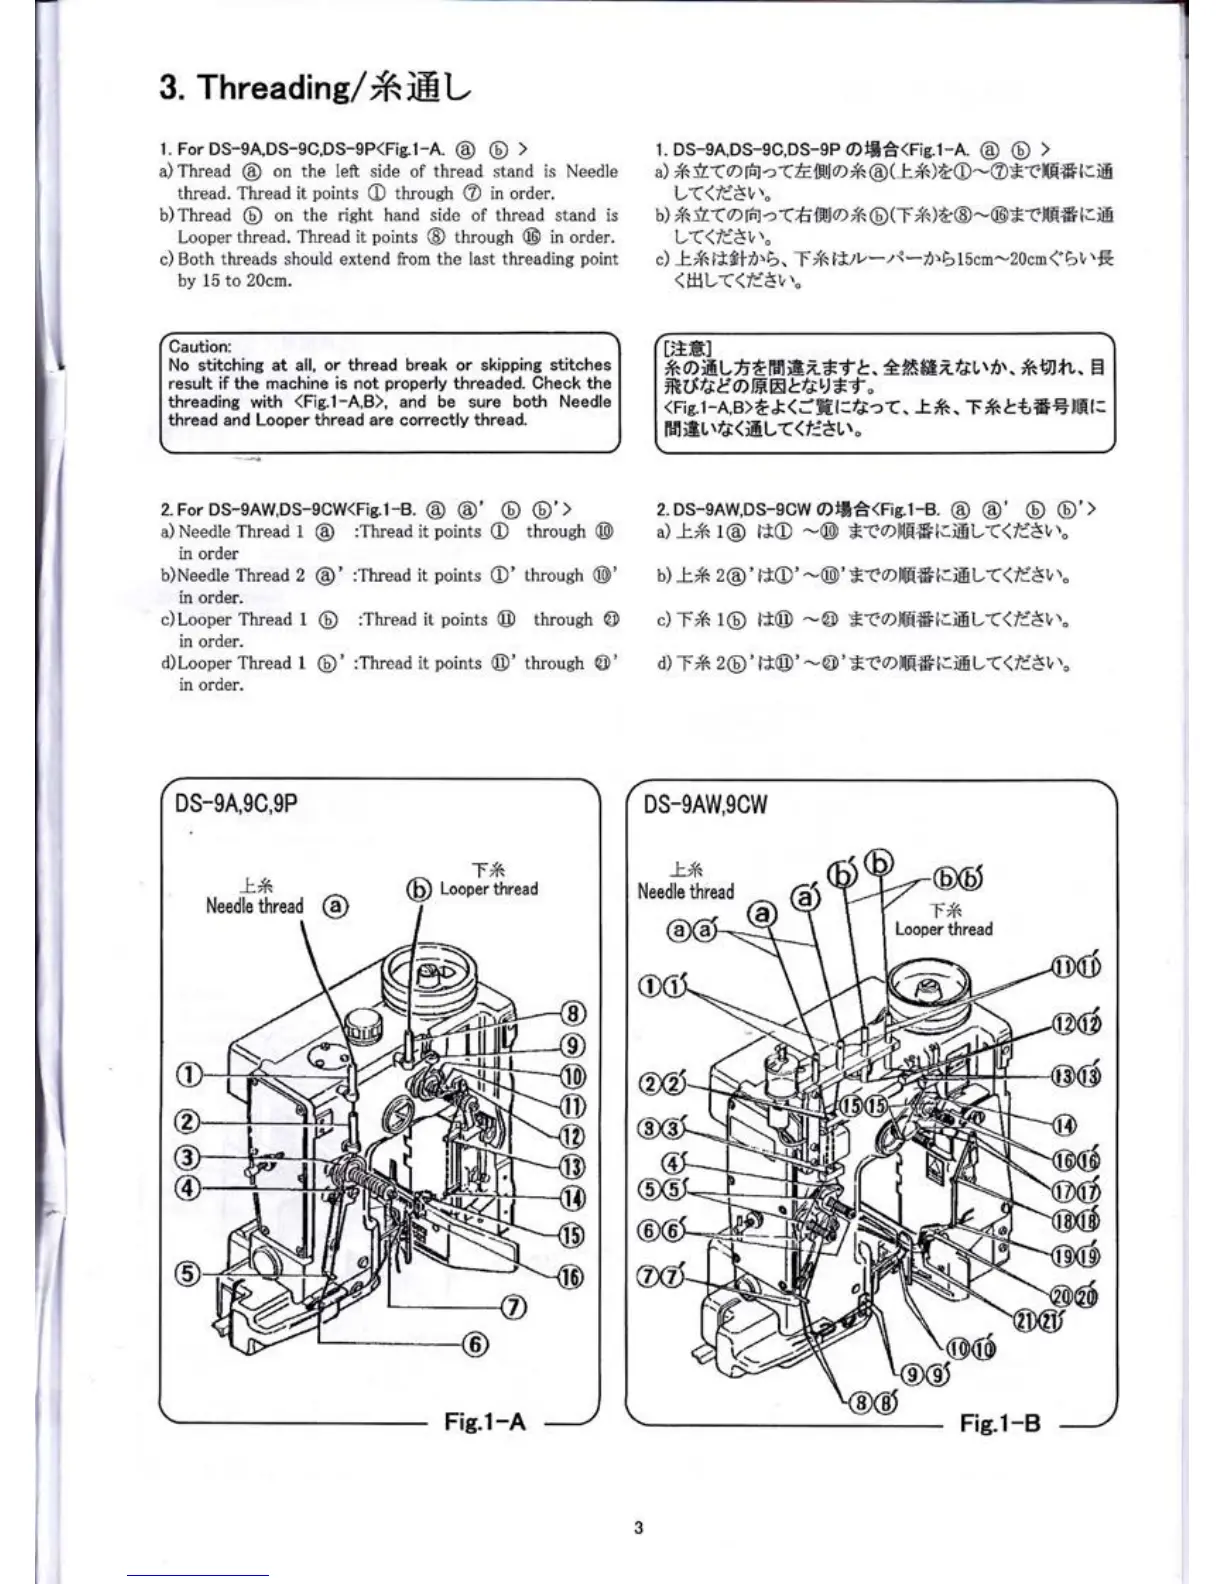
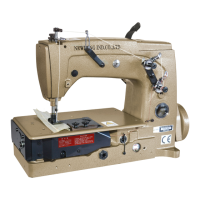
3. Threadins/friEL
1. ForDS-9A,DS-9C,DS-9P(Fig.1-A.
@ @
>
a) Thread
@
on the left side
of
thread
stand is Needle
thread. Thread it
points
O
throueh
@
in order.
b) Thread
@
on the
right
hand
side
of thread stand is
Looper
thread. Thread it
points
@
through
@
in order.
c) Both
threads should
extend
from the last threading
point
by 15
to 20cm.
1. DS-eA,DS-e0,DS-9P 0)Efi<rie.l-A.
@ @
>
a)
i6
ir(
o
rto
->a
El$lo
*<@
G'tr ) AO
-@Erl[F6
E iE
L(<fa'8v\"
b) iA
ir
(
o
rFJ
c\
h lill
0)
*,
@
(
T
i6
)
A@
-
@
E
tllF6
I
r
iE
L((/i8v',"
c)
t i6
l*fi
n'
6.
T/A
li.tv
-
f
*
71.
b
1 5cm-20cm
{ b
t,'E
(HL((/dEv',"
Caution:
No stitching at all, or thread break or skipping stitches
result if
t}te
machine is
not
properly
threaded.
Check the
threading
with
(Fis.l-A,B),
and be sure both Needle
thread and Looper thread are correctly thread.
DEH]
lRaiEVfi
*F"1
EZ*f
t. A*ffi er*u
tit.
*fl
*t.
El
fttXfa&"0>lHtrbfsL)*t
"
(Fig.l
-A,B)f &
(f
H
l:/au
(.
-t.
#.
T
#
&t,iFEllLE
l:
FpliEtrfa(iEL<<EtL\"
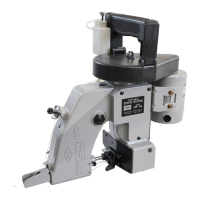
2.DS-eAW,DS-9CW
@l6d/.Gie.t-B.
@
@' @
o'>
a)
-L.i6
1@
t*O
-@
*reol|[FE{.rEL((IdSv''.
b)
tX
2@'
i*O'
-@'
*tolllH6[.iEL((fd3v''"
c)
T/6
1@
lt@
-@
*<"olrF#l.iEL<(li'3t,."
d)
TX
2O)'
lt@'
-@'E-eol{E6t.iEL<(li3t,
''"
2.
For DS-9AW,DS-9GW(Fig.1-8.
@ @'
a)
Needle
Thread 1
@
:Thread it
points
in order
b)Needle
Thread 2
@'
:Thread it
points
in order.
c)Looper Thread 1
@
:Thread it
points
in
order.
d)Looper
Thread I
@'
:Thread
it
points
in order.
@ @'>
O
through
@
O'
through
@'
@
throush
@
@'
through
@'