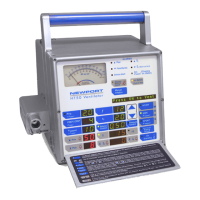
CALIBRATION / OPERATIONAL VERIFICATION PROEDURE
5-8 SERHT50NA A0808
PRESSURE VERIFICATION
1. Connect the T-connector between the test lung and the
exhalation valve. Connect the tubing from the T-connector to a
calibrated pressure gauge.
2. Press the ▲Up control button to select “Paw P M B” in the
Message Displa
y Window. Press the On/Standby button to
begin ventilation.
NOTE: Whenever an alarm message is in the Message Display
Windo
w, the user cannot select pressure or volume measurements for
display.
3. Set t
I
to 2.0 seconds. Verify that the peak pressure displayed on
both the calibrated pressure gauge and the Message Display
Window (i.e. “P”) are within 10% of each other.
4. Leave calibrated pressure gauge connected.
P trig
1. Set t
I
to 1.0 second and set ƒ to 1 b/min. Trigger breaths by
squeezing the test lung hard enough to create a negative
pressure equal to or greater than 1 cmH
2
O/mbar. Verify the P
trig indicator blinks and the ventilator delivers a mandatory
breath with each successful squeeze of the test lung.
2. Set ƒ to 15 b/min and Ptrig to 0.2 cmH
2
O/mbar. Verify that there
is no auto-triggering.
PEEP / CPAP
1. Connect the Rp50 parabolic resistor between the T-connector
and the test lung.
2. Set Volume Control to 250 mL, PEEP to 5, and Ptrig to 1.0.
After a few breaths, verify that the baseline pressure
measurements for the Paw meter and the Message Display
Window are both 5 ±1 cmH
2
O/mbar. If necessary, increase
Ptrig level until there is no auto triggering. Verify the Ptrig level
does not exceed 1.5 cmH
2
O/mbar.
3. Set PEEP to 15. After a few breaths, verify that the baseline
pressure measurements for the Paw meter and the Message
Display Window are both 15 ±2 cmH
2
O/mbar. If necessary,
increase Ptrig level until there is no auto triggering. Verify the
Ptrig level does not exceed 2 cmH
2
O/mbar.

 Loading...