Do you have a question about the Newstripe RollMaster 5000 and is the answer not in the manual?
Read all operation instructions to prevent damage or injury. Use in well-ventilated areas and away from sparks.
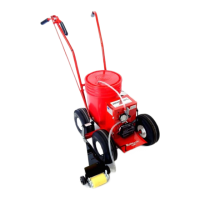
Instructions for unpacking chassis, handles, and securing them with bolts and nuts.
Steps for installing the battery, connecting positive and negative terminals with specific wire leads.
Activate paint trigger, check motor rotation, and reattach the battery cover securely.
Attach the roller carrier and lifting rod, ensuring proper movement for operation.
Install the 'L' shaped hose guide in the designated front right corner of the frame.
Assemble rollers, discs, and mandrel nuts onto the mandrel correctly.
Insert mandrel tube and place the assembled roller into the 'J' Yokes for operation.
Place the pail on the chassis and connect the dip tube through the paint lid.
Connect the paint hose to the pump trough and mandrel tube, ensuring correct orientation.
Discusses suitable paints (Latex, Alkyd, epoxy) and thinning for better flow and consistency.
Steps for cleaning the area and setting up the paint pail on the chassis before striping.
Guides on saturating the roller with paint and priming the unit before starting striping.
Explains controlling paint flow with the trigger and feathering for different line widths.
Instructions for disassembling, cleaning parts with solvent/water, and proper storage.
Advises against certain paints (lacquer, fast dry, epoxy) and provides thinning guidance.
Checks for free roller/mandrel movement in yokes and identifies lubrication points.
Explains feathering for saturation and trigger release for clean line ends without puddling.
Emphasizes roller saturation and recommends water-base traffic paints for easier cleanup.
Discusses how temperature affects paint viscosity and the need for thinning.
Tips on moving at a slow pace for even edges and releasing the trigger for clean ends.
Remedies for issues like trough closure, hose kinks, battery charge, and roller rotation.
Solutions for painted lines solid on one side but light or skipping on the other.
Advice for heavy ridges or excessive paint on line edges, suggesting disc use and trigger release.
Solutions for paint skipping across the roller width, checking for free roller movement.
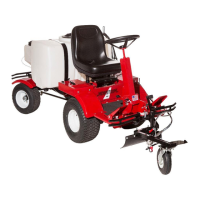
Lists main components of the RollMaster™ 5000 with their corresponding part numbers.
Details part numbers for various replacement roller kits and covers for different sizes.
Details the 18-month warranty, covering defects but excluding misuse, neglect, or accidents.
Outlines the process for service, shipping defective parts, and obtaining an RMA number.
States warranty limitations, exclusion of implied warranties, and liability for consequential damages.
| Brand | Newstripe |
|---|---|
| Model | RollMaster 5000 |
| Category | Construction Equipment |
| Language | English |