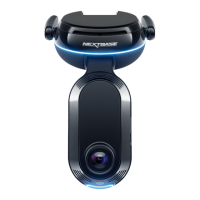
Open up the iQ App and select ‘Power your iQ’.
For optimum results follow the step-by-step instructions closely.
Here’s a breakdown of the steps needed for setup:
Clean Windshield
Wipe the front windshield and back window with alcohol
rub, wipe clear with cloth, and leave to dry for 5 minutes.
Connect your iQ
Connect the end of the QuickConnect power cable
to your iQ. Plug in your QuickConnect OBD Cable.
Most vehicles have their OBD outlet near the footwell,
on either the passenger or driver’s side.
Connect Rear Camera (if necessary).
Plug the rear camera cable into the top of your iQ.
Use Live View to Position iQ Camera
Use the iQ app to Scan the QR Code on the iQ.
Use the live view on the iQ app to hold you iQ where you
intend to mount it, for both Front and Rear cameras.
Ensure that the road is positioned in the centre third
of the Live View, and the road is centered in frame.
Your iQ should not obstruct the driver’s view.
1
2
3
4
Mount iQ
Remove the red cover from the adhesive mount
and firmly press the mount onto the windscreen.
Hold for 10 seconds. If necessary, adjust the angle
of your iQ using the iQ App Live View.
Mount Rear Cam
Plug the Rear Cam into the Rear Cam Connector Cable.
Plug the Rear Cam Connector Cable into iQ and route
the Rear Cam Connector Cable towards the Rear of the vehicle.
Choose a position for the Rear Camera at the top of
the rear window, leaving enough loose cable to allow
boot to be opened. Using the iQ App Live view to ensure
the rear road is in frame.
When ready, remove the adhesive cover, and firmly press
to rear window for 10 seconds in your desired position.
Adjust angle using the iQ App Live view if required.
Create an Account
Continue to follow the iQ App setup steps, by
creating an account and setting up a subscription.
A subscription is necessary to access iQ’s unique
4G features such as Emergency SOS, Witness Mode,
and Remote Notifications.
5
SET UP
11

 Loading...