7
PREPARING THE CAMERA
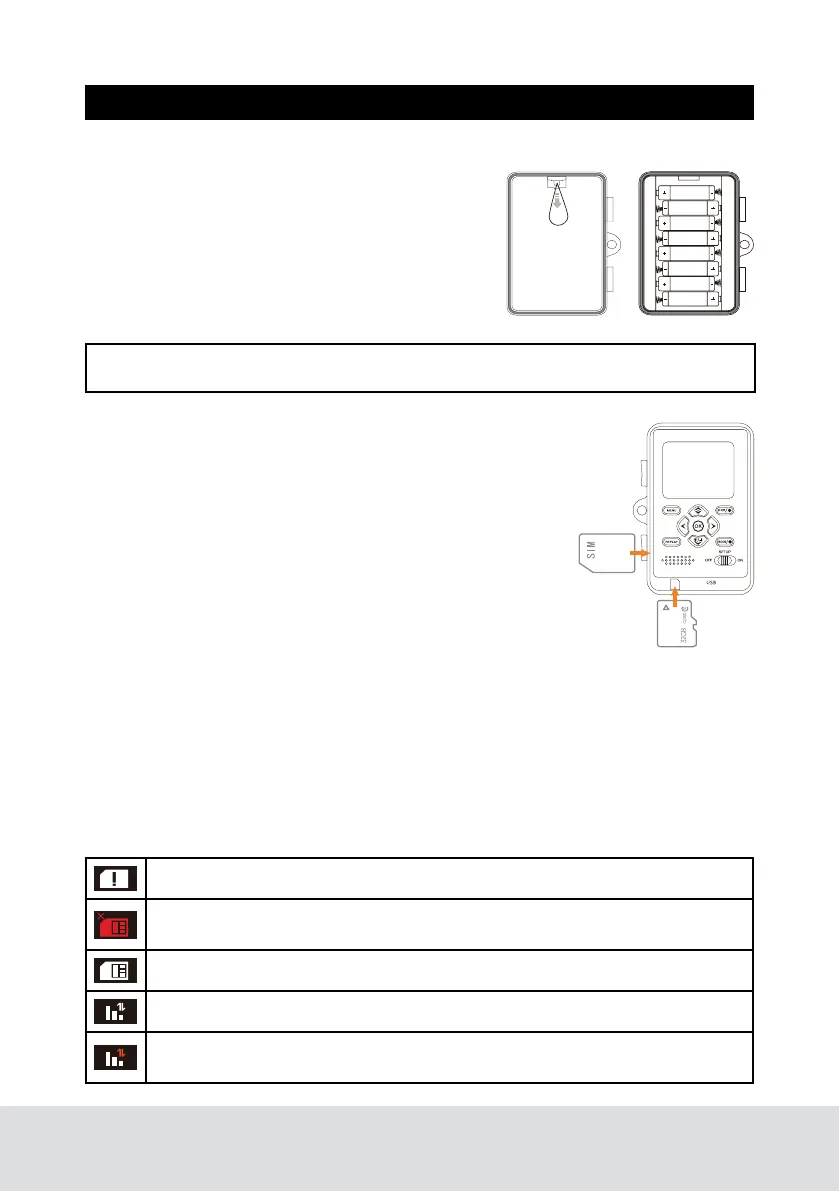
Inserting the batteries
Open camera and lift out battery tray. With the
tray removed, insert 8 new AA batteries, being
careful to match orientation marked on try. After
batteries are inserted, align metal contacts and
reinsert battery try into camera. If you are using
an external power source, ensure that it is 12V.
Other voltage levels could damage your camera.
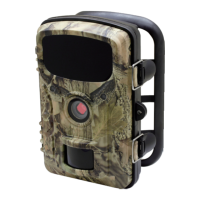
TF Card and SIM Card Installation
The TF card slot is located on the bottom left side of your
camera. A class 6 or above TF card is recommended, use of
a different card may result in unexpected results. The SIM
card slot is located on the lower part of the left side of the
camera. Insert SIM card with label facing you, as shown
in below diagram. When insert SIM card you should only
feel minimal resistance and a click when the card is fully
inserted.
Antenna Installation
Screw on device antenna until it is hand-tight. The antenna must be screwed tight
to ensure the camera is sealed from water. Be careful that the antenna is not
overtightened.
Power On and Check Status
Press the mode swift button to SET UP, the camera would be power on and camera
would automatically begin SYNC. Please refer to below diagram to make sure your
camera SYNC is complete.
NOTE: Do not mix new and old batteries or alkaline and lithium batteries.
Indicates SIM card is in the state of self-checking
Indicates failure of SIM card self-checking. This is caused when there is
no SIM present or if the SIM contacts are damaged.
Indicates SIM card reading successfully.
Indicates signal and network are both in good status.
Indicates network has been disconnected, the traffic is insufficient or the
SIM card has been shut down.