EasyManua.ls Logo

NI cRIO-9045 User Manual

Default Icon
28 pages
To Next Page IconTo Next Page
Page #1 background imageLoading...
Page #1 background image
GETTING STARTED GUIDE
cRIO-904x
Embedded CompactRIO Controller with Real-Time Processor and
Reconfigurable FPGA
This document describes how to begin using the cRIO-904x.
In this document, the cRIO-9040, cRIO-9041, cRIO-9042, cRIO-9043, cRIO-9045,
cRIO-9046, cRIO-9047, cRIO-9048, and cRIO-9049 are referred to collectively as cRIO-904x.
Note Refer to the device Safety, Environmental, and Regulatory Information
document, shipped with your cRIO-904x controller and available on ni.com/
manuals, for important safety and environmental specifications necessary when
setting up your device.
Unpacking the Kit
Notice To prevent electrostatic discharge (ESD) from damaging the device, ground
yourself using a grounding strap or by holding a grounded object, such as your
computer chassis.
1. Touch the antistatic package to a metal part of the computer chassis.
2. Remove the device from the package and inspect the device for loose components or any
other sign of damage.
Notice Never touch the exposed pins of connectors.
Note Do not install a device if it appears damaged in any way.
3. Unpack any other items and documentation from the kit.
Store the device in the antistatic package when the device is not in use.
Question and Answer IconNeed help?

Do you have a question about the NI cRIO-9045 and is the answer not in the manual?

NI cRIO-9045 Specifications

General IconGeneral
Operating SystemNI Linux Real-Time
Chassis Slots4
Chassis TypeCompactRIO
Real-Time ClockYes
Ethernet Ports2
Serial Port1
Operating Temperature-40 °C to 70 °C
Memory2 GB DDR3

Summary

Unpacking the Kit

Host Computer Software Installation

C Series Module Installation

Connecting the cRIO-904x Controller

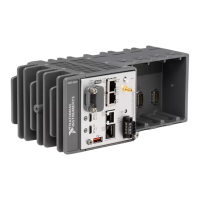
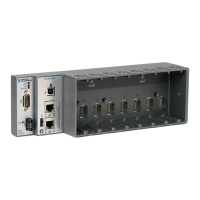
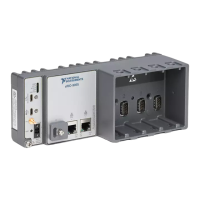
Overview of physical connections for the cRIO-904x controller.

Controller Grounding

Grounding the Controller

Steps for properly grounding the cRIO-904x controller to safety ground.

Controller Power Connection

Host Computer Connection

USB Connection Procedure

Steps to connect the cRIO-904x to a host computer using USB.

System Configuration and Software

Setting a System Password

Steps to establish a secure login password for the controller.

Installing Controller Software

Process for deploying software and drivers onto the cRIO-904x controller.

Controller Testing and Modes

Testing Controller in MAX

Steps to test controller communication and functionality using MAX.

Changing Module Programming Modes

How to select and deploy different programming modes for C Series modules.

Troubleshooting Controller Issues

LabVIEW Integration

LabVIEW FPGA Integration

Related product manuals