14
7.2.4) Level two programming (adjustable parameters)
The adjustable parameters are factory set as shown in table 15, with: “ “. However, they can be changed at any time as shown in Table
16. Follow the procedure carefully, as there is a maximum time of 10 seconds between pressing one button and another. If a longer period
of time lapses, the procedure will finish automatically and memorize the modifications made up to that stage.
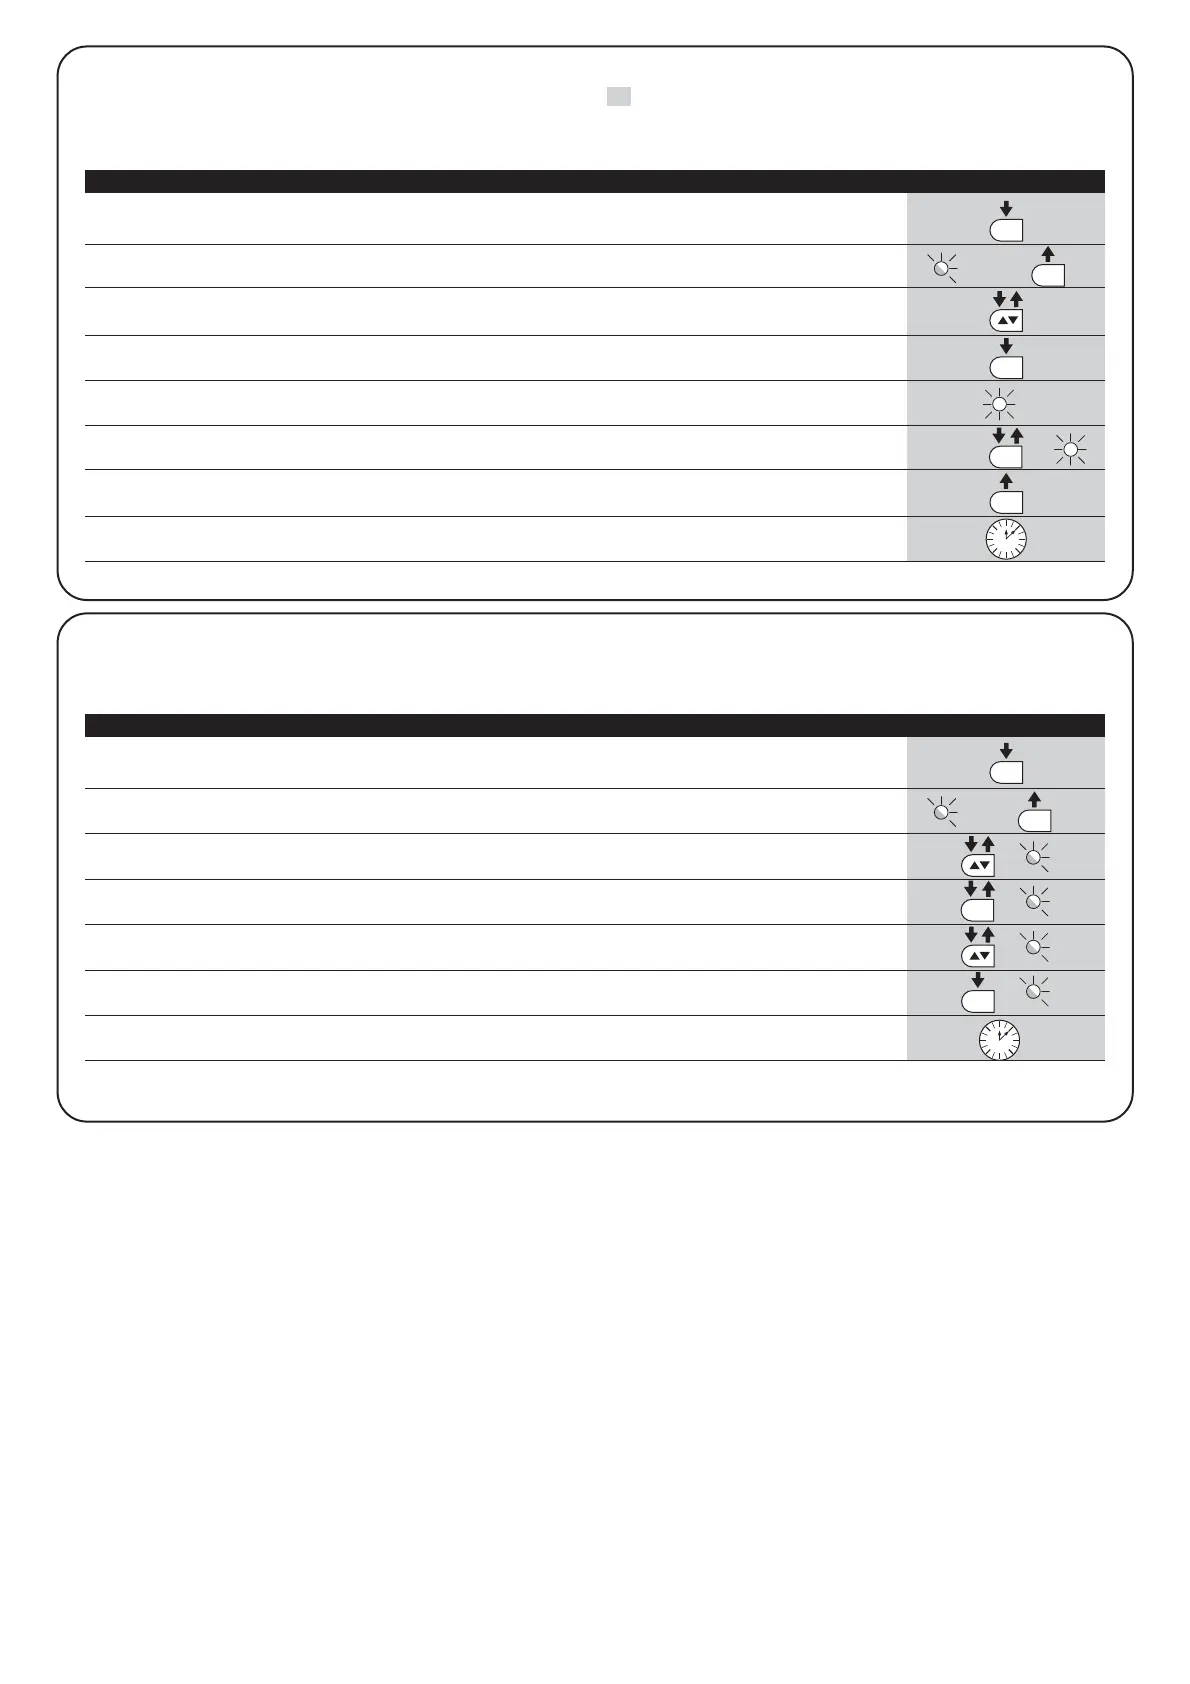
1. Press the button [Set] and hold it down (approx. 3 s)
3s
2. Release the [Set] button when L1 LED starts flashing
L1
3. Press button [▲▼] to move the flashing LED onto the input LED representing the parameter which is
to be changed.
4. Press the button [Set] and hold it down during step 5 and 6
5. Wait approx. 3 seconds, after which the LED representing the current level of the parameter which is
to be modified will light up.
6. Press button [▲▼] to move the LED representing the parameter value
7. Release the button [Set]
8. Wait 10 seconds before leaving the programme to allow the maximum time to lapse.
10s
Note: Points 3 to 7 can be repeated during the same programming phase in order to set other parameters
Table 16: changing the adjustable parameters Example
SET
7.2.5) Level one programming example (ON-OFF functions).
The sequence to follow in order to change the factory settings of the functions for activating “High Speed” (L2) and “Automatic Closing” (L3)
have been included as examples.
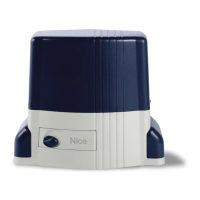
1. Press the button [Set] and hold it down (approx. 3 s)
3s
2. Release the [Set] button when L1 LED starts flashing
L1
3. Press the [▲▼] button once to move the flashing LED to LED L2.
L2
4. Press the [Set] button once to change the state of the function associated with L2 (Motor Speed).
LED L2 will now flash with long flashes. L2
5. Press the [▲▼] button once to move the flashing LED to LED L3
L3
6. Press the [Set] button once to change the state of the function associated with L3 (Automatic Closing).
LED L3 will now flash with long flashes. L3
7. Wait 10 seconds before leaving the programme to allow the maximum time to lapse.
10s
Once these operations have been completed, LEDs L2 and L3 must remain on to indicate that the “High Motor Speed” and “Automatic
Closing” functions are active.
Table 17: Level one programming example Example