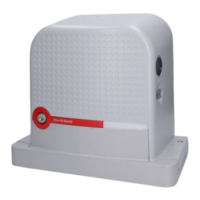
8
The manufacturers recommend you position the leaf at approxi-
mately half travel before starting the checking and start up phase of
the automation. This will ensure the leaf is free to move both during
opening and closure.
4) Final checks and start up
4.1) Choosing the direction
The direction of the opening manoeuvre must be chosen depending
on the position of the gearmotor with respect to the leaf. If the leaf
must open towards the left, the selector must be moved to the left
as shown in Figure 16; alternatively, if the leaf has to open towards
the right, the selector must be moved to the right as shown in Fig-
ure 17.
3.5) Description of the electrical connections
The following is a brief description of the electrical connections; for further information please read “7.3 Adding or Removing Devices” paragraph.
Terminals Function Description
Aerial Connection input for the radio receiver aerial.
LUCY B has an incorporated aerial; alternatively an external aerial can be used or a section of wire
already present on the terminal can be left to serve as an aerial.
1 - 2 Step-By-Step input for devices which control movement. It is possible to connect “Normally Open” devices up to
this input.
3 - 4 Stop input for the devices which block or eventually stop the manoeuvre in progress. Contacts like
“Normally Closed”, “Normally Open” or constant resistance devices can be connected up using
special procedures on the input. For more useful information about STOP see also Paragraph “7.3.1
STOP Input”.
1 - 5 Photocell input for safety devices such as photocells. Cut-in during closure inverting the manoeuvre.
It is possible to connect “Normally Close” contacts. For more useful information about PHOTO see
also Paragraph “7.3.2 Photocells”.
4 - 6 Phototest all safety devices are controlled every time a manoeuvre is performed and the manoeuvre starts only
if the test is positive. This is possible using a particular type of connection; the “TX” photocell
transmitters and the “RX” receivers are powered separately from one another.
For more useful information about the connection see also Paragraph “7.3.2 Photocells”.
7 - 8 Flashing light a NICE “LUCY B” flashing light with a 12V 21W car bulb can be connected to this output.
During the manoeuvre the unit flashes at intervals of 0.5 s
16 17
4.2) Power supply connection
The connection of ROAD200 to the mains must be
made by qualified and experienced personnel in strict
observance of current legislations, standards and regula-
tions.
As soon as ROAD200 is energized, you should check the following:
1. Make sure that the “OK” LED flashes regularly, with about one
flash per second.
2. Check that the motor does not control the door movement and
that the courtesy light is off.
If the above conditions are not satisfied, you should immediately
switch off the power supply to the control unit and check the electri-
cal connections more carefully.
Please refer to Chapter “7.6 Troubleshooting” for further information
about finding and analysing failures.