EN
– English
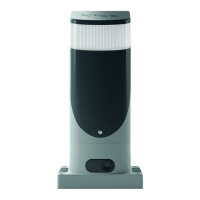
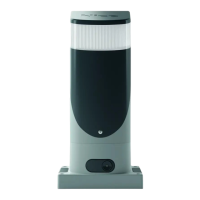
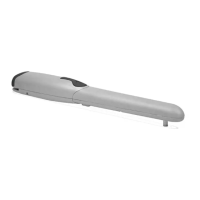
,QVWDOODWLRQRIWKHJHDUPRWRU
:$51,1*6
s,QFRUUHFW LQVWDOODWLRQPD\ FDXVHVHULRXV SK\VLFDOLQMXU\WR WKRVH
ZRUNLQJRQRUXVLQJWKHV\VWHP
s%HIRUHVWDUWLQJDXWRPDWLRQDVVHPEO\PDNHWKHSUHOLPLQDU\FKHFNV
DVGHVFULEHGLQSDUDJUDSKVDQG.
(ESGDRTQE@BDHSHRSNQDRSNM@KQD@CXDWHRSRSGDFD@QLNSNQLTRSADLNTMSDC
CHQDBSKXNMSNSG@SRTQE@BDTRHMF@OOQNOQH@SDLD@MRDFDWO@MRHNMANKSR.SG-
erwise, in order to mount the gear motor:
#HF@M@CDPT@SDKXRHYDCENTMC@SHNMGNKDTRHMF
as a reference the values indicated in ƄJ;
Prepare one or two tubes for the passage of the electricity cables as in ƄJ
;
Assemble the two anchoring devices onto the foundation plate, placing
one nut under and one over the plate; the bolt must be tightened as in ƄJ
so that the threaded part emerges about 25-35 mm above the plate;
Pour in the concrete and before it starts to set, place the foundation plate
@SSGDKDUDKRHMCHB@SDCHM%HFTQDL@JDRTQDSG@SHSHRO@Q@KKDKSNSGDKD@E@MC
perfectly level, ƄJ. Wait for the concrete to set fully;
Remove the 2 nuts above the plate;
Before proceeding with installation, you should position the door halfway
along its travel and then anchor the gear motor to the foundation plate.
3GHRDMRTQDRSG@SSGDLDBG@MHB@KKHLHSRVHSBGDR@QD@CITRSDC@TSNL@SHB@KKX
(Paragraph 3.6) and then rest the gear motor on it.
,@JDRTQDSG@SSGDFD@QLNSNQHRODQEDBSKXO@Q@KKDKVHSGSGDSGDKD@E@MCSGDM
tighten the 2 nuts and washers as shown in ƄJ;
SSGHRONHMSHESGDQDHR@KQD@CX@Q@BJ@CITRSSGDLDBG@MHB@KKHLHSRVHSBGDR
as described in paragraph 3.6.
(ESGDQ@BJHRSNADHMRS@KKDCOQNBDDC@RENKKNVR
D Release the gear motor as shown in the “Release and manual move-
ment” paragraph in chapter “Instructions and Warnings for users of the
Slight gear motor”.
E Position the leaf in a closing position, leaving it at least 50cm from the
KHLHSRVHSBGRSNO1DRSSGDjQRSO@QSNESGDQ@BJ@F@HMRSSGDOHMHNM@MCL@JD
RTQDSG@SSGDRS@QSNESGDQ@BJBNQQDRONMCRSNSGDRS@QSNESGDKD@E@RHMƄJ
.
,@JDRTQDSG@SSGDQDHRRNLDOK@XNE@ANTSLLADSVDDMSGDOHMHNM@MC
SGDQ@BJ@MCSGDMjWSGDQ@BJSNSGDKD@ETRHMF@OOQNOQH@SDLD@MR
,QRUGHUWRDYRLGWKHZHLJKWRIWKHOHDIEHDULQJRQWKHJHDUPRWRULW
LVLPSRUWDQWWKDWWKHUHLVVRPHSOD\RIDERXWPPEHWZHHQWKH
UDFNDQGWKHSLQLRQDVLQƄJ
F2KHCDSGDKD@E@MC@KV@XRTRDSGDOHMHNM@R@QDEDQDMBDSNjWSGDNSGDQ
DKDLDMSRNESGDQ@BJ
G"TSSGDK@RSO@QSNESGDQ@BJENQSGDRTQOKTRO@QS
H3QXSNNODM@MCBKNRDSGDKD@E@MTLADQNESHLDR@MCBGDBJSG@SSGD
Q@BJLNUDRHMKHMDNMSGDOHMHNMVHSG@L@WHLTLLHR@KHFMLDMSNELL
@MCSG@SSGDOK@XNELLADSVDDMSGDOHMHNM@MCSGDQ@BJHRNARDQUDC
throughout the length.
I!QHRJKXSHFGSDMSGDjWHMFMTSRNESGDFD@QLNSNQL@JHMFRTQDSG@SHSHR
jQLKXjWDCSNSGDFQNTMCBNUDQSGDjWHMFMTSRVHSGSGDRODBH@KSNOR@RHM
%HFTQD
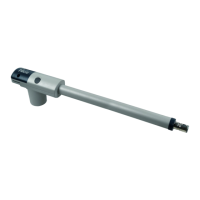
$GMXVWLQJWKHPHFKDQLFDOOLPLWVZLWFKHV
1DKD@RDSGDFD@QLNSNQVHSGSGDJDXOQNUHCDCQDEDQSNO@Q@FQ@OG
3GDML@MT@KKXODQENQL@BNLOKDSD.ODMHMF@MC"KNRHMFL@MNDTUQDSN
permit automatic adjustment of the mechanical limit switches. ,PSRUWDQW
l#TQHMFSGHRL@MNDTUQDBGDBJSG@SSGDQ@BJQTMRHM@KHFMLDMSVHSGSGD
OHMHNMVHSG@L@WHLTLLHR@KHFMLDMSNELL@MCSG@SSGDQDHR@OK@XNE
LLADSVDDMOHMHNM@MCQ@BJ@KNMFHSRDMSHQDKDMFSG(ƄJ);
+@RSKXL@MT@KKXONRHSHNMSGDKD@EG@KEV@X@KNMFHSRSQ@UDK@MCKNBJSGDFD@Q
LNSNQHMOK@BDVHSGSGDJDXOQNUHCDCQDEDQSNO@Q@FQ@OG
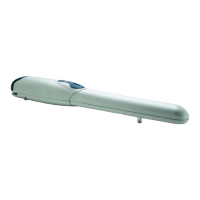
0DQXDOO\UHOHDVLQJDQGORFNLQJWKHJHDUPRWRU
3GDFD@QLNSNQHRDPTHOODCVHSG@LDBG@MHB@KAKNBJHMFRXRSDLSNDM@AKDL@M-
ual opening and closing of the gate.
3GDRDL@MT@KNODQ@SHNMRRGNTKCNMKXADODQENQLDCHMSGDDUDMSNE@ONVDQ
failure, malfunctions or during the installation procedures.
Insert the release wrench (ƄJ);
1NS@SDSGDVQDMBGBKNBJVHRD¦ƄJ);
It is now possible to move the leaf into the desired position manually.
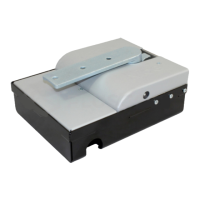
(/(&75,&$/&211(&7,216
4
:$51,1*t$OOHOHFWULFDOFRQQHFWLRQVPXVWEHPDGHZKLOHGLVFRQ-
QHFWHGIURPWKHJULGDQGGLVFRQQHFWHGIURPWKHEXIIHUEDWWHU\LIDQ\.
Insert all the connecting cables to the various devices, leaving them 20 to
BLKNMFDQSG@MMDBDRR@QX1DEDQSN3@AKDENQSGDB@AKDSXOD@MC%HFTQD
2 for connections.
Use a clamp to hold together all the cables that enter the gear motor, and
place the clamp underneath the hole through which the cables enter.
"NMMDBSTOSGDONVDQB@AKDSNSGDSDQLHM@KOQNUHCDC@RRGNVMHM%HFTQD
SGDMTRD@BK@LOSNKNBJSGDB@AKDNMSNSGDjQRSB@AKDQHMF
"NMMDBSTOSGDNSGDQB@AKDR@BBNQCHMFSNSGDCH@FQ@LHM%HFTQDR@MC
%NQFQD@SDQBNLLNCHSXSGDSDQLHM@KBK@LOR@QDQDLNU@AKD
ESDQL@JHMFSGDBNMMDBSHNMRKNBJSGDB@AKDRXNTG@UDBNKKDBSDCSNFDSGDQ
HMOK@BDTRHMFSGDQHMFROQNUHCDCjF@MC@MBGNQSGDDWBDRRO@QSNE
the aerial cable to the other cables.
3NBNMMDBSTOLNSNQRNMNOONRHSDKD@UDRQDEDQSNO@Q@FQ@OGf2+(&'3
in Slave mode”.
'HVFULSWLRQRIWKHHOHFWULFDOFRQQHFWLRQV
s)/$6+NTSOTSENQNMDNQSVNf+4"8!tNQRHLHK@QSXODk@RGHMFKHFGSRVHSG
RHMFKD5L@WHLTL6ATKA
q6&$f.ODM&@SD+HFGStNTSOTS@5L@W6RHFM@KKHFGSB@MADBNM-
nected. It can also be programmed for other functions; see paragraph “8.4
Level two functions”.
q%/8(%86BNLO@SHAKDCDUHBDRB@MADBNMMDBSDCTOSNSGHRSDQLHM@K3GDX
are connected in parallel using two conductors only, through which both the
DKDBSQHBHSXRTOOKX@MCSGDBNLLTMHB@SHNMRHFM@KRSQ@UDK%NQLNQDTRDETKHMENQ-
mation about BlueBUS see also paragraph “9.1.1 BlueBUS”.
q6723HMOTSENQSGDCDUHBDRVGHBGAKNBJNQSG@SL@XRSNO@L@MNDTUQD
HMOQNFQDRR"NMS@BSRKHJDf-NQL@KKX"KNRDCtf-NQL@KKX.ODMtNQBNMRS@MS
resistance devices can be connected up using special procedures on the
HMOTS%NQLNQDTRDETKHMENQL@SHNM@ANTS23./RDD@KRN/@Q@FQ@OGf
23./HMOTSt
q67(3%<67(3 = input for devices which control Step-by-Step movement.
(SHRONRRHAKDSNBNMMDBSBNMS@BSRNESGDf-NQL@KKX.ODMtSXODSNSGHRHMOTS
q23(1 = input for devices which control only the opening movement. It is
ONRRHAKDSNBNMMDBSBNMS@BSRNESGDf-NQL@KKX.ODMtSXODSNSGHRHMOTS
q&/26( = input for devices which control only the closing movement. It is
ONRRHAKDSNBNMMDBSBNMS@BSRNESGDf-NQL@KKX.ODMtSXODSNSGHRHMOTS
q$(5,$/ = connection input for the radio receiver aerial (the aerial is incorpo-
rated in LUCY B).
 Loading...