4
1. Press and hold the programming pushbutton.
2. Wait for the led to illuminate, then wait for it to turn off, followed by a flashing sequence.
3. Release the pushbutton precisely on the third flash to delete only the memorised
transmitters or on the fifth flash to clear all memory contents.
4. If the deletion procedure is successful, the led emits 5 flashes.
Table “A4” Deleting items from the memory Example
1. Press and hold key n of the new transmitter (for at least 5 seconds) confirmed by a
long flash, after which release.
2. Slowly press key n three times of a previous and memorised transmitter.
3. Press the key n of the new transmitter, and release on the first of the 3 long flashes
confirming memorisation.
Note. If the memory is full (30 transmitters memorised) 6 long flashes are emitted and the transmitter cannot be memorised.
If transmitters have already been memorised, others can be enabled as described in the following procedure.
Table “A2” Memorising other transmitters in Mode I Example
New
Old
5s
New
X3
1. Press and hold the programming pushbutton (for at least 4 seconds).
2. Release the programming pushbutton when the led illuminates.
3. Within 10 seconds press any key of the transmitter to be memorised for at least
3 seconds.
4. If the memorisation procedure is successful, the led emits 3 long flashes.
Note. If there are other transmitters to be memorised, repeat point 3 within a further 10 seconds; the memorisation phase terminates if no
new transmitters are received within a 10 second interval.
Table “A3” Memorisation of a transmitter in Mode I Example
4s
3s
( )
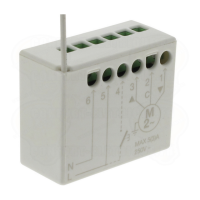
3.2) Settings via the programming pushbutton
To memorise a transmitter via the programming pushbutton proceed as described below.
If memorised transmitters and settings need to be deleted, proceed as described below.
3.1) Settings via transmitters
• This chapter describes the memorisation procedures in
Mode I, used to control a single automation with the 3 keys
of the transmitters. Paragraph 4.2 describes the memorisa-
tion procedures in Mode II, used to control an automation
with a single key, thus leaving the other keys free for control
of other automations.
• The key n corresponds to the central key of the transmitters
ERGO, PLANO and NICEWAY.
• All memorisation sequences are timed, which means they
must be completed within the set time limits.
• With transmitters that envisage several “groups”, the
relative group to associate with the control unit must be
selected before proceeding.
• Settings via radio are possible on all receivers located
within the operating radius of the transmitter, and therefore
only the device required for the operation should remain
powered.
The user can check whether any transmitters are already memo-
rised on the TT2N control unit by simply checking the type of flash
sequence of the leds when the control unit is switched on.
2 long flashes (total 1.5s) No transmitter memorised
2 short flashes (total 0.4s) Transmitters memorised
Checking for memorised transmitters
1. Connect the control unit to the power mains, confirmed by 2 long flashes.
2. Within 5 seconds press and hold key n of the transmitter to be memorised
(for at least 3 seconds).
3. Release key n on the first of the three flashes confirming memorisation.
When there is no transmitter memorised, the first can be memorised according to the following procedure.
Table “A1” Memorisation of first transmitter in Mode I Example
3s
EN