8 – English
EN
9
5.1 - Product description and intended use
The DPRO500 control unit is designed to control electromechanical actuators
for automating gates, sectional doors or shutters.
CAUTION! – All uses other than the intended use described and use
in environmental conditions other than those described in this manual
should be considered improper and forbidden!
The control unit can be connected to all common safety elements. To open and
close a gate, you only need to operate the appropriate button installed on the
coverortheexternalbuttonorviaaradioreceiver.
6
INSTALLATION
6.1 - Pre-installation checks
Before proceeding with installation, check the condition of the product com-
ponents, suitability of the selected model and conditions of the intended instal-
lationenvironment:
• Check that all the materials are in good working order and suited to the
intended use.
•Check that all conditions of use fall within the “application limits” of the
product(paragraph6.2)andthevaluelimitsshowninthe“Producttechnical
characteristics”.
• Check that the installation location is compatible with the overall dimensions
of the product (Fig. 9).
• Check that the surface chosen for installing the product is solid and can
ensure stable attachment.
•Makesurethattheinstallationareaisnotsubjecttoooding;ifnecessary,the
product may be installed, appropriately raised above ground level.
• Check that the space around the product allows safe and easy access.
• Check that all electrical cables to be used belong to the type listed in Table 1.
• Check that the automation has mechanical stops in both the opening and
closing phases.
IMPORTANT!
Before performing any type of operation or
procedure, read carefully the general instructions
(page 1) and the application limits (paragraph 6.2)
TABLE 1 - Technical specications of electrical cables
Connection Cable type Maximum admissible length
CONTROLUNITPOWERSUPPLYCable
- three-phase
- single-phase
4x1mm
2
3x0,75mm
2
5 m (note 1)
2m(note 1)
MOTORcable special cables for Nice gearmotors are on sale as
accessories.
for other brands, contact the motor manufacturer
5 - 7 - 11 m
CableforFLASHINGLIGHTwithaerial 2x1mm
2
(for230VACashinglight)
RG58typeshieldedcable(aerial)
10 m
PHOTOCELL cable 4x0,5mm
2
10 m
KEYSWITCHcable 2cables2x0.25mm
2
10 m (note 2)
SPIRALcableforsafetyedge Nice spiral cable is available as an accessory 50 m
Note 1 – If the power cable exceeds the maximum allowed length, a cable with larger cross-section must be used
Note 2 – These two cables may be replaced by a single 4 x 0.5 mm
2
cable.
CAUTION! – The cables used must be suited to the type of environment of the installation site.
5
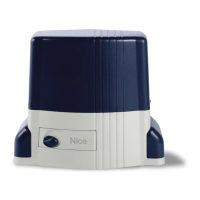
INTEGRATED CONTROL UNIT DPRO500
6.2 - Product application limits
Theproductisonlytobeusedasindicatedinthefollowingtable:
Control unit power supply Type of motor*
Three-phase3x400Vac-
50/60Hz
Three-phase3x400VAC–50/60Hz–with
Nice encoder or mechanical limit switches
Single-phase1x230Vac-
50/60Hz
Single-phase1x230VAC–50/60Hz–with
Nice encoder or mechanical limit switches
(*) In respect of the corresponding application limits.
For single-phase motors, see Paragraph 7.2.
CAUTION! – The control unit described in this instruction manual
cannot be used in areas subject to the risk of explosion.
Important – Before installation, prepare the electrical cables required for the
system, by referring to “Table 1-Technicalspecicationsofelectricalcables”
.
Caution! – When laying the ducting for routing the electrical cables and for
the cable entry point into the control unit housing, be aware that due to pos-
sible deposits of water in the junction wells, the connection ducts might create
condensate in the control unit, with consequent damage to the electronic cir-
cuits.
6.3 - Installation of the control unit
Proceedasfollowswheninstallingthecontrolunit:
01. Open the control unit box: unscrew the screws as shown in Fig. 10-A /
Fig. 10-B;
02. Prepare the holes for routing the electrical cables for the accessories pro-
vidingcontroland/orsignallingfunctions.Forthispurpose,werecommend
using a special tool (e.g. hole cutter) on the marked positions at the bottom
ofthebox,alsotoensuremaintainingthelevelofIPprotection.Ifneces-
sary, you can use the lateral cable entry points, but only by using suitable
ducting connections;
 Loading...