1 Commander S100 Step by Step Guide
Introduction
This guide provides step-by-step instructions on how to install the drive, wire the drive using appropriate fuses and cables,
configure the drive and run the motor. The Commander S100 is fully compatible with the mobile app, Marshal, which can be
found on Google Play store and the App Store. Download the full Commander S100 User Guide at
www.controltechniques.com/support.
Important safety information
1. Hazards
This Step by Step Guide applies to Commander S100 drives and supplies safety information that must be observed.
2. Responsibility
It is the responsibility of the installer to ensure the safety of the complete system. The manufacturer of the drive
accepts no liability for any consequences resulting from inappropriate, negligent, or incorrect design and installation or
the failure of the drive.
3. Compliance with Regulations
The installer is responsible for complying with all relevant regulations, such as national wiring regulations.
4. Enclosure
The Basic Drive Module (BDM) is open-type and must be mounted in an enclosure which prevents access except by
trained and authorised personnel.
5. Electrical Hazards
The voltages used in the drive can cause severe electrical shock and/or burns and could be lethal. Care is necessary
when working with or adjacent to the drive.
6. System design
System design, installation, commissioning, start-up and maintenance must be carried out by personnel with the
necessary training and competence who must read all of the safety information and instructions in the User Guide.
When protected by fuses or circuit breakers with maximum ratings as specified in Table 1-4, this product is suitable for use
on a circuit capable of delivering not more than 5,000 RMS symmetrical amperes, 480 V maximum (up to the rated voltage
of the drive module).
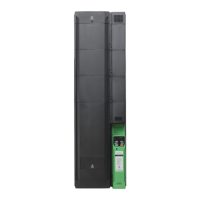
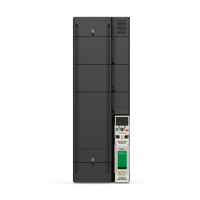
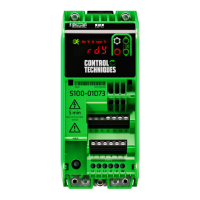
Drive features
11. Ground (Protective Earth) Connections
**Read Information in chapter 4.0 Electrical
Installation in the User Guide before removal.
1. DIN Rail Release
2. NFC Reader Location
3. Rating Information (side of drive)*
4. Model Number
5. Relay Connections
6. Digital I/O Connections
7. 485 Communication Port
8. Analog I/O Connections
9. EMC Filter Disconnect Screw**
10. A.C. Supply and Motor Connections
(2 x M4 screws provided)
*Always check the drive voltage rating is
suitable for the installation
Ground
(Protective Earth)
Connections
11
11
1
5
6
8
10
4
7
9
3
11
2