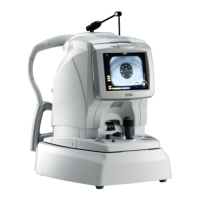
Do you have a question about the Nidek Medical NT-530P and is the answer not in the manual?
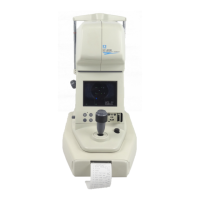
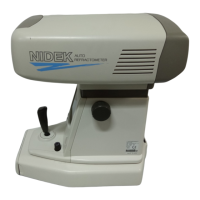
| Brand | Nidek Medical |
|---|---|
| Model | NT-530P |
| Category | Medical Equipment |
| Language | English |
Details safety measures related to the power supply and cord to prevent hazards.
Describes the built-in safety features designed for user protection during operation.
Guides troubleshooting steps for issues where the initial display does not appear.
Provides guidance for resolving problems indicated by specific error messages displayed by the device.
Details the procedure for checking the power supply voltage to diagnose screen display issues.
Outlines steps to troubleshoot when the TFT LCD backlight fails to illuminate.
Provides troubleshooting steps for the EEPROM error, including data restoration.
Guides on resolving date and time setting errors, typically by reconfiguring the settings.
Details troubleshooting for character time-out errors, involving cable and board checks.
Provides steps for resolving reception start time-out errors, referencing ERR011.
Guides on troubleshooting reception errors, referencing the procedure for ERR011.
Directs to ERR011 procedure for reception code errors.
Directs to ERR011 procedure for reply time-out errors.
Directs to ERR011 procedure for DTR-DSR errors.
Directs to ERR011 procedure for data errors.
Directs to ERR011 procedure for command errors.
Advises to perform measurement to confirm data display for "NO DAT" errors.
Directs to the procedure for joystick movement issues for tracking errors.
Guides on troubleshooting right/left tracking errors, involving motor, board, and sensor checks.
Details troubleshooting for forward/backward tracking errors, checking motor, board, and sensor.
Refers to the procedure for chinrest movement issues for error 034.
Provides steps to resolve "NO PAPER" errors, checking paper loading and printer components.
Guides on troubleshooting printer hardware errors, suggesting printer or driver board replacement.
Outlines steps to resolve piston errors, checking solenoid, ASSY, sensor, and board.
Details troubleshooting for charging errors, involving SL cable, driver board, and solenoid board checks.
Guides on troubleshooting issues preventing pachymetry measurements.
Guides on troubleshooting issues preventing tonometry measurements.
Details steps to resolve issues where the blue light fails during pachymetry.
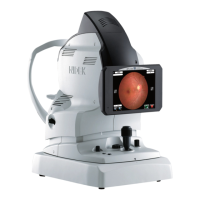
Outlines troubleshooting for when the pachymetry image is not displayed on the screen.
Guides on resolving issues where the observation image is not shown on the LCD.
Details troubleshooting for the FIX LED not illuminating, checking cable and board.
Details troubleshooting for AL2 LED illumination issues, checking cable and ASSY.
Guides on troubleshooting AL1 LED illumination problems, checking LED and ASSY.
Outlines steps to resolve NT ILL illumination issues, checking component and driver board.
Provides troubleshooting steps when the measurement does not start, checking joystick, sensors, and boards.
Guides on troubleshooting auto-tracking alignment failures, checking error messages, covers, LEDs, sensors, and motors.
Details troubleshooting for up/down auto-alignment, checking error, cover, LEDs, U/D sensor, and motor.
Outlines troubleshooting for right/left auto-alignment, checking error, cover, LEDs, and R/L motor.
Guides on troubleshooting forward/backward auto-alignment, checking error, cover, LEDs, and F/B motor.
Provides steps to troubleshoot measurement start issues after alignment and focus.
Details troubleshooting for abnormal piston noise, checking encoder, pressure, and driver board.
Guides on resolving "OPEN THE EYE WIDER" message, checking NT ILL and eyelid detection.
Outlines troubleshooting for "NO SEARCH" message, checking AL1 LED and cornea reflection.
Provides steps to resolve "LOW CONF" message, checking applanation area and adjusting APL GAIN.
Guides on resolving abnormal measurement data by comparing with a contact tonometer and adjusting constants.
Provides steps for replacing the main board, including model variations.
Details the procedure for replacing the driver board, including parameter settings.
Provides steps for replacing the base board.
Details the procedure for replacing the LCD board.
Provides steps for replacing the SLPOS encoder board.
Details the procedure for replacing the solenoid board.
Provides steps for replacing the NT board, including adjustment.
Details the procedure for replacing the pressure sensor board.
Provides steps for replacing the front/RL sensor board.
Details the procedure for replacing the pachy board.
Provides steps for replacing the DC-AC inverter.
Details the procedure for replacing the left panel SW board.
Provides steps for replacing the U/D SW board.
Details the procedure for replacing the right panel SW board.
Provides steps for replacing the printer interface board.
Details the procedure for adjusting the camera focus using jigs and the alignment spot.
Guides on adjusting the optical reticle position for precise alignment.
Details adjusting the NT camera position for proper alignment.
Guides on adjusting the solenoid brake for proper operation.
Details adjusting puffed air pressure and its parameters.
Covers the adjustment of the applanation detector using model eyes.
Provides steps for adjusting the applanation detector using a silicon model eye.
Details performing measurements using model eyes for calibration.
Provides steps for performing model eye measurements using a silicon eye.
Details performing model eye measurements using an electric model eye.
Guides on setting A and B constants for measurement accuracy.
Details the procedure for adjusting the auto tracking function.
Guides on adjusting the tracking limits for the measuring unit.
Details the process of backing up parameter settings to the main board.
Guides on restoring parameter settings from the main board to the driver board.
A comprehensive list of error codes, their display, contents, and details.