Do you have a question about the Nikon Coolpix S220 and is the answer not in the manual?
| Megapixel | 10 MP |
|---|---|
| Camera type | Compact camera |
| Sensor type | CCD |
| Image stabilizer | Yes |
| Image sensor size | 1/2.33 \ |
| Maximum image resolution | 3648 x 2736 pixels |
| Optical zoom | 3 x |
| Focal length range | 6.3 - 18.9 mm |
| Interface | USB |
| Digital SLR | No |
| Camera shutter speed | 1/1000 - 2 s |
| Effective sensor resolution | 10000000 pixels |
| Focal length (35mm film equivalent) | 35 - 105 mm |
| Normal focusing range | 0.6 - ∞ m |
| Auto focusing (AF) modes | Centre weighted Auto Focus |
| Macro focusing range (wide) | 0.10 - ∞ m |
| ISO sensitivity | 80, 100, 200, 400, 800, 1600, 2000, Auto |
| Internal memory | 44 MB |
| Compatible memory cards | sd, sdhc |
| Motion JPEG frame rate | 30 fps |
| Video formats supported | AVI |
| Maximum video resolution | 640 x 480 pixels |
| Display diagonal | 2.5 \ |
| Display resolution (numeric) | 150000 pixels |
| USB version | 2.0 |
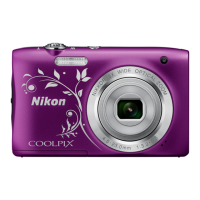
| Product color | Purple |
| Battery type | EN-EL10 |
| Battery capacity | 740 mAh |
| Power requirements | DC 3.7V |
| Battery life (CIPA standard) | 180 shots |
| Number of batteries supported | 1 |
| Operating temperature (T-T) | 0 - 40 °C |
| Operating relative humidity (H-H) | 0 - 80 % |
| Flash modes | Red-eye reduction |
| Scene modes | Backlight, beach, Close-up (macro), dusk, Fireworks, Museum, Night landscape, Night portrait, Panorama, party (indoor), Portrait, Sports, Sunset, Landscape (scenery) |
| Image editing | Rotating |
| Photo effects | black&white, Sepia, Vivid |
| White balance | auto, Cloudy, daylight, flash, Fluorescent, Incandescent, manual |
| Camera playback | single image, slide show |
| Camera shutter type | electronic, mechanical |
| Depth | 18 mm |
|---|---|
| Width | 89.5 mm |
| Height | 55.5 mm |
| Weight | 100 g |
Controls switching between shooting modes and accessing the shooting mode selection menu.
Enables entry into playback mode and access to the playback mode selection menu.
Describes standard uses for navigating menus, selecting options, and applying selections.
Instructions for charging the rechargeable Li-ion battery EN-EL10 using the MH-63 charger.
Guide on how to correctly insert the battery into the camera, noting orientation.
Guide on how to correctly insert Secure Digital (SD) memory cards into the camera.
Steps to power on the camera and select the automatic shooting mode for simple use.
Procedure for focusing on subjects and capturing images using the shutter-release button.
Instructions on how to view captured images and remove unwanted pictures from the camera.
Utilizing pre-set camera settings optimized for various shooting scenarios and subject types.
In-camera functions for enhancing and modifying captured images like retouching or cropping.
Steps for transferring pictures from the camera to a computer using USB and Nikon Transfer software.
Instructions for connecting the camera directly to a PictBridge-compatible printer for image output.
Configuration settings for image quality, white balance, ISO, and other shooting parameters.
Options for managing and viewing pictures, including slide shows, deletion, and protection.
System settings for language, date, monitor, sound, and general camera configuration.
Precautions for maintaining the camera's condition, including cleaning and storage advice.
List of common error messages, their problems, and suggested solutions for the camera.
Common problems, solutions, and detailed technical specifications of the camera.