
S
Stephanie GuzmanSep 12, 2025
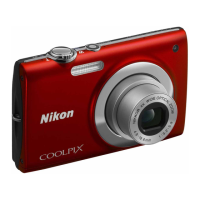
Why do my pictures appear smeared on my Nikon COOLPIX S205?
- AAnthony DaltonSep 12, 2025
If your pictures appear smeared on your Nikon Digital Camera, the lens may be dirty. Clean the lens.
Why do my pictures appear smeared on my Nikon COOLPIX S205?
If your pictures appear smeared on your Nikon Digital Camera, the lens may be dirty. Clean the lens.
Why is my Nikon Digital Camera battery not charging when connected to the computer?
If the battery inserted into your Nikon Digital Camera is not charging when connected to a computer, ensure the camera is turned on to charge the battery. Charging will stop if the computer enters sleep mode, so ensure the computer remains active during charging. If charging via computer is not possible, use a wall charger instead.
Why do the settings on my Nikon COOLPIX S205 Digital Camera keep resetting?
If the settings on your Nikon Digital Camera keep resetting, the clock battery may be exhausted. Replace the clock battery.
Why can't I select the paper size with my Nikon COOLPIX S205 Digital Camera?
If you cannot select the paper size from the camera, it may be because the printer does not support the paper sizes used by the camera, or the printer automatically selects the paper size. Use the printer to select the paper size.
Why are the colors unnatural in my photos from my Nikon Digital Camera?
If the colors are unnatural in your photos from your Nikon Digital Camera, the white balance may not match the light source. Adjust the white balance to match the light source.
What should I do if Nikon Transfer doesn't start when my Nikon COOLPIX S205 is connected?
If Nikon Transfer does not start when your Nikon Digital Camera is connected, ensure the camera is turned on. Also, make sure the battery is not exhausted; recharge or replace it if necessary. Check the USB connection to ensure it is properly connected. If the camera is not recognized by the computer, try reconnecting it. Verify that the computer is set to start Nikon Transfer automatically. Also, ensure that the computer meets Nikon Transfer system requirements.
Why do bright specks appear in pictures taken with flash on my Nikon Digital Camera?
Bright specks may appear in pictures taken with flash on your Nikon Digital Camera because the flash is reflecting off particles in the air. Turn the flash off.
Why are there streaks of light or discoloration in the monitor of my Nikon Digital Camera?
Streaks of light or partial discoloration are visible in the monitor of your Nikon Digital Camera because smear occurs when extremely bright light strikes the image sensor. Avoid bright objects when shooting.
Why isn't the PictBridge startup screen displayed when I connect my Nikon Digital Camera to a printer?
With some PictBridge-compatible printers, the PictBridge startup screen may not be displayed. Set the Charge by computer option to Off and reconnect the camera to the printer.
How to fix underexposed (too dark) pictures on my Nikon COOLPIX S205 Digital Camera?
If your pictures are too dark (underexposed) on your Nikon Digital Camera, first ensure the flash is turned on. Check that the flash window is not blocked and that the subject is within the flash range. You can also adjust exposure compensation, increase ISO sensitivity, or select the Backlight scene mode or use fill flash if the subject is backlit.
Crucial warnings regarding malfunction, disassembly, flammable gas, and strap usage.
How to switch between shooting and playback modes using dedicated buttons.
Guide on using the multi selector for navigation and selection in menus and modes.
Detailed steps for correctly inserting the camera's rechargeable battery.
Procedure for safely removing the battery from the camera.
Instructions for charging the camera battery using the AC adapter.
How to power the camera on/off and manage its power saving features.
Guide to setting language, date, time, and time zone for camera operation.
Steps for inserting and removing SD/SDHC memory cards.
Instructions for formatting memory cards and using the write-protect switch.
Steps to turn on the camera, select Auto mode, and check battery/exposure status.
Understanding monitor indicators and available functions in Auto mode.
Guidance on how to frame subjects for optimal picture composition.
How to focus on subjects and capture images using the shutter button.
How to view, select, and delete pictures in playback mode.
Guide to choosing between Auto, Scene, Smart Portrait, Subject Tracking, and Movie modes.
Overview of settings available in the Auto mode shooting menu.
Overview of editing features like Quick Retouch, D-Lighting, and Skin Softening.
Using Quick Retouch to improve picture contrast and saturation.
Using D-Lighting to brighten dark areas and improve contrast in pictures.
Steps for shooting movies with sound using the built-in microphone.
How to play back movies and delete them from the camera.
List and description of all options available in the setup menu.
Setting the camera's clock, time zones, and daylight saving time.
Instructions for formatting the internal memory or memory cards.
Restoring all camera settings to their default values.
Precautions for using and storing the device to ensure optimal performance.
Instructions for cleaning camera parts and proper storage procedures.
Common error messages and troubleshooting steps.
Troubleshooting common problems related to display, settings, and power.
| Type | Compact Digital Camera |
|---|---|
| Lens | NIKKOR lens |
| Digital zoom magnification | 4x |
| Autofocus (AF) | Contrast-detect AF |
| Storage media | SD/SDHC/SDXC memory cards |
| Metering | Matrix, Center-weighted, Spot |
| Exposure control | Programmed auto exposure |
| Interface | USB 2.0 |
| Data transfer protocol | MTP, PTP |
| Video output | NTSC, PAL |
| Shooting (battery life) | Approx. 200 shots |
| Image Sensor | 1/2.3 in. CCD |
| Maximum Aperture | f/3.5-5.6 |
| Motion blur reduction | Yes |
| Focus range (from lens) | 50cm (1 ft. 8 in.) to infinity |
| LCD Screen | 2.7 inch |
| LCD Monitor | TFT LCD |
| Frame coverage (shooting mode) | Approx. 97% horizontal and 97% vertical |
| Frame coverage (playback mode) | Approx. 100% horizontal and 100% vertical |
| File system | DCF |
| File formats | JPEG |
| Image size (pixels) | 4000 x 3000 |
| ISO Sensitivity | ISO 80-1600 |
| Compensation | ±2 EV in 1/3 EV steps |
| Shutter type | Mechanical and CCD electronic shutter |
| Speed | 1/2000 to 1 sec. |
| Self-timer | 2 sec, 10 sec |
| Flash range (approx.) (ISO sensitivity: Auto) | 0.5-4.0 m (1 ft 8 in.-13 ft) |
| Control | Auto, Scene, Movie |
| Shooting modes | Auto, Scene Modes |
| Video Recording | 640 x 480 / 30 fps |
| Dimensions (W x H x D) | 93.5 x 57.5 x 19.5 mm (3.7 x 2.3 x 0.8 in.) |