6
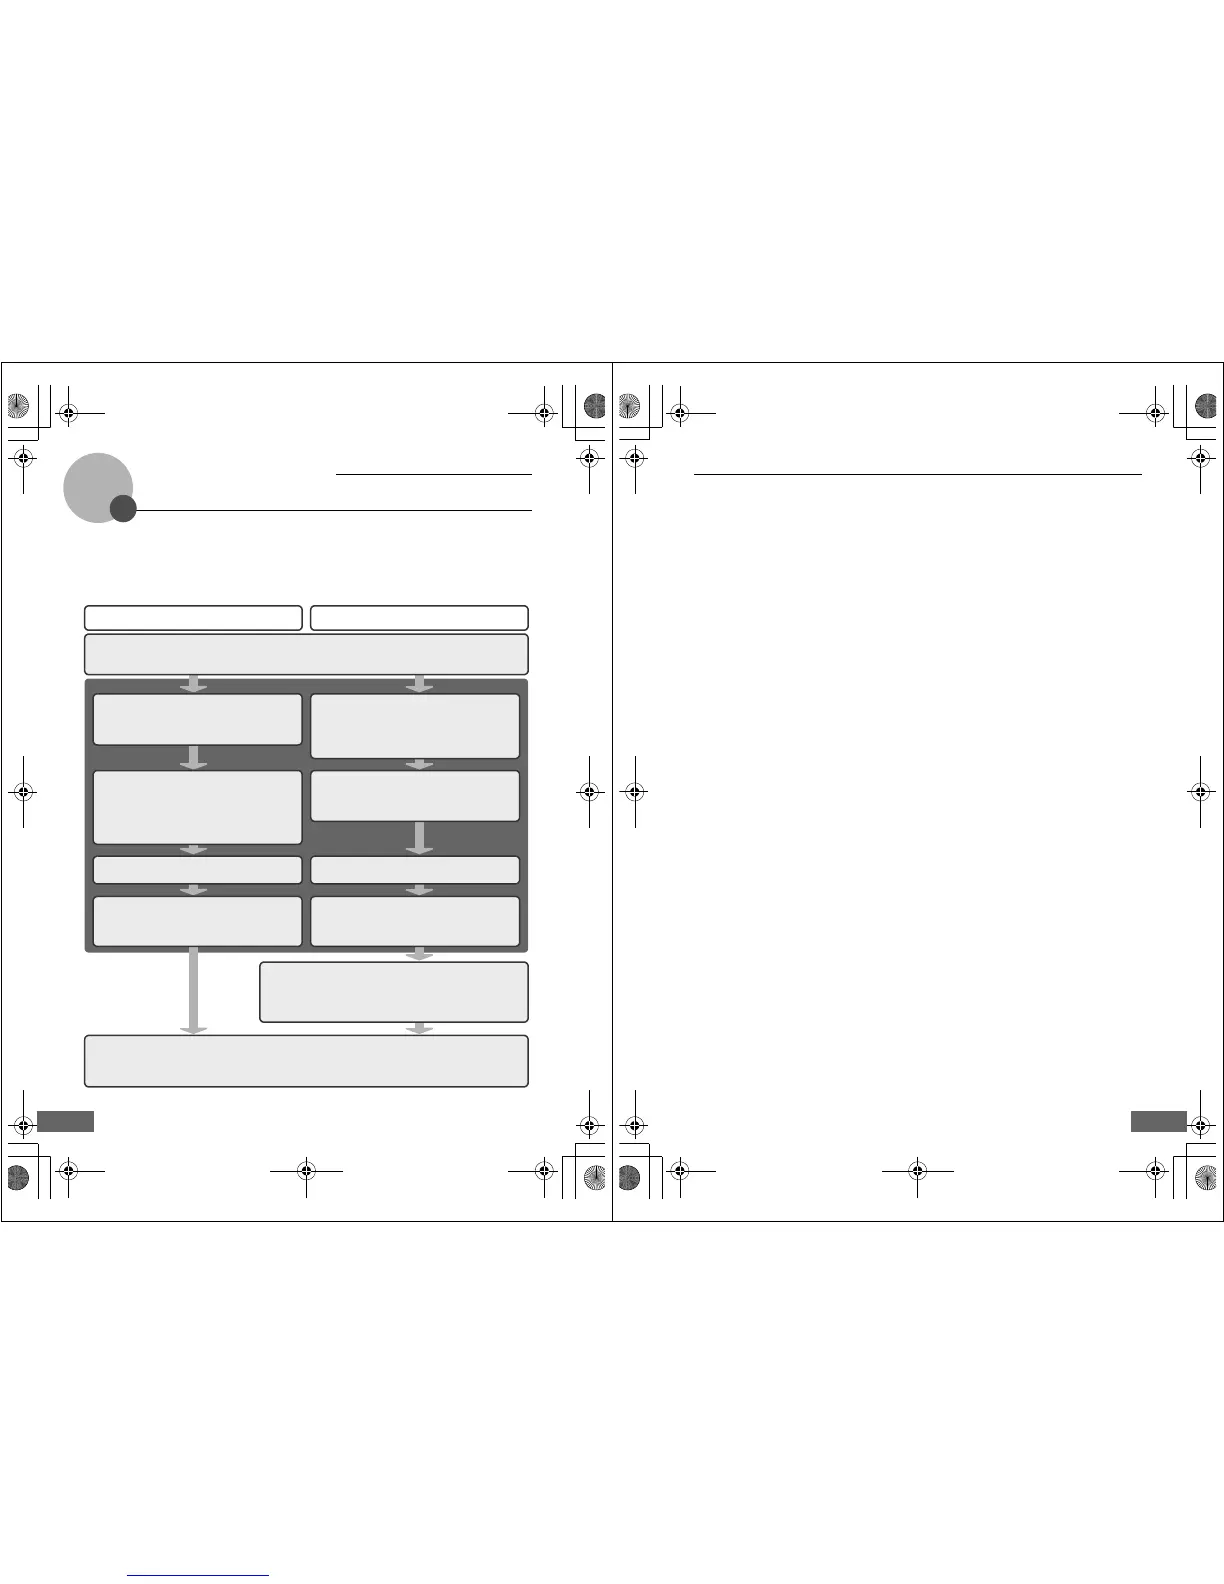
my Picturetown Setup Workflow
Before taking advantage of my Picturetown services using the wireless LAN features of the
COOLPIX S610c, the camera’s wireless settings must be configured and you must register
with my Picturetown. These two processes are generally referred to as “setup.” The camera’s
wireless settings can be configured using a computer and the my Picturetown Utility
(supplied), or by using just the camera. Follow either of the procedures described below.
Applying wireless settings using
the my Picturetown Utility
Applying wireless settings using the camera
Configuring a Network Profile (A 17)
Configure the network profile necessary for
connecting the camera to the Internet via an
access point.
Wireless settings
Configuring a Network Profile (A 28)
Configure the network profile necessary for
connecting the camera to the Internet via an
access point. Configuring the network profile is
simple using WPS (A 7, 39).
Enter my Picturetown User Information (
A
20)
Enter the information, such as your e-mail address,
required to use the my Picturetown services.
Once this information has been specified, e-mail
notification requesting user registration with my
Picturetown will be sent to this e-mail address.
Enter my Picturetown User Information (
A
33)
Enter the information, such as your e-mail
address, required to use the my Picturetown
services, from the camera’s Sender option.
Specifying Picture Mail Recipients/Recipient
Groups (A 22)*
Specifying Picture Mail Recipients/Recipient
Groups (A 34)*
Protecting Wireless LAN Information Stored
in the Camera (A 23)*
Apply password protection to the camera’s
wireless LAN features.
Protecting Wireless LAN Information Stored
in the Camera (A 37)*
Apply password protection to the camera’s
wireless LAN features.
Uploading Pictures to the my Picturetown Server (A 44)
Upload pictures using Picture Mail or Picture Bank. Once
pictures have been uploaded, e-mail notification requesting
user registration with my Picturetown will be sent to the e-
mail address specified from the camera’s Sender option.
Registering with my Picturetown (A 41)
Use a computer to open the e-mail notification requesting user registration, click the URL provided in the e-
mail notification, and register the camera and user information with my Picturetown from the sign-up Web
page. Setup is complete when you receive an e-mail message confirming my Picturetown registration.
First Steps (be sure that all wireless LAN requirements are in place and ready necessary information) (
A
8)
Confirm network requirements for wireless LAN connection, and ready the necessary network profile for
wireless LAN connection and user information for my Picturetown.
* Picture Mail recipients and the camera’s password do not need to be specified immediately.
Q7115_Wireless_EN.book Page 6 Tuesday, June 3, 2008 7:34 PM
my Picturetown Setup Workflow
7
D
The my Picturetown Utility
• The my Picturetown Utility (hereafter “Utility“) is software that can be installed on a computer and
used to configure the camera’s wireless settings, and to request user registration with
my Picturetown when the camera is connected to a computer via the supplied USB cable. The
Utility is convenient for entering a large amount of text.
• The Utility is installed from the Software Suite CD supplied with the camera (A 13).
D Wi-Fi Protected Setup (WPS)
• Wi-Fi Protected Setup is a standard that simplifies home connection and security of wireless
devices.
• The COOLPIX S610c supports WPS. If your wireless LAN access point also supports WPS,
configuring the network connection between your home wireless LAN access point and the
camera is simple. (See the documentation provided with your access point to confirm whether or
not WPS is supported.)
See “Configuring a Network Profile for a Home Wireless LAN Using WPS” (A 39) for detailed
information about using WPS to configure a network profile. Note that WPS cannot be used to
configure a network profile for a public wireless LAN access point.
Q7115_Wireless_EN.book Page 7 Tuesday, June 3, 2008 7:34 PM
 Loading...