Chapter 1 Microscopy Procedures
26
Chapter 1-4
Microscopy Procedures
Sensitive Tint Plate Microscopy
17
View the specimen.
(1) Swing out the lambda plate from the optical path. (The field of view gets darker.)
(2) Rotate the stage knob to move the target. If the target is not in focus, use the focus knob to adjust the focus.
(The specimen looks brighter in the dark field of view.)
(3) Bring the lambda plate back into the optical path. (The background of the field of view will be colored
magenta.)
(4) Of the needle-like crystals seen in the field of view, check the color of the longitudinal ones.
(5) Turn the lambda plate rotation lever from right to left (clockwise) to check the change of color of the crystal
being observed.
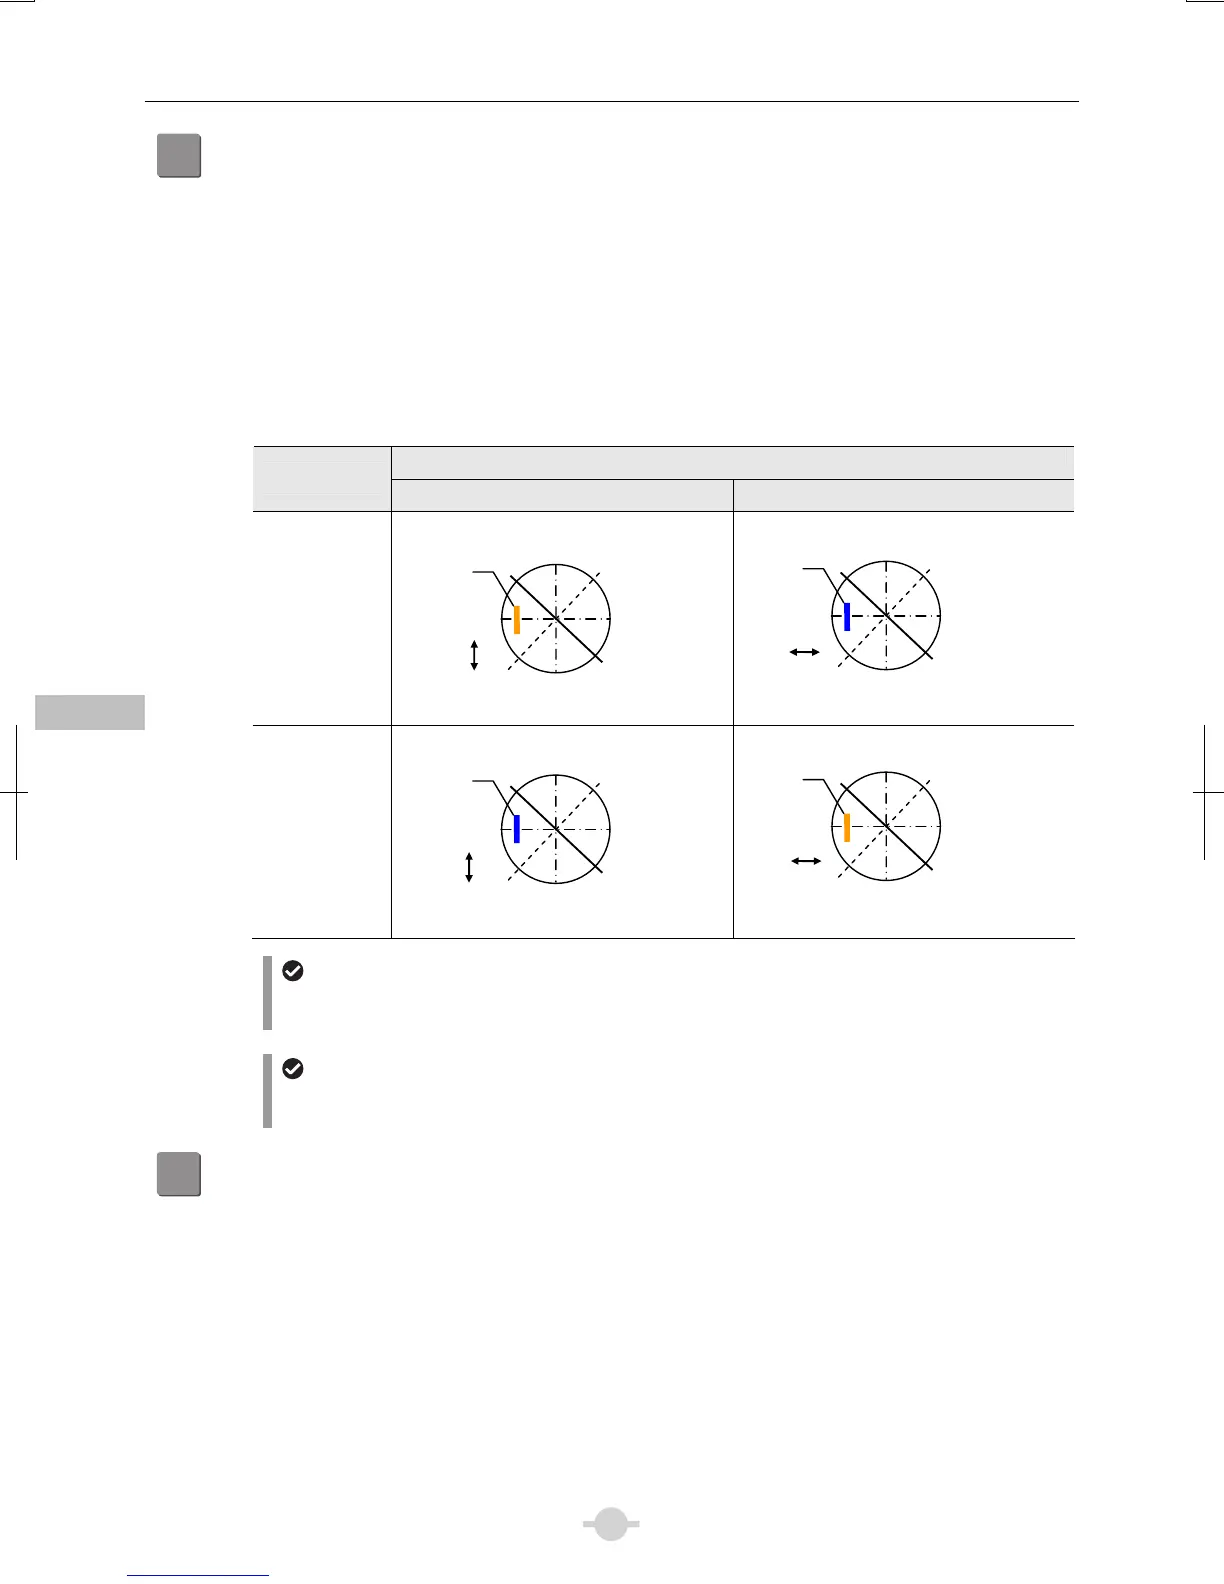
Identify the crystal by its change of color. (See the table below.)
Position of the lambda plate rotation lever
Crystal
Leftmost Rightmost
Urate crystal
Calcium
pyrophosphoric
acid crystal
Keep the lambda plate clean
Note that dirt such as dust and fingerprint on the lambda plate can significantly degrade the polarization
performance. Keep it clean.
To switch to bright-field microscopy
Pull out the analyzer IN/OUT knob to remove the analyzer from the optical path. Remove the polarizer unit
from the field lens.
18
Turn off the power.
Turn off the power switch (press to the “O” position) for the microscope. (The power LED on the front of the main
body will turn off.)
Vibration
direction of
the anal
ze
Vibration
direction of
the
olarize
Z’
Vibration
direction of
the anal
ze
Vibration
direction of
the
olarize
Crystal
(blue)
Direction of the
lambda
late
Z’
Vibration
direction of
the anal
ze
Vibration
direction of
the
olarize
Crystal
(blue)
Direction of the
lambda plate
Z’
Vibration
direction of
the anal
ze
Vibration
direction of
the
olarize
Crystal
(yellow)
Direction of the
lambda plate
Z’
Crystal
(yellow)
Direction of the
lambda
late