Chapter 3 Assembly
65
Chapter 3
Assembly
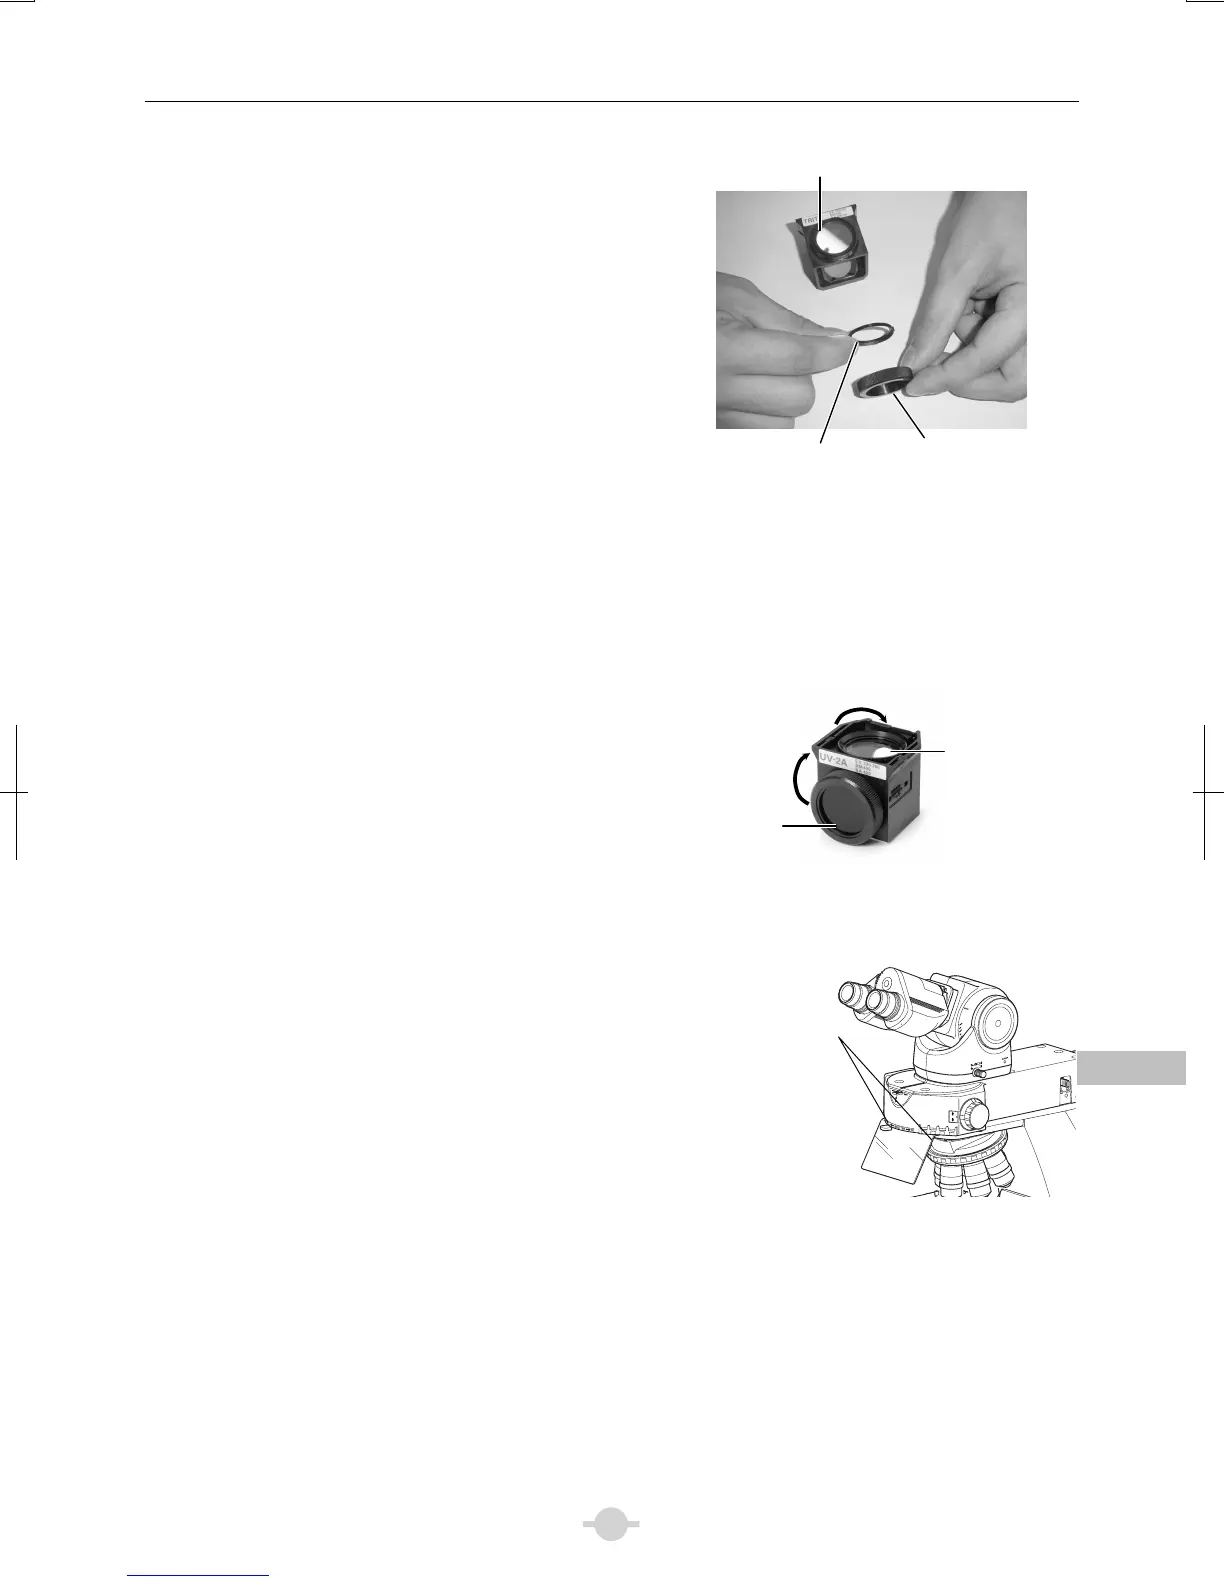
●Removing/attaching the internal spacer●
1) Place the filter cube on a work table with the
excitation filter facing up.
2) Unscrew the ring retaining the excitation filter.
(Be careful to avoid dropping the filter.)
3) Remove the spacer inside the removed ring.
4) Remove or reverse the spacer as appropriate fo
the particular filter cube type before its insertion.
5) Reattach the ring.
Attaching/removing the internal spacer
(3) Insert a nameplate into the position with the same address as the one indicated on the filter cube switching knob
on the right side of the microscope.
(4) Turn the filter cube switching knob and insert other filter cubes into the remaining open bays.
(5) Restore the slot cover back to its original position.
■ Replacing excitation and barrier filters
The excitation filter, barrier filter, and dichroic mirror can be
removed from the filter cube for replacement.
Excitation filters are screw-in filters, while barrier filters are
slide-in filters.
Align the projection on the barrier filter with the groove on
the filter cube and turn clockwise by approximately 30
degrees to secure it in place.
Replacing the excitation and barrier filters
■ Attaching a light shielding plate
Secure a light shielding plate in place with the fixing screws
on the lower front of the epi-fluorescence attachment. To
remove the plate, loosen the fixing screws and pull it
forward.
A1
-
2
-
3
-
4
B1
-
2 / 3
-
4
C1
-
2
-
3
-
4
1
1
4
2
3
4
CUBE
Attaching a light shielding plate
■ Attaching a shielding tube
Attach a shielding tube using the same procedure for attaching a condenser to the condenser holder.
Space
Filter cube
Ring
Excitation filte
Barrier filte
Turn approx. 30 degrees to
secure in place.
Light shielding plate
clamp screws
(on the back of the
plate)