Chapter 4 Assembly
60
Chapter 4 Assembly
4
Assembly
Before assembling or connecting devices, thoroughly read the “Safety Precautions” and "Notes on Handling
the Product" at the beginning of this manual, and be sure to follow all the instructions written therein.
Tools Required for Assembly: Hexagonal wrench (the distance between opposite sides is 3 mm)
(one hexagonal wrench is provided with the microscope)
1
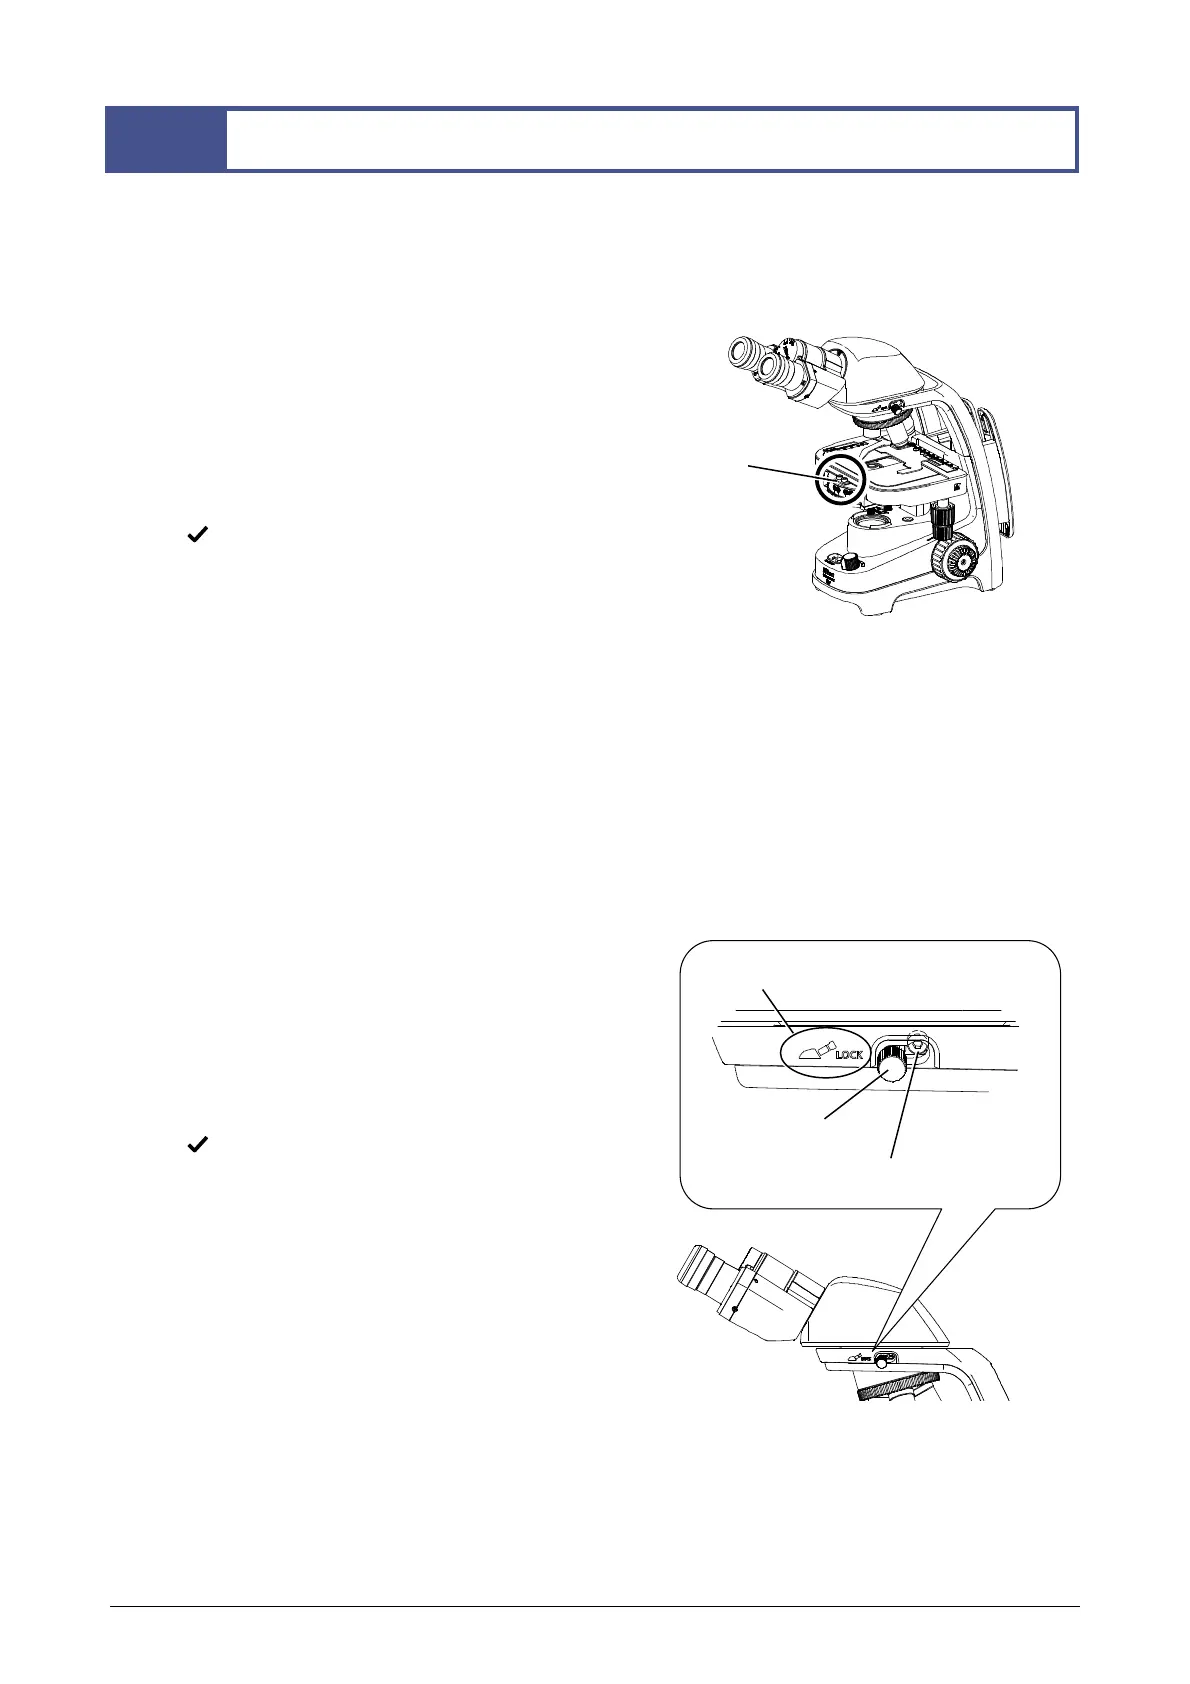
Remove the fastening plate
Remove the red fastening plate attached to the top of
the stage.
The fastening plate retains movement in the front and
back directions of the stage and is attached with two
bolts. Remove this fastening plate with the hexagonal
wrench provided.
Keeping the fastening plate
Be sure to keep the fastening plate with two bolts
just in case re-fastening is needed.
2
Change the direction of the eyepiece tube, remove and attach the eyepiece tube
When you have purchased the microscope as a set, the eyepiece tube is already installed to the main
body.
At the time of observation, turn the binoculars toward you and fix the eyepiece tube. At the time of
storage, turn the binoculars backward and fix the eyepiece tube.
When changing the direction of the eyepiece tube, or replacing the eyepiece tube to another one, follow
the following procedure.
When installing the eyepiece tube to the main body for the first time, also follow the procedure described
in “■ Installing the eyepiece tube”.
Changing the direction of the eyepiece tube
Manually rotate the fixing screw for the eyepiece tube
a couple of turns to loosen it while supporting the
eyepiece tube by hand.
Turn the eyepiece tube in the desired direction and
securely tighten the fixing screw for the eyepiece tube
while the eyepiece tube fits into the circular dovetail
mount properly.
Mark of the direction in which to fix the eyepiece
tube for storage
The microscope has an icon on the arm that
indicates the direction in which to fix the eyepiece
tube when storing the microscope. This mark
indicates that the binoculars of the eyepiece tube is
turned backward and fixed.
Removing the eyepiece tube
Manually loosen the fixing screw for the eyepiece tube
while supporting the eyepiece tube by hand.
Loosen the auxiliary fixing screw for the eyepiece tube
by using the supplied hexagonal wrench and remove
it.
Remove the eyepiece tube with care not to drop it.
Fastening
plate (red)
Mark of the direction in which to
fix the eyepiece tube for storage
Fixing screw for
the eyepiece tube
uxiliary fixing screw for the
e
e
iece tube