22
En
Fr
Measuring
Actual distance mode is used here as an example.
1. Press the PWR button to turn on the power.
• If you do not operate the buttons for about 30 seconds, the power turns off automatically.
2. Aim at the target.
Position the center of the target mark on the target.
3. Press the PWR button to measure.
• After measurement, the result is displayed for approx. 30
seconds, and power automatically turns off.
Press the PWR button while the power is on to measure
again.
• See page 20 for more information on the display content
of each mode.
• To check the measurement log later, take a note of the log
number displayed on the external display. The number
corresponds to the number in the log list (page 16).
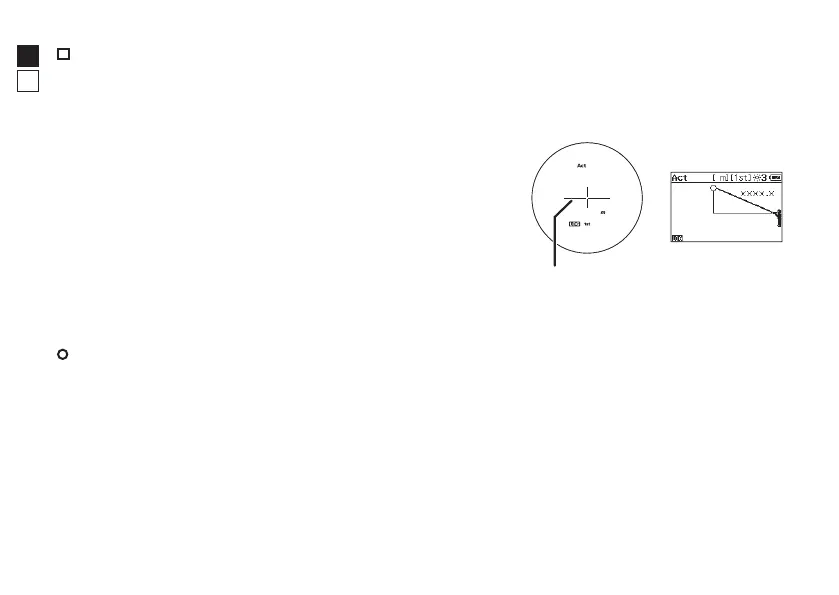
Internal display External display
Target mark
l Continuous measurement
In Actual distance, Horizontal distance, Height, and Angle mode, you can measure continuously up to
approx. 8 seconds by pressing and holding down the PWR button. During measurement, the measured
result is displayed consecutively while the laser emission mark is flashing. If you release your finger from
the button, continuous measurement stops.
Note: The last measured result is the only log saved and you can check it in the log list. Result errors are
not saved.





 To Next Page