-BASIC
OPERATION-continued-------~--
~
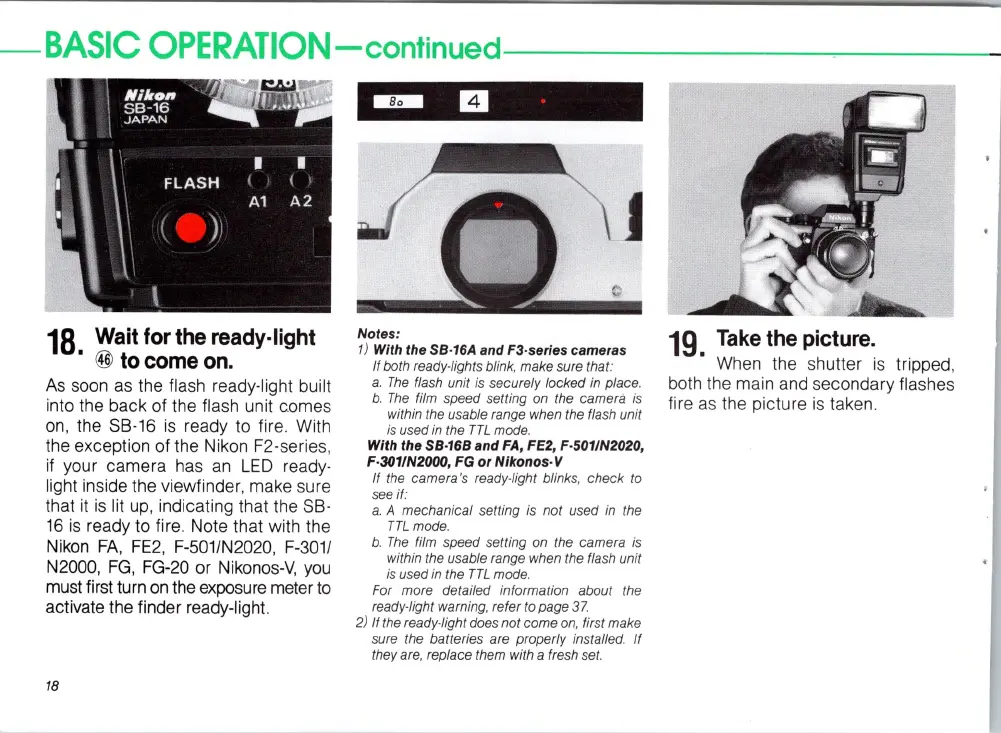
18.
Waitfor the ready·
light
@ tocomeon.
As
soon as the flash ready-light built
into the back of the flash unit comes
on
, the 8B-16
is
ready to fir
e.
With
the exception of the Nikon F2-serie
s,
if your camera
ha
s
an
LED
ready-
light inside the viewfinder, make sure
that
it
is
lit
up
, indicating that
th
e 8B-
16
is
ready to fire. Note that with the
Nikon
FA
,
FE2
, F-501/N2020,
F-3011
N2000,
FG
, FG-20 or Nikonos-V,
you
must first turn
on
the exposure meter to
activate the finder ready-light.
18
Notes
:
1)
With
the
SB
-
16A
and F3·series cameras
If both ready·lights blink, make sure that:
a.
The
flash unit is securely locked in place.
b.
The
film speed setting
on
the camera is
within the usable range when the flash unit
is used
in
the
TTL
mode.
With
the
SB-16B
and
FA,
FE2,
F·5011N2020,
F-301IN2000,
FG
or
Nlkonos· V
If
the
camera's ready-light blinks, check to
see
if:
a.
A mechanical setting is not used
in
the
TTL
mode.
b.
The
film speed setting on the camera is
within the usable range when the flash unit
is used
in
the
TTL
mode.
For more detailed information about the
ready·light warning, refer to page
37.
2)
If the ready·light does not come on, first make
sure the batteries are properly installed. If
they are, replace them with a fresh set.
19.
Take
the picture.
Wh
en
th
e shutter is tripped,
both the m
ai
n and secondary flashes
fire
as
the picture is taken.
 Loading...