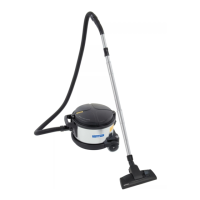
Primary lter replacement
Figure 15
1. Vacuum hose
2. Release lever
3. Cover
4. Clamp
WARNING!
Check the vacuum cleaner class (L, M, H).
Take care not to raise dust when this operation is carried out.
Wear a P3 mask and other protective clothing plus protective
gloves (DPI) suited to the hazardous nature of the dust
collected, refer to the laws in force.
Before proceeding with these operations, turn o the vacuum
cleaner and remove the plug from the power socket.
■ Loosen the clamp (4).
■ Remove the vacuum hose (1).
■ Use the lever (2) to remove the cover (3) together with
the primary lter.
■ Remove the old lter from the cage.
■ Fit the new lter and secure it in the cage with special
clamps.
■ Install the cover and the primary lter in the reverse order
of removal.
■ Dispose of the old lter according to the laws in force.
If necessary contact the manufacturer’s Service Centre.
HEPA lter replacement
Version for dust harmful for the health: Class H
WARNING!
Take care not to raise dust when this operation is
carried out. Wear a P3 mask and other protective
clothing plus protective gloves (DPI) suited to the
hazardous nature of the dust collected, refer to the
laws in force.
WARNING!
Do not use the Class H lter again after having
removed it from the vacuum cleaner.
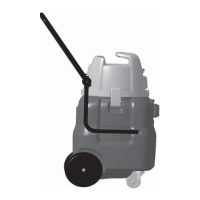
Primary lter cartridge replacement
Figure 21
1. Vacuum hose
2. Clamp
3. Cap
4. Release lever
5. Filter ring
6. Cartridge assembly
7. Power supply cable
8. Air intake coupling
9. Junction
10. Connector
11. Screws
12. Screws
13. Washer
14. Cartridges
WARNING!
Take care not to raise dust when this operation is
carried out. Wear a P3 mask and other protective
clothing plus protective gloves (DPI) suited to the
hazardous nature of the dust collected, refer to the
laws in force.
Before performing these procedures, turn o the machine
and remove the plug from the power socket, disconnect the
compressed air supply by emptying the air tank inside the
machine.
■ Loosen the clamp (2).
■ Remove the vacuum hose (1).
■ Operate the levers (4).
■ Remove the cover (3) and the lter ring (5).
■ Disconnect the power supply cable (7) and the
compressed air supply from the air intake coupling (8).
■ Remove the cartridge assembly (6).
■ Disconnect the connectors (10) and the union (9).
■ Disassemble the air tank by operating on the screws
(11).
■ Disassemble the cartridges by operating on the screws
(12) and washers (13).
■ Assemble the new cartridges.
■ Install the cartridge assembly in the in the reverse order
of removal.
■ Dispose of the old lters according to the laws in force.
If necessary contact the manufacturer’s Service Centre.
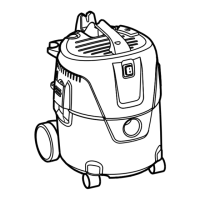
Upstream HEPA lter replacement
Figure 16
1. -
2. Filter operating knob
3. Cover
4. Lever
5. Safety bolt
6. Stop nut (absolute lter)
7. Absolute lter holder disc
8. Primary lter
9. Clamp xing screw
10. Primary lter xing clamp
11. Absolute lter
12. Vacuum hose
13. Vacuum hose clamp
■ Stop the vacuum cleaner.
■ Loosen the clamp (13) with a screwdriver and remove
the vacuum hose (12).
■ Unscrew the knob (2).
■ Unlock the safety bolt (5).
■ Use the lever (4) to remove the cover (3).
■ Loosen the screw (9) of the primary lter (8) xing clamp
(10) using a screwdriver.
■ Remove the lter holder disc (7) with the absolute lter
installed and unscrew the nut (6).
■ Remove the absolute lter (11).
■ Cover the absolute lter (11) with a plastic bag, close
the plastic bag hermetically and dispose of the lter in
accordance with the laws in force.
■ Insert a new lter (11) with the same ltering
characteristics as the removed one.
■ Lock the absolute lter with the nut (6).
■ Tighten the clamp (10) screw (9) xing the primary lter
 Loading...