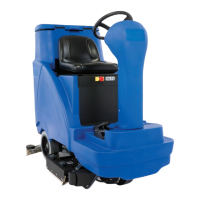
Squeegee System 72Service Manual – Focus II / Scrubtec R6 Rider Autoscrubber
Maintenance and Adjustment
Squeegee Blade Cleaning and Inspection
Periodically clean and inspect the squeegee tool (1)
and blades (5&8). Remove the squeegee tool from the
pivot/lift assembly by removing the suction hose (2)
and loosening the two thumb nuts (3).
Clean the squeegee blades (5&8) and suction area
between the blades with soap and water.
Inspect the squeegee blades for nicks, tears, and
worn leading edges. If a squeegee blade is worn or
damaged, it may be turned around with a fresh edge
facing down/forward up to four times before complete
blade replacement is required.
When reinstalling the squeegee tool (1) to the pivot/
lift assembly, tighten the two thumb nuts (3) only
hand tight.
Squeegee Trim Adjustment
The squeegee trim needs to be checked or adjusted
whenever the squeegee blades are replaced, or if the
squeegee is not fully wiping the oor. Misadjustment
symptoms include water streaks at the center or edges of
the squeegee path.
1. Park the machine on a at, even surface and lower
the squeegee tool.
2. Inspect/adjust the wheel height to ensure the
squeegee tool is resting at the proper level.
3. Examine how the rear squeegee blade is making
contact with the oor surface, and inspect for gaps at
either the center or edges.
4. Tighten (clockwise) or loosen (counterclockwise)
the squeegee trim adjustment knob (19) to level
the squeegee across its length.
• If there is a gap in the center, loosen the
adjustment knob.
• If there are gaps at the outside, tighten the
adjustment knob.
• Make sure the are of the rear blade is even
along the entire length of the blade.
2
3
3
1
8
5
7/8”
19
19
Gap
Knob Too
Tight
Gap
Knob Too
Loose

 Loading...