OPERATION
8
Nobles Strive (09--04)
MACHINE INSTALLATION
UNCRATING MACHINE
1. Carefully check shipping crate for signs of
damage. Report damages at once to carrier.
2. Check the contents list, contact distributor for
missing items.
Contents:
D Machine
D 2 Extractor Brushes
D 2 ReadySpace Rollers
D 1 Extractor Vacuum Shoe
D 2 ReadySpace Vacuum Shoes (installed)
D 2 Scrub Head Flush Lines (installed)
D Scrub Head Vacuum Tube (Installed)
D ReadySpace Pre-Treatment detergent (1 gal.)
D 24DC/120AC 20A Battery Charger (Option)
D 4 6VDC, 235AH Batteries (Option -- Installed)
D Battery Tray (installed)
D 3 381mm (15”) Battery Cables
D 8 Battery Post Covers
D 8 Battery Cable Rubber Boots
D 6mm Hex Head Tool
3. To uncrate the machine, remove the shipping
hardware and straps that secure the machine to
the pallet. Position the supplied ramp at the rear of
the machine and carefully back the machine off
the pallet. Make sure the scrub head is in the
raised position.
ATTENTION: Use the supplied ramp when
uncrating the machine to prevent machine
damage.
INSTALLING BATTERIES
W ARNING: Fire Or Explosion Hazard.
Batteries Emit Hydrogen Gas. Keep Sparks And
Open Flame Away. Keep Battery Hood Open When
Charging.
FOR SAFETY: When servicing machine, wear
protective gloves and eye protection when
handling batteries and battery cables. A void
contact with battery acid.
Recommended Battery Specifications:
Four 6 volt, deep cycle, 235 AH batteries. Maximum
battery dimensions are 181 mm (7.13 in) W x 260 mm
(10.25 in) L x 292 mm (11.50 in) H.
1. Park the machine on a level surface and remove
the key from the machine.
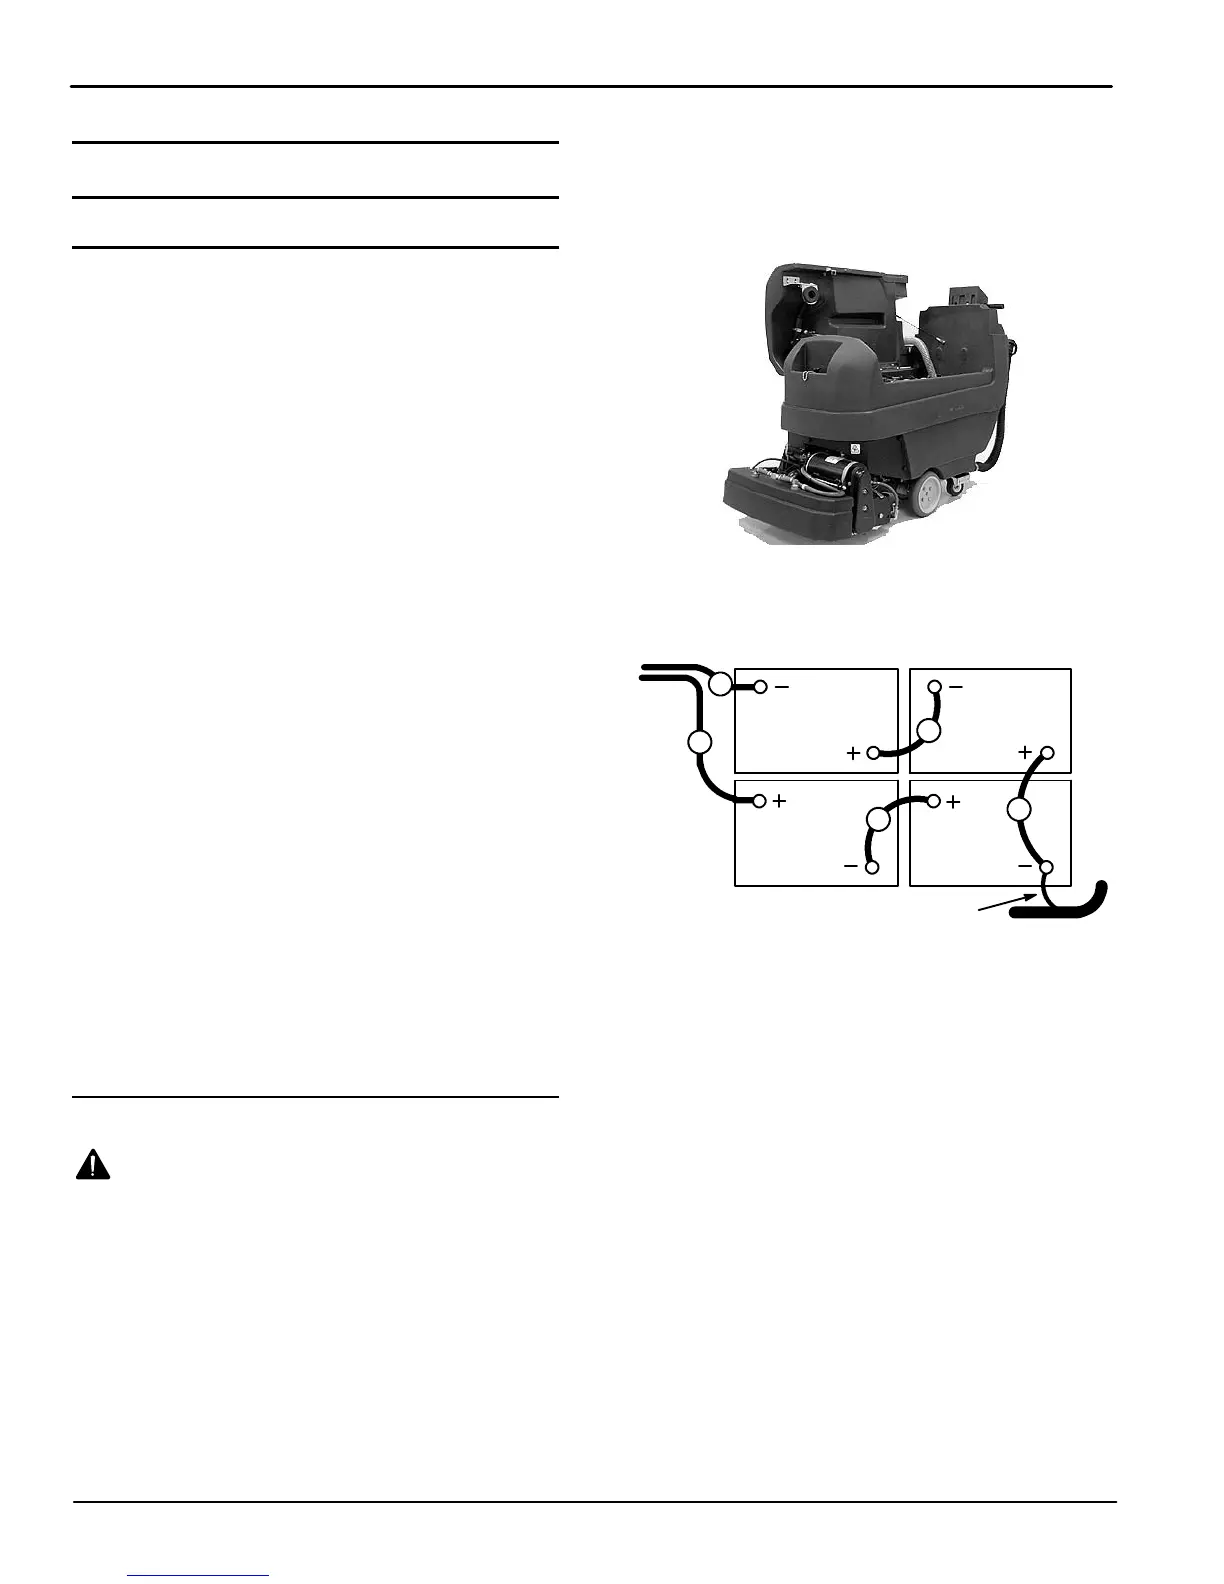
2. Lift the recovery tank to access the battery
compartment (Figure 1). Remove the loose battery
cables from the compartment.
FIG. 1
3. Carefully install the batteries into the battery
compartment tray and arrange the battery posts
as shown (Figure 2).
Machine Front
5
RED
BLACK
3
1
2
4
Wire #47 from machine’s wire harness
FIG. 2
4. Before connecting the battery cables, make sure
the terminals and posts are clean. Use a post
cleaner and wire brush if necessary.
NOTE: Apply a light coating of non-metallic grease or
protective spray on the cable connections to prevent
battery corrosion.
5. Connect the cables to the battery posts in
numerical order as labeled (Figure 2), RED TO
POSITIVE & BLACK TO NEGATIVE. Use the
battery post covers and rubber boots supplied.
6. After installing the batteries, check the battery
meter charge level. The machine must be in full
operation for an accurate reading (See MACHINE
OPERATION). Charge batteries if needed.