Nomadic Cooling Co 9 NC-X
2
Instalation Manual Ver. 240130
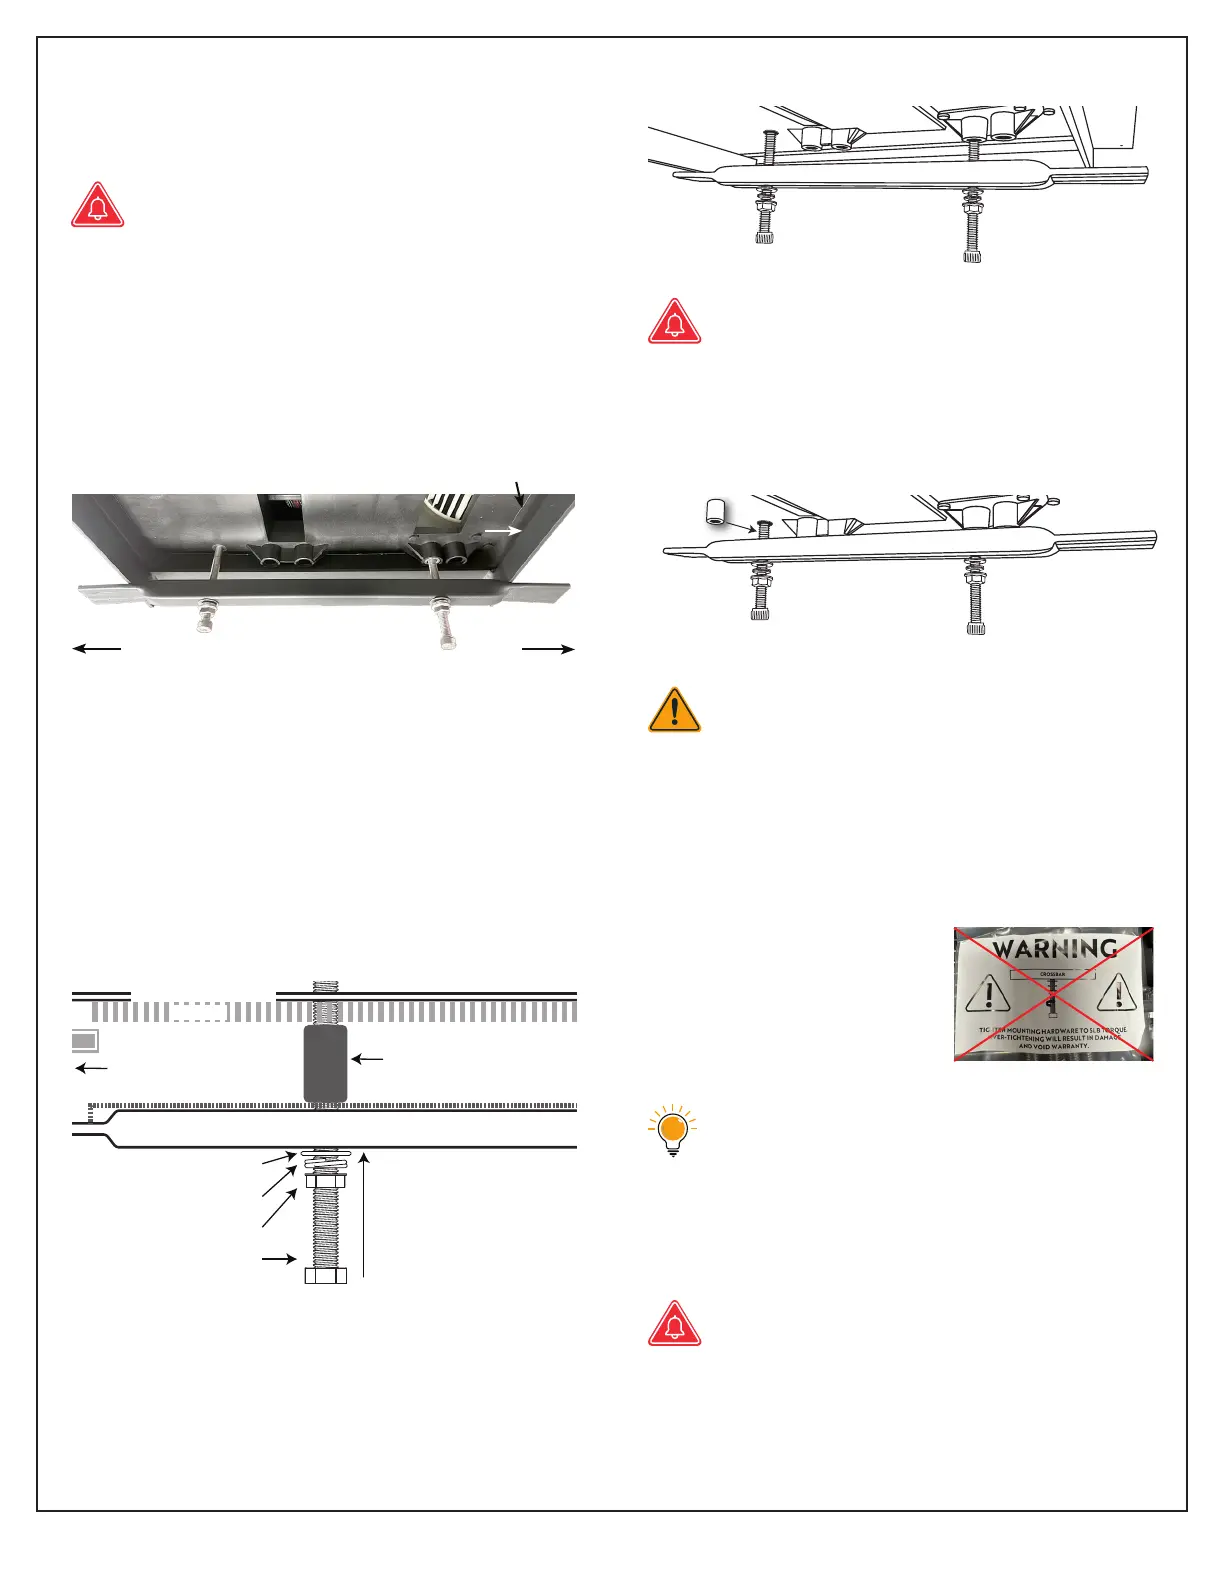
11. From inside the vehicle add the crossbars
to attach AC unit to the roof. Locate the
mounting bolts, washers and nuts.
Do not use electric drill on crossbars.
12. If possible with your particuar build, we
recommend using a trim ring to provide ad-
ditional support around the rooftop open-
ing. The DIY kit includes a Nomadic Cooling
X
2
trim ring. Professional upfitters typically
create their own custom trim rings.
13. Add the nut, washer and lock washer to
each of the four bolts that screw into the AC
unit base pate through the crossbar.
Hand-tighten all four bolts to the AC unit.
Do not over tighten! Once all four bolts are
hand-tight, torque the lock nuts to 3.7 lb to
secure the crossbars to the AC unit, and the
AC unit to the roof.
With optional Trim Ring:
If NOT using a trim ring, you may use
the optional pastic spacer for the two
rear bolts, between the crossbars and
the AC unit base.
Without Trim Ring showing optional spacer:
During the instalation process, if the
locking nut is installed too tightly, it
may cause deformation of the AC unit
base pate. The spacer can pay a limit-
ing role, with any excess locking force
acting on the spacer instead of the AC
unit base pate.
A sticker found on the bag
of bolts may say to tighten
to 5.0 lbs. of torque, please
disregard and use the rec-
ommended 3.7 lbs.
AC unit will help to create pressure.
When securing AC unit to the vehicle,
increased compression of the gasket
will level the unit against the roof. No
light should be visible.
Do not over-tighten mounting bolts.
Bolts will rotate if over-torqued,
and may break from AC base pate.
Over-tightening will void warranty.
FrontRear
Trim Ring
Crossbar
Gasket
Spacer
Back of AC unit
Hand tighten all 4
bolts to crossbars,
then torque the
nuts to 3.7lbs (~5nm).
Crossbar
Washer
Lock Washer
Nut (fat side up)
Bolt
Pastic Spacer
(optional if not
using Trim Ring)
Vehicle Roof (cutout)
Gasket
Trim Ring (Optional)
FrontRear