The clearance from the refri
erator’s left side
facin
the front of the refri
erator
to the vehicles exterior wall
is important. This is the area in which the inlet and outlet
flexible pipin
will be connected to the vent terminal
housin
durin
installation. Provisions must be made
to access
as burner observation port for service and
for visual check of the burner flame.
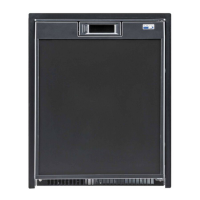
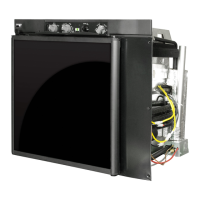
Refer to Figures 3
and 4 for maximum clearances from refrigerator cabi-
net to vehicles exterior wall.
The wall thickness the vent terminal housin
will
accommodate is .030" minimum to 1.250" maximum.
Fi
ure 2 below illustrates the confi
uration of the open-
in
for the vent terminal housin
.
Do not make the
opening in the vehicle wall larger than required.
The
clearance should be enou
h for the terminal housin
to
pass throu
h the openin
. If the openin
is too lar
e,
the outer
asket will not cover the vent housin
openin
.
It is imperative that the wall openin
for the vent
terminal housin
not be too low. The flexible pipin
inlet and outlet pipes
must rise from the refri
erator to
the terminal housin
. There are two specific vent-air
intake assembl
kits available to accommodate most
installations.
Figures 3 and 4 illustrate two installations
with the maximum flexible piping lengths and the vent
terminal housing locations.
Burner
Observation
Port
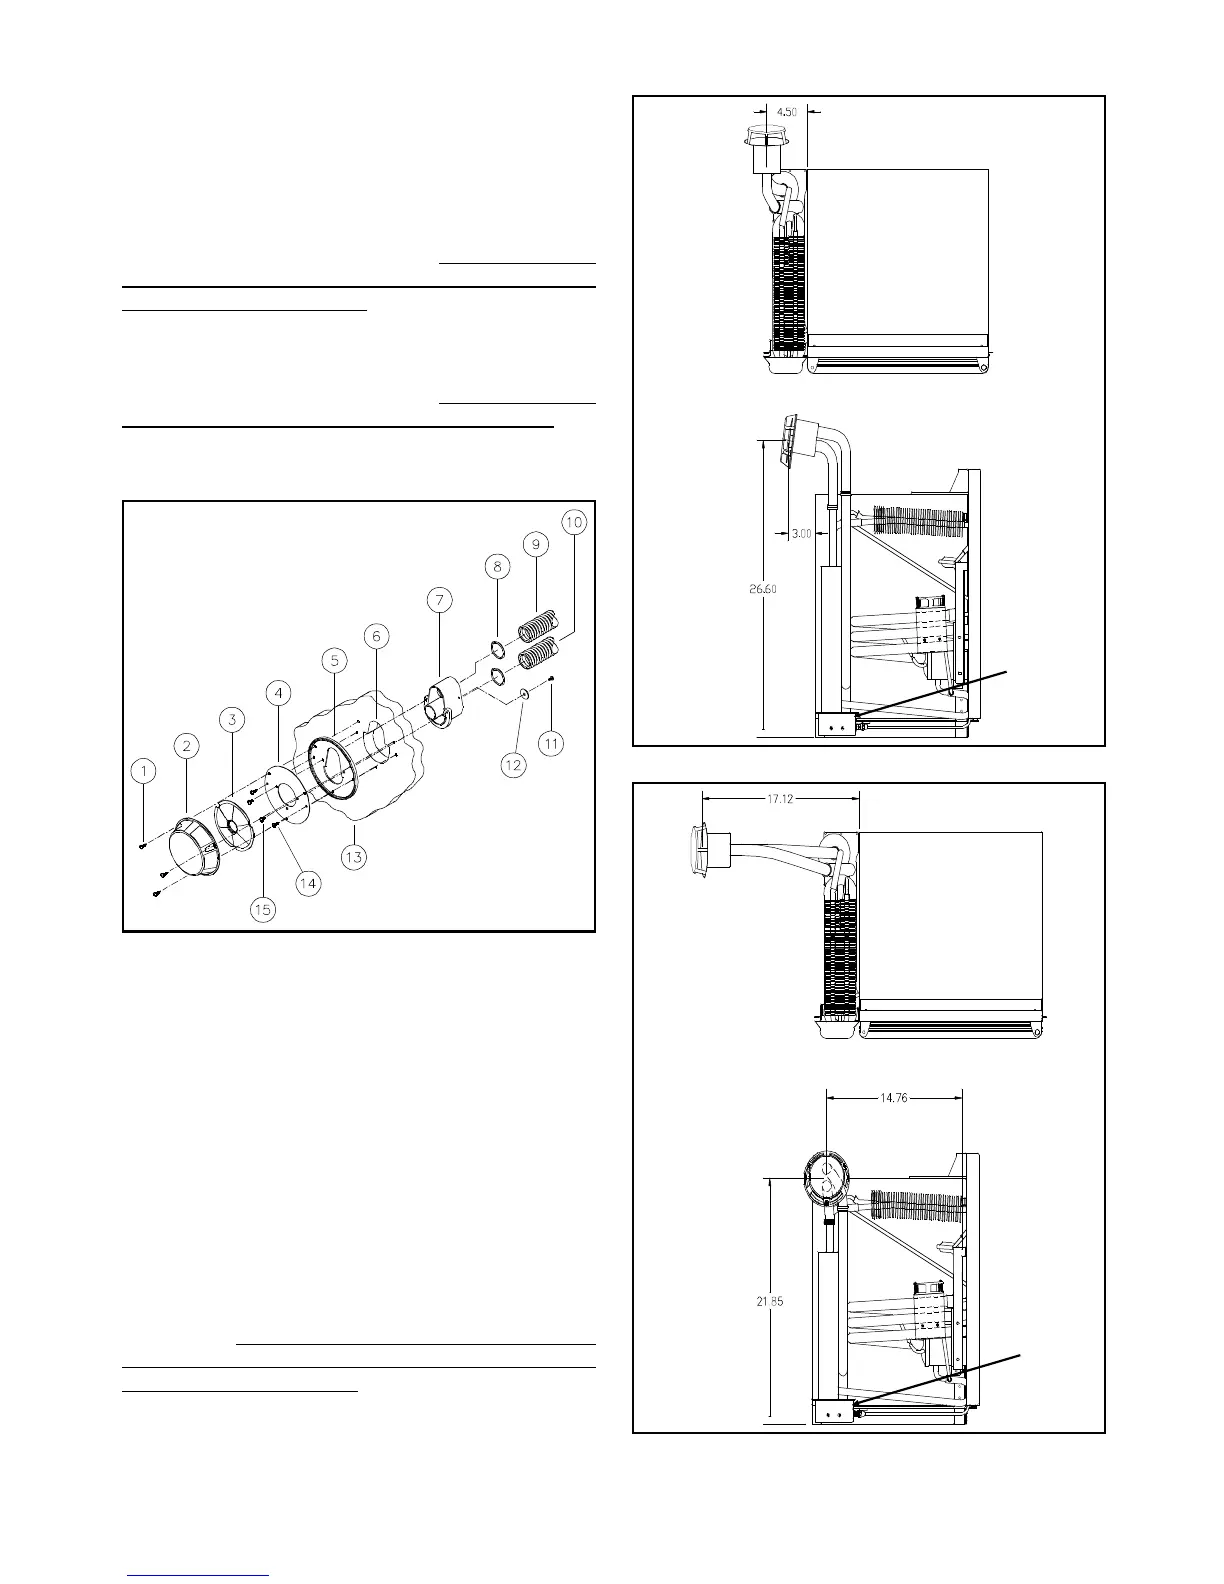
Fi
ure 2 Air Intake/Exhaust Assembl
Burner
Observation
Port
Fi
ure 3-Kit# 617941 Flexible Pipe and Vent Location
Fi
ure 4-Kit# 617943 Flexible Pipe and Vent Location
1. Mountin
Screw 8. O Rin
s
2. Vent Cover 9. Intake Pipin
3. Outer Disk 10. Exhaust Pipin
4. Inner Disk 11. Lockin
Washer Screw
5. Rubber Gasket 12. Lockin
Washer
6. Vent Terminal 13. Vehicle Exterior Wall
Housin
Cut-Out 14. Mountin
Screw
7. Vent Terminal 15. Mountin
Screw
Housin
4