4
Pre-installation
First, unpack the cabinet and check it for any transport damage. Do not use a damaged cabinet.
In the event of damage, please contact the shipping company and make sure that the damage is
noted on the consignment note. Check that all the parts on the parts list at the back of this guide
are present. Contact the vendor in the event of damage or missing parts.
Check that the wall recess has the correct dimensions for your unit and that the distance to the
ceiling is correct (see dimensions and technical specifications). Also ensure that the unit is located
as high as possible on the wall for stable temperature in the cold room. Cold air is blown out of the
rear of the cold side. Distance between walls in the cold room must be min. 1000 mm to prevent
the cold air from stagnating around the unit. Do not locate the unit directly opposite the door as
this can cause condensation on the magnetic seals. Do not locate the unit over a heat source.
If the power cable is not long enough, have an electrician to install a minimum10A earthed socket
closer to the unit. Never allow the unit to be permanently connected via an extension lead.
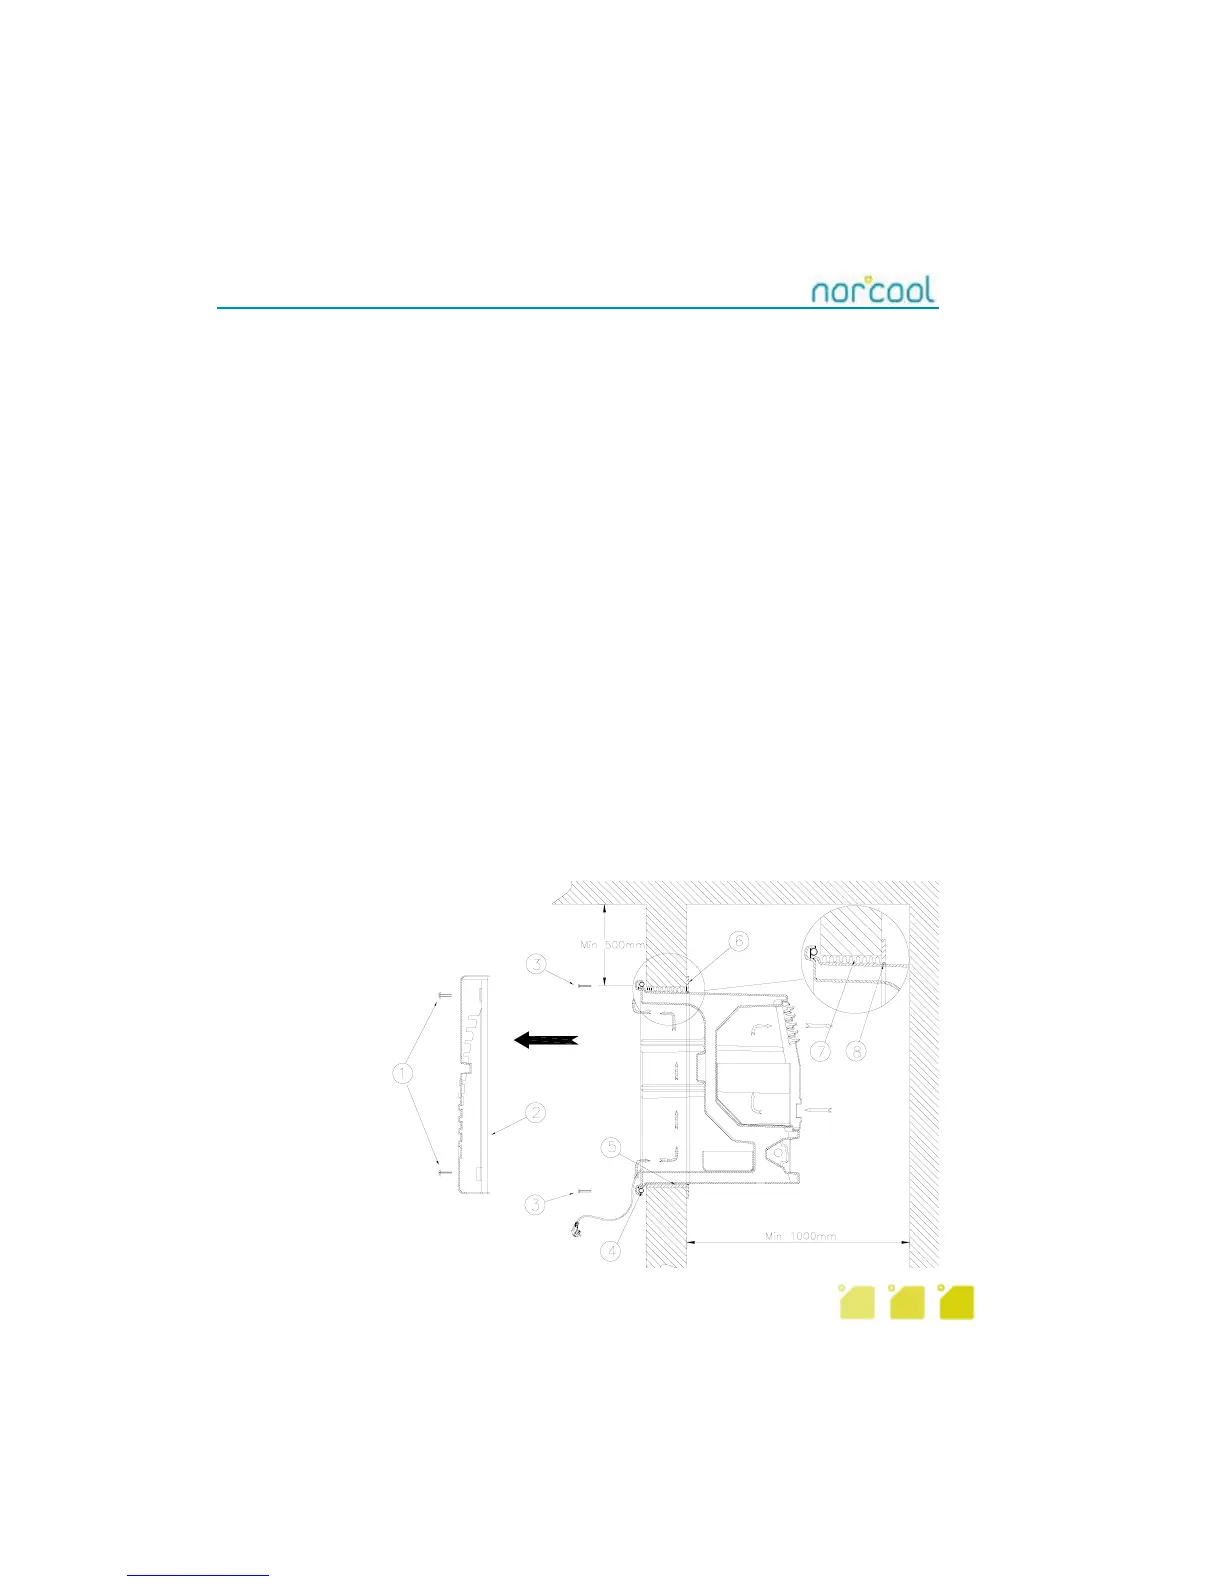
Common installation instructions
1. Attach the wide foam tape to the lower surface of the aperture with the adhesive side down.
2. Slide unit into the wall recess from the outside of the cold room until it stops against the edge.
Centre unit in the aperture and screw securely to the wall using the 4 screws supplied. Tighten
these screws until the rubber seal is pressed gently against the wall.
3. Mount front cover using the 4 screws supplied
4. Insert insulation between unit and aperture from cold room side. Ensure all sides of the unit are
insulated! NOTE: Do not pack insulation tightly.
5. Secure D-seal around unit so that the seals are pressed against this, and not the unit. This is
important to avoid vibration being transferred to the wall structure. Cut seals around the unit to
length, press gently against the D-seal and secure to the wall.
1. 4 pcs. screws for front cover.
2. Front cover.
3. Screws for securing unit to wall.
4. Rubber seal for flange.
5. Broad foam tape.
6. Wooden seals
7. Insulation
8. D-seal
Cu-350
Figure 2