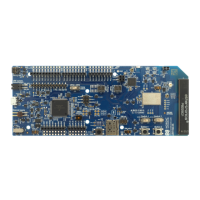
Testing a prebuilt application
Ownership code
The ownership code is the PIN or the hardware ID of your DK. You can find it on the label of
your nRF9160 DK. If the label contains a PIN in addition to the IMEI number, enter this PIN.
If it does not contain a PIN, enter the HWID HEX code, with or without colons. For example:
AA:BB:CC:DD:EE:FF or AABBCCDDEEFF
Note: The ownership code serves as a password and proves that you own the specific nRF9160
DK. Therefore, you should not share it with anyone.
4. Click Download Certificate and save the *.cert.json file to a folder of your choice.
Note: The certificate contains all information that is needed to connect your nRF9160 DK to nRF
Cloud. Therefore, you should not share the certificate with anyone.
3.4.2 Provisioning the nRF Cloud certificate
After retrieving the certificate from nRF Cloud, you must provision it to your nRF9160 DK.
Note: The application firmware on the nRF9160 DK must support long AT commands up to 3 kB to
provision the certificate. If you updated the application firmware as described, this requirement is
fulfilled.
Complete the following steps to provision the certificate:
1. Open nRF Connect for Desktop and launch nRF Connect LTE Link Monitor.
2. In the Settings pane on the right, deselect the check box for Automatic requests.
3. If you have already inserted the SIM card into your DK, remove it before you continue.
4. Connect the nRF9160 DK to the computer with a micro-USB cable, and turn it on.
In the navigation bar, No devices available changes to Select device.
5. Click Terminal in the navigation bar to switch to the terminal view.
6. Enter AT+CFUN=4 in the AT command text field and click Send.
This AT command puts the modem to offline state.
7. Enter AT+CFUN? in the AT command text field and click Send.
This AT command returns the state of the modem.
The command should return +CFUN: 4, which indicates that the modem is in offline state. If it
returns a different value, repeat the previous step.
8. Click Certificate manager in the navigation bar to switch to the certificate manager view.
9. Click Load from JSON and select the *.cert.json file that you downloaded from nRF Cloud.
You can also drag and drop the file onto the GUI.
10.Ensure that the Security tag is set to 16842753, which is the security tag for nRF Cloud credentials.
11.Click Update certificates.
The log message "Certificate update completed" indicates that the certificate was provisioned
successfully.
If you encounter any errors, switch to the terminal view and check the output of the AT commands that
were sent to the nRF9160 DK modem.
Note: If you had connected your nRF9160 DK to nRF Cloud before, you must delete the device
there after provisioning the certificate. To do so, open the entry for your device from the Devices
view, click Configure, and select Delete Device. Then, add the nRF9160 DK again as described in
Connecting the DK to nRF Cloud on page 11.
4418_1412
10
 Loading...