Testing a prebuilt application
3.2.1 Downloading the DK firmware
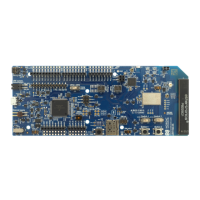
The nRF9160 DK firmware is available from the Nordic Semiconductor website.
Download the latest nRF9160 DK application and modem firmware from the nRF9160 DK Downloads page
and extract it to a folder of your choice.
The zip file contains the following firmware:
Application firmware
The images_app_bl folder contains full firmware images for different applications. When
following this guide, use the image for the Asset Tracker v2 application. Depending on where you are
located, you need the image with either LTE-M or NB-IoT support. See iBasis IoT network coverage
for information about which mode is supported in your location.
Application firmware for Device Firmware Update (DFU)
The images_fota_dfu_bin and images_fota_dfu_hex folders contain firmware images
for DFU. When following this guide, ignore these images.
Modem firmware
The modem firmware is located in the root folder of the zip file. When following this guide, use the
mfw_nrf9160_*.zip file to update the modem firmware. Do not unzip the file.
3.2.2 Updating the application firmware
After downloading the DK firmware, use nRF Connect Programmer to program the latest application
firmware.
Complete the following steps to update the application firmware:
1. Open nRF Connect for Desktop and launch nRF Connect Programmer.
2. Set the PROG/DEBUG SW10 switch (SW5 for v0.9.0 and earlier) on the nRF9160 DK to nRF91 so that
the application firmware is programmed to the nRF9160 System in Package (SiP).
3. Connect the nRF9160 DK to the computer with a micro-USB cable, and turn it on.
In the navigation bar, No devices available changes to Select device.
4. Click Select device and select the device from the drop-down list.
You can identify the nRF9160 DK by the fact that it has three COM ports. If the three COM ports are not
visible, it could be because of the following reasons:
• When the nRF9160 DK is reset while it is still connected to the Programmer app. Press Ctrl+R in
Windows and command+R in macOS to restart Programmer and to correctly view the COM ports.
• Other errors.
The button text changes to the SEGGER ID of the selected device, and the Device Memory Layout
section indicates that the device is connected.
5. If you have not selected the Auto read memory option under the Device menu and wish to visually see
the memory layout before you program, click Read in the menu. If you have selected it, the memory
layout will update automatically.
6. Click Add HEX file in the File pane on the right and select Browse.
7. Navigate to the images_app_bl subfolder of the folder where you extracted the
nRF9160 DK firmware and select the nrf9160dk_asset_tracker_v2_ltem_*.hex,
nrf9160dk_asset_tracker_v2_nbiot_*.hex, or
nrf9160dk_asset_tracker_v2_nbiot_legacy_pco_*.hex file.
See iBasis IoT network coverage for information on which mode (LTE-M or NB-IoT) is suitable for your
location. For NB-IoT, two variants of the firmware with different Protocol Configuration Options (PCO)
handling are available. The main NB-IoT variant is suitable in most cases. Only use the legacy PCO
variant if your network does not support ePCO.
4418_1412
7

 Loading...