7-16
Disassembly and Repair
Actuator assembly cleaning or
replacement
(continued)
1
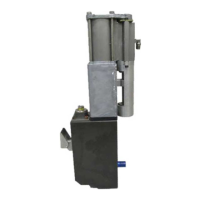
Figure 7.42 -
Installing the Actuator
Assembly:
7 Screws
2 Washers
3 Actuator Assembb
Magnet assembly cleaning or
replacement
26. Carefully align the actuator assembly with the shifter fork and the
pins on the air cylinder.
27. Secure the assembly with the screws and washers removed in
disassembly. Apply torque of 3-4 Nom (28-36 in.-lb).
28. Connect the air line to the actuator.
29. Replace the pump enclosure and resume operation.
Work on a clean work surface. The actuator assembly contains
magnets which will pick up small particles that may damage the
assembly.
1. Complete steps 1 through 4 of the Actuator assembly cleaning or
replacement procedure earlier in this section.
2. Inspect the magnet assembly. Clean if fouled. If damaged, replace
the magnet assembly by continuing with step 7 of the Actuator
assembly cleaning or replacement procedure earlier in this section.
3. Reassemble and reinstall the actuator assembly.
4. Resume normal operation.
PM 106 7018
41-23OOSP- Issued 10’95
@No&on Corporation 1994
All Rights Reserved
 Loading...

