– 63 –
WARNING: As long as the residual heat indication
remains active, the cooking zone(s) must not be
touched and no heat-sensitive items should be
placed on the cooking zone. Risk of fire and burns.
5.3.4 Power function and Super Power function
The Power function
P
and Super Power increases the
power rating of the selected cooking zone. If this function is
activated, these cooking zones will be subjected to considerably
higher power for 10 minutes.
The Power function is designed to quickly heat large quantities
of water, for pasta for example.
Switching Power on and off:
Switch on power
Display
Glide your nger over the slider to the end or
push the end of the slider
P
Switch off Power
9‐0
Glide your nger over the slider
Switching Super Power on and off:
Switch on power
Display
Glide your nger over the slider to the end or
push the end of the slider
P
Switch on Super Power
+ P
Press the end of the slider again
Switch off Super Power
P‐0
Glide your nger over the slider
Switch off Power
9‐0
Glide your nger over the slider
Management of maximum power:
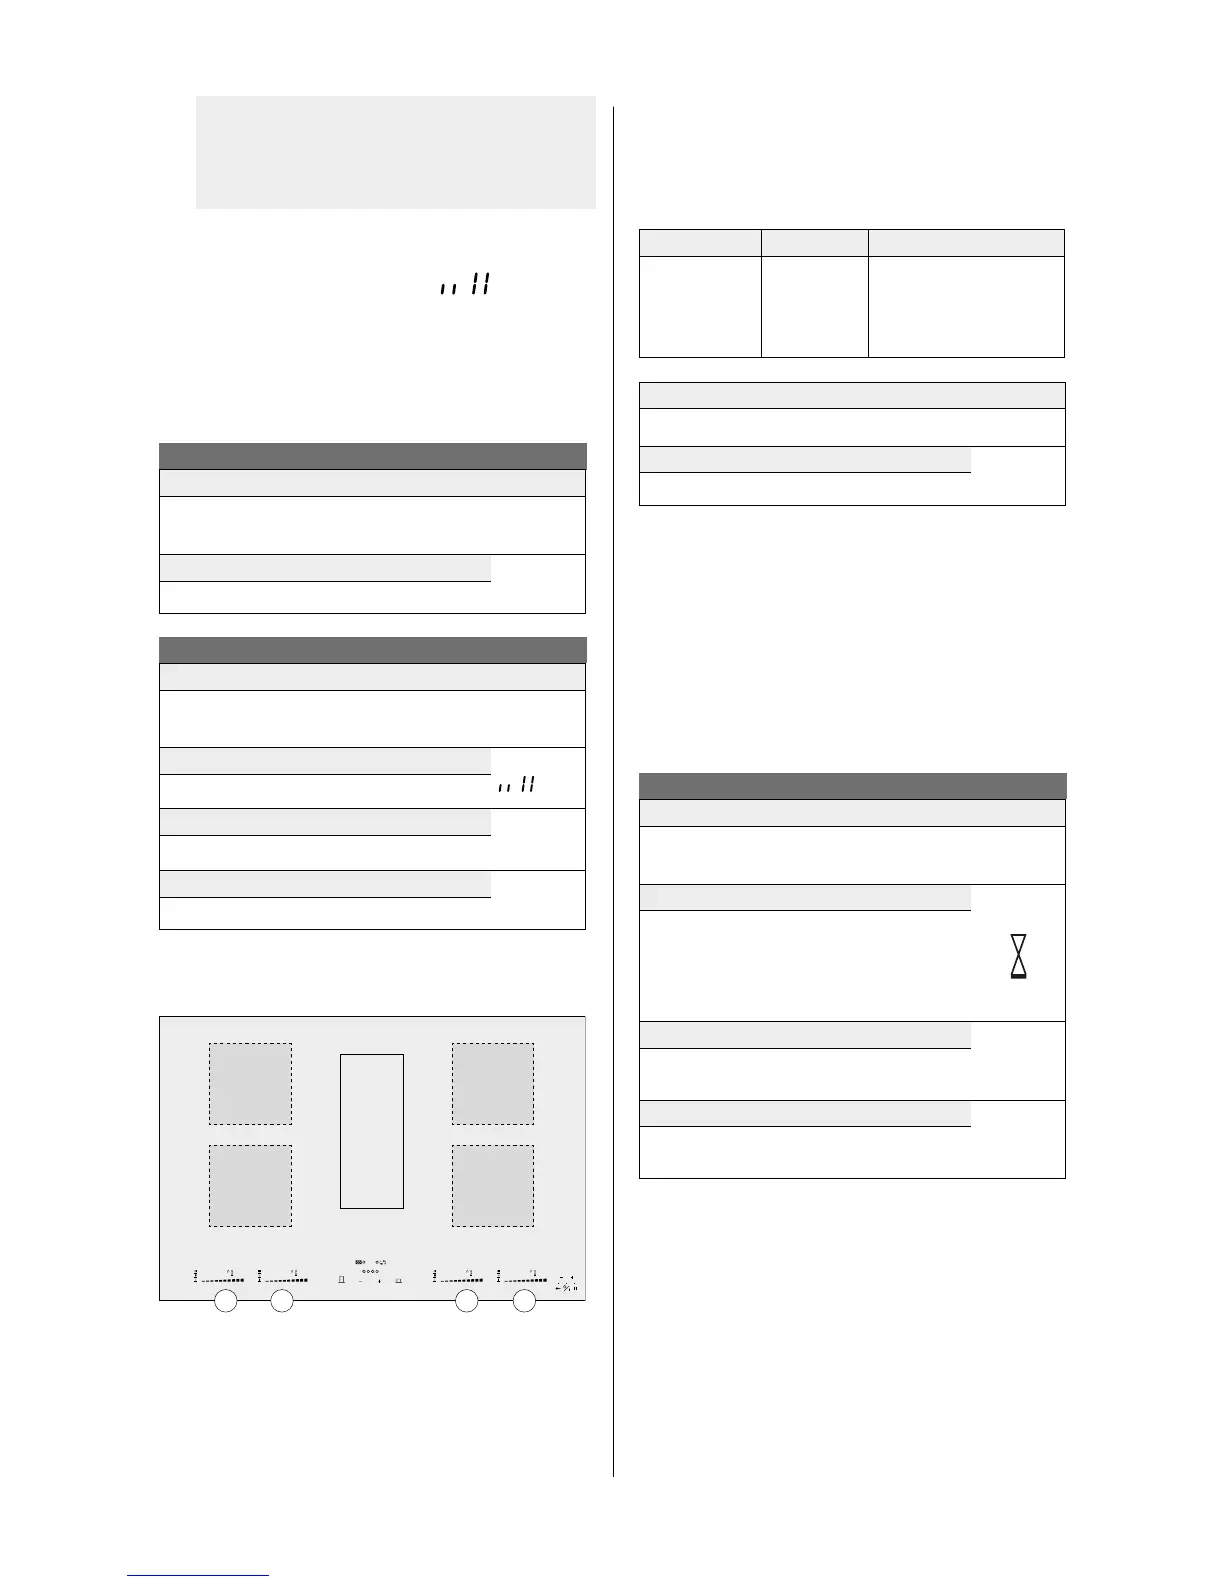
The hob is divided into 2 separate heating groups.
8
888
min
888
A2
A1
B2
B1
A1A2B1B2
If this power limit is exceeded when switching to a high
selected cooking heat or switching the power function on, the
power management module reduces the cooking position of
the relevant cooking zone. This cooking zone will rst ash,
and it is then automatically reduced to the maximum possible
cooking heat
The maximum individual power for each zone is 3700 W.
If simultaneous cooking is taking place on zones A1 and A2 or B1
and B2, the power of 3700 W is divided between these 2 zones
A1 and A2 or B1 and B2.
Cooking zone in cm
Power (W)
A1
A2
B1
B2
24 x 20
24 x 20
24 x 20
24 x 20
Normal: 2100
Power: 3000
Super power: 3700
Power limit
Display
Selected cooking zone with Power function
P
Power limit activated
8
[9] reduced to [8] and ashes
In order to be able to make use of the maximum possible power
for 2 zones at the same time, use a combination of zone A1 or
A2 and B1 or B2.
5.3.5 Timer function
The timer function allows all cooking zones to be used
simultaneously for dierent periods of time (0 to 99 minutes)
for each zone.
Timer function
Setting or changing the cooking time
Display
Select the power by gliding your nger over the
slider
1‐P
Select the timer
Press
‐
and
+
on the timer at the same time
and if necessary press simultaneously again
until the hourglass of the relevant zone is
highlighted
Reduce the time
060‐
059...
press
‐
on the timer
Increase the time
001‐
002...
press
+
on the timer
After a few seconds the LED no longer ashes [ min ]. The time
has been selected and the countdown has begun.