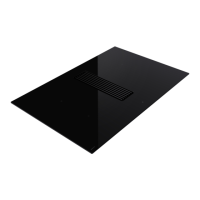
This document describes an induction hob with an integrated worktop extractor, designed for household use. The device features four cooking zones and a central extractor for removing cooking vapors. Both the hob and the extractor can be operated independently.
Before installation and operation, users must carefully read the manual, which contains important information for mounting and using the device. The appliance is suitable for household use only. Upon unpacking, users should check the device and mounting materials for damage. If damaged, Novy should be contacted. Sharp knives should not be used to open the packaging. The manual and serial number stickers should be stored carefully for future reference, especially when reporting problems.
The device's materials are environmentally friendly and suitable for recycling. Users are encouraged to dispose of packaging and old devices responsibly, in accordance with European directive 2002/96/EG for electrical and electronic waste.
Safety precautions include removing all labels and stickers from the glass surface and never modifying the unit. The cooking plate should not be used as a base or work surface. Safety is ensured only when the unit is connected to an earth wire according to regulations. Extension cords should not be used for connecting to the electricity grid.
Before first use, the glass plate should be cleaned with a damp cloth and dried without detergent to avoid a bluish haze. Metal objects like knives, forks, spoons, and covers should not be placed on the hot glass cooking surface. Electrical cables from other devices must not contact hot cooking surfaces or pans. Only suitable cooking pots and pans should be used, as other materials may melt or catch fire. The device should never be covered with a cloth or protective sheet, as this could cause overheating or fire. The heat source should be turned off after use. Caution is advised with recipes containing oils and fats, which can catch fire quickly. Magnetically sensitive items (credit cards, smartphones) should be kept away from the operating device. Users should be aware of burn risks during and after use. Children under 8, individuals with limited psychological or mental abilities, or those with insufficient knowledge should only use the device under supervision or after training in safe use. The device is not intended for use by individuals with diminished physical, sensory, or mental capacities, or those lacking experience and knowledge, unless supervised or instructed by a responsible person. Children must be accompanied to ensure they do not play with the device.
Precautions against damage include avoiding damaged or rough-based cooking pans (e.g., cast iron without enameling) that can scratch the glass. Sand or other abrasive materials can also damage the glass. Items, even small ones, should not be dropped on the glass. Impact of cooking pans against the glass edge should be avoided. Device ventilation must be installed according to manufacturer instructions. Empty cooking pans should not be placed or left on the hob. Contact of sugar, synthetic substances, or aluminum foil with hot zones should be avoided, as these can crack or affect the vitro-ceramic surface; they should be removed immediately after switching off the appliance (beware of burns). Hot pans should never be placed on the control zone. If a drawer is under the built-in device, a 2 cm distance between its contents and the device bottom is needed for good ventilation. Flammable objects (e.g., sprays) should not be stored in the drawer. If the drawer contains a cutlery holder, it must be made of heat-resistant material.
In case of a fault, the device should be turned off and the electrical supply disconnected. If a crack or split is discovered in the vitro-ceramic glass, the electrical power should be immediately switched off, and after-sales service notified. Repairs must only be carried out by specialized personnel; users should never open the device themselves. If the glass cooking surface is broken, the device must be turned off to prevent electric shock.
Other precautions include ensuring the cooking pan remains centered on the cooking zone and covers as much of the zone as possible. Magnetic fields can affect electronic equipment; individuals with pacemakers should consult a distributor or doctor first. Synthetic or aluminum cooking pans should not be used, as they can melt on hot cooking zones. Water should never be used to extinguish a fire; instead, turn off the cooking zone and gently cover flames with a lid, fire blanket, or similar.
Device Description
The appliance is an induction hob with integrated worktop extraction. It has four cooking zones and a central extractor for cooking vapors. The hob and extractor can be operated separately.
Principle of Induction
Each cooking zone has an induction coil underneath. When activated, it produces a variable electromagnetic field that induces a current in the bottom of the cooking pan, warming it up. Suitable cooking pans have a magnetic base (e.g., cast iron, black iron, enameled metal, stainless steel with magnetic base). Unsuitable pans include copper, stainless steel without magnetic base, aluminum, glass, wood, ceramics, and pottery. The induction cooking zone automatically adjusts to the pan size. If the pan diameter is too small, the cooking pan will not work, and a "U" symbol will flash.
Noise Caused by Induction
Various noises may occur during induction hob use, depending on the construction and materials of the cooking utensils:
- Humming: Occurs at higher power due to energy transfer from hob to utensils. Decreases at lower power settings.
- Sputtering: Occurs with utensils made of different material layers, caused by vibrations where layers touch.
- Whistling: Common with multi-layered utensils or when two adjacent cooking zones are used at maximum power. Decreases at lower power settings.
- Clicking: May occur at lower power settings due to electronic switches.
- Buzzing: May occur when the fan is switched on to cool electronics during intensive hob use. The fan continues to run after the hob is switched off if the temperature is too high.
Global Overview
The device includes an inlet grille, grease filter, monoblock filter (for 1861 model), monoblock filter frame (for 1861 model), induction hob, and controls.
Induction Hob Control
The device features touch control keys for various functions. Touching a key activates the function, displaying a light, reading, and/or sound signal. Multiple control keys should not be pushed simultaneously during normal use. Power is selected by gliding a finger over the slider or by directly selecting a desired level.
Switch On and Off
To switch on the hob, press and hold for 2 seconds until the display lights up. To switch off, press until the display goes out. To switch on a cooking zone, slide a finger from left to right on the slider (0-9). To switch off a cooking zone, slide a finger from right to left on the slider until "0" or "H" (Hot) is displayed. If no control input is received within 20 seconds, the electronics return to the wait position.
Pan Detection
The hob has an interactive control system for ease of use. When a pan is placed on the hob, it is automatically detected, and a "0" indicates which slider to use. Pan detection ensures optimum safety. The induction hob will not work if there is no pan or if the pan is unsuitable, and the "U" symbol will flash. Operation is suspended if the pan is removed during cooking, with the "U" symbol flashing until the pan is replaced. The cooking then resumes at the previous power level. Pan detection is no longer active after the cooking zone is switched off.
Indication of Residual Heat
After the cooking zone or hob is switched off, the glass remains warm, indicated by "H". The "H" symbol disappears when the glass can be handled safely. While residual heat is active, cooking zones should not be touched, and heat-sensitive items should not be placed on them to avoid fire and burns.
Power Function
The Power function "P" increases the power rating of the selected cooking zone for 10 minutes, designed for quickly heating large quantities of water (e.g., for pasta). To activate, glide a finger to the end of the slider or push the end. To switch off, glide a finger over the slider (9-0).
Management of Maximum Power
The hob is divided into two separate heating groups (A1/A2 and B1/B2). If the power limit is exceeded when selecting high cooking heat or activating the power function, the power management module reduces the cooking position of the relevant zone. This zone will flash and then automatically reduce to the maximum possible cooking heat. The maximum individual power for each zone is 3700 W. If cooking simultaneously on A1/A2 or B1/B2, the 3700 W is divided between these two zones. To use maximum power for two zones simultaneously, combine A1 or A2 with B1 or B2.
Timer Function
The timer function allows all cooking zones to be used simultaneously for different periods (0 to 1 hour 59 minutes) for each zone. To set or change cooking time, select power by gliding a finger over the slider (1-P), then press the timer icon above the zone selection key. Use [-] to reduce time and [+] to increase time. After a few seconds, the LED stops flashing, and the countdown begins. To switch off the timer, press the timer icon and keep pressing [-] until "000" is displayed. If multiple timers are needed, repeat the operation. The timer can also be used as an independent cooking alarm without selecting a cooking zone; it continues until the end of the set time even if the hob is switched off.
Programming Auto Heat Up
All cooking zones have an auto heat up function, which initially operates at full power for a set time before automatically reducing to the selected power level. To activate, glide a finger over the slider to the desired level (e.g., 7) and hold for 3 seconds (7A). To switch off, glide a finger over the slider (0-9).
Stop & Go Function
This function temporarily interrupts hob activity and allows a restart with the same settings. To turn on, press "||" for 2 seconds until it blinks. To turn off, press "||" for 2 seconds and select a cooking zone with the zone selection key.
Recall Function
After turning the hob off, it is possible to recall the last selected settings (up to 10 seconds), including the state of all cooking zones (power), programmed timer minutes and seconds, "Automatic cooking" function, and Keep warm function. To recall, push the control key for 2 seconds, then push "||" before the flashing stops. The previous settings will then be active again.
Keep Warm Function
This function automatically reaches and maintains temperatures of 42°C, 70°C, or 94°C. It prevents pans from overflowing and food from sticking. To activate Keep Warm 42°, press once. For 70°, press twice. For 94°, press three times. To switch off, glide a finger over the slider (0-9) or press until "0" is displayed. The maximum duration for the keep warm function is 2 hours.
Flexzone
This function allows joining the two left and two right zones to operate as two large flex zones, activated manually. To activate, simultaneously press the two zone selection keys of the flex zones A1/A2 or B1/B2. To increase power, slide a finger over the left slider to the desired power level; both flex zones display the chosen power. To switch off, simultaneously press the two zone selection keys of the two combined zones.
Grill Function
This special cooking function optimizes heating and warming in a cast iron pot/grill plate, improving cooking results. Flex zones A1/A2 or B1/B2 must first be connected with the flexzone function. To activate, select the lower cooking zone A1 or B1 using the zone selection key and press "GRILL". To increase power, glide a finger over the left slider; both zones display the chosen power. To switch off, select a cooking zone using the zone selection key and press "GRILL".
Locking the Controller
To prevent accidental changes to hob selections (e.g., during cleaning), the controller can be locked (except the on/off button). This function can only be activated 10 seconds after switching on the hob. To lock, press for 2 seconds; the symbol lights up brightly. To unlock, press for 2 seconds; the symbol lights up normally.
Recirculation Mode (1861 only)
In recirculation mode, air is first cleaned by grease filters, then scents are removed by the recirculation filter before re-entering the kitchen. Adequate ventilation in the kitchen is important for optimal efficiency.
The device has touch control keys for various functions. Touching a key activates the function, displaying a light, reading, and/or sound signal. Multiple control keys should not be pushed simultaneously during normal use. Power is selected by gliding a finger over the slider or by directly selecting a desired level.
Switch On and Off
To increase extraction power, press the zone selection button of the extractor and slide over the "SLIDER" (0-9). To reduce extraction power, press the zone selection button of the extractor and slide over the "SLIDER" (9-0). To switch off the extractor, press the zone selection button of the extractor and slide over the "SLIDER" (0).
This function automatically adjusts extraction power based on the cooking zone's power usage. If active when the appliance is switched off, it automatically reactivates when switched on again. To switch on, press and hold the zone selection button of the extractor for 3 seconds. To switch off, press and hold the zone selection button of the extractor for 3 seconds. The extraction power can be quickly changed by sliding over the "SLIDER".
This function starts after cooking stops, extracting cooking vapors at low power for a preset time (default 10 minutes). It is advisable to complete this function. The extractor switches off automatically after the delay. The delay function can be manually switched off by pressing the button again.
Delay Function Recirculation Mode (1861 only)
This function starts after cooking stops, extracting cooking vapors at low power. Recirculation filters are dried, and the delay time is set to 30 minutes by default. It is advisable to complete this function. The extractor switches off automatically after the delay. The delay function can be manually switched off by pressing the button again, but this is advised against to avoid affecting the service life and operation of the recirculation filter.
Cleaning Indications
Grease Filter Cleaning Indicator
The grease filter should be cleaned after 20 hours of cooking, indicated automatically by the appliance. When the appliance is switched on and extraction power is set to 0, the remaining time before cleaning can be read from the timer display. After 20 hours, "GrF 00h" appears. To reset, press the zone selection button of the extractor, then press above it. Press "00h" for 3 seconds until it changes to "20h", then press "20h" again to confirm. Follow cleaning instructions in the "Cleaning and Maintenance" chapter.
Recirculation Filter Replacement Indicator (1861 only)
The Monoblock filter should be changed after 450 hours of cooking, indicated automatically. After 450 hours, "odF 00h" appears. To reset, press the zone selection button of the extractor, then press twice above it. Press "00h" for 3 seconds until it changes to "450", then press "450" again to confirm. Follow replacement instructions in the "Cleaning and Maintenance" chapter.
Cooking Advice
Quality of Pots and Pans
Suitable cookware includes steel, enameled steel, cast iron, stainless steel with magnetic base, and aluminum with magnetic base (±100mm min). Unsuitable pans include aluminum and stainless steel without magnetic base, copper, brass, ceramics, and porcelain. Manufacturers will state if their products are suitable for induction. To check suitability, pour a little water into a pan, place it on an induction cooking zone set to 9; the water should heat up quickly. A magnet should stick to the pan's base. Some pans may hum on an induction zone, which is not a fault and does not affect operation; this noise decreases with power adjustment. Pans should be lifted, not slid, to avoid stains and scratches. Meals should be prepared with the pan lid on whenever possible.
Dimensions of Cooking Pans
Cooking zones can adapt to pan diameter to some extent. The pan base must have a minimum diameter (±9cm). Place the pan in the middle of the cooking zone for optimal energy transfer. If the pan diameter is much larger than the zone, optimal cooking results may not be achieved, as only the surface above the induction coil generates heat. The rest of the surface heats via conduction. If the pan is much larger than the cooking zone, set the cooking zone to a slightly lower level for more even heat distribution.
Cleaning and Maintenance
All instructions in the Safety chapter must be followed. Before cleaning, ensure the cooking plate is fully switched off and the glass above the cooking zones has cooled down. Follow cleaning instructions for long life and optimum functioning.
Maintenance of the Hob
Allow the device to cool down to avoid burns. Never use "steam" or "pressure" equipment. Do not use objects that could damage the vitro-ceramic glass, such as abrasive sponges, cleaning liquids, or aggressive cleaning agents.
Cleaning the Glass of the Cooking Plate
Wipe the surface with washing-up liquid on a damp cloth or sponge (preferably after every use), then dry with a dry cloth or kitchen paper. Ensure all cloths are clean to avoid scratching.
Stubborn Stains
Heavy contamination and stains (limescale, shiny spots) are best removed while the hob is still warm. Apply common cleaning agents and methods. If needed, use a specific vitro-ceramic glass cleaning product (e.g., Vitroclen). Boiled-over food should be soaked with a wet cloth, then removed with a glass scraper designed for ceramic hobs, and then cleaned as described. Burnt-on sugar and melted plastics are best removed immediately while still hot with a glass scraper, then cleaned as described. Dirt/sand grains can cause scratches when moving pans, so ensure the surface is free of them.
Discoloration of the hob does not affect operation or strength of the vitro-ceramic; it is due to residues that have burnt-in. Shiny spots from wear (e.g., from aluminum-bottomed pans or wrong cleaning agents) can be removed with difficulty using common cleaning agents; repeat if necessary. Aggressive cleaning agents and scratching from pan bases can rub off the glass surface over time, leaving dark stains. Do not use the cooking plate as a tabletop or for utensils. Always lift pans/pots; do not slide them.
Maintenance of the Extractor
Remove the Inlet Grille
Do not use objects that could damage the inlet grille, such as pot scourers, scouring agents, or aggressive cleaning agents. First, switch off the hob and the delay before removing components. Press the right side of the inlet grille until it tilts, then grasp and set it aside safely on the kitchen worktop. Do not place the inlet grille on the hob glass to avoid scratches or on a switched-on hob to prevent heating up.
Replace Inlet Grille
Ensure the Monoblock filter and grease filter are in place before replacing the inlet grille. Grasp the inlet grille and insert it in the center of the extraction opening, aligned with the position marks.
Cleaning the Grease Filter
When the grease filters need cleaning (indicated by the grease filter cleaning indicator), remove the inlet grille. Grasp the grease filter by its grips and lift it out of the extraction opening. Wash in the dishwasher or submerge in hot water with anti-grease dishwashing liquid. Failure to follow these instructions can lead to serious soiling and fire hazard. After cleaning, replace the grease filter in the right direction using its grips, then replace the inlet grille, and reset the grease filter indicator.
Replacing the Monoblock Filter (1861 only)
Remove the inlet grille, then the grease filter. Grasp the Monoblock filter, tilting it forwards, fold both corners over, and remove it from the extraction opening. After replacing, fold back the corners of the new Monoblock filter and replace it in the frame through the extraction opening. Press the filter against the frame. Using the grips, replace the grease filter in the right direction in the extraction opening. Replace the inlet grille in the extraction opening. Reset the recirculation indicator.
Troubleshooting Minor Faults
Messages on the Hob
- "U": No cooking pan, unsuitable pan, or pan diameter too small.
- "U" (Chapter 4.3.9 Keep warm): Keep warm function.
- "E": Electronic system disrupted. Disconnect and reconnect the hob, then call after-sales service.
- "||" (Chapter 4.3.7 Stop & Go): Stop & Go function.
- "~" (Er03): Controller keys covered by liquid or an item. Symbol disappears when keys are released or cleaned.
- "E2": Hob overheated. Let cool, then switch back on.
- "E8": Fan air supply blocked. Unblock it.
- "0400": Hob not properly connected to the network. Check connection.
- (Er47): Problem in the device's internal bus system.
If error messages persist, contact after-sales service.
Hob or Cooking Zone Not Working
Possible causes: poor electrical connection, blown safety fuse, locking key enabled, touch control keys splashed with water/fat, object on touch control keys.
Single Zone or All Zones Not Working
Possible causes: safety device operated (e.g., zone left on unintentionally, one or more touch control keys covered), empty pan overheated, automatic power reducer/shut-down in event of overheating.
Fan Continues to Operate After Hob Switched Off
This is not a defect; the fan protects electronic equipment and will stop automatically.
Automatic Cooking Controller Not Working
Possible causes: cooking zone still warm ("H"), maximum cooking level selected ("9"), cooking level selected using control key "-".
Possible causes:
- Grease filter needs cleaning. Follow cleaning indications. Filters should be cleaned every two weeks for correct operation.
- Air supply in the house. Ensure air is supplied by opening grates or a window when the cooker hood is on.
Miscellaneous
For faults, contact Novy Repair Service. Provide device type information (found on the type plate in the inner frame of the extraction unit) for proper handling.