9
You should now see a reading on the display unit and you’re ready
to start using your npower home energy monitor.
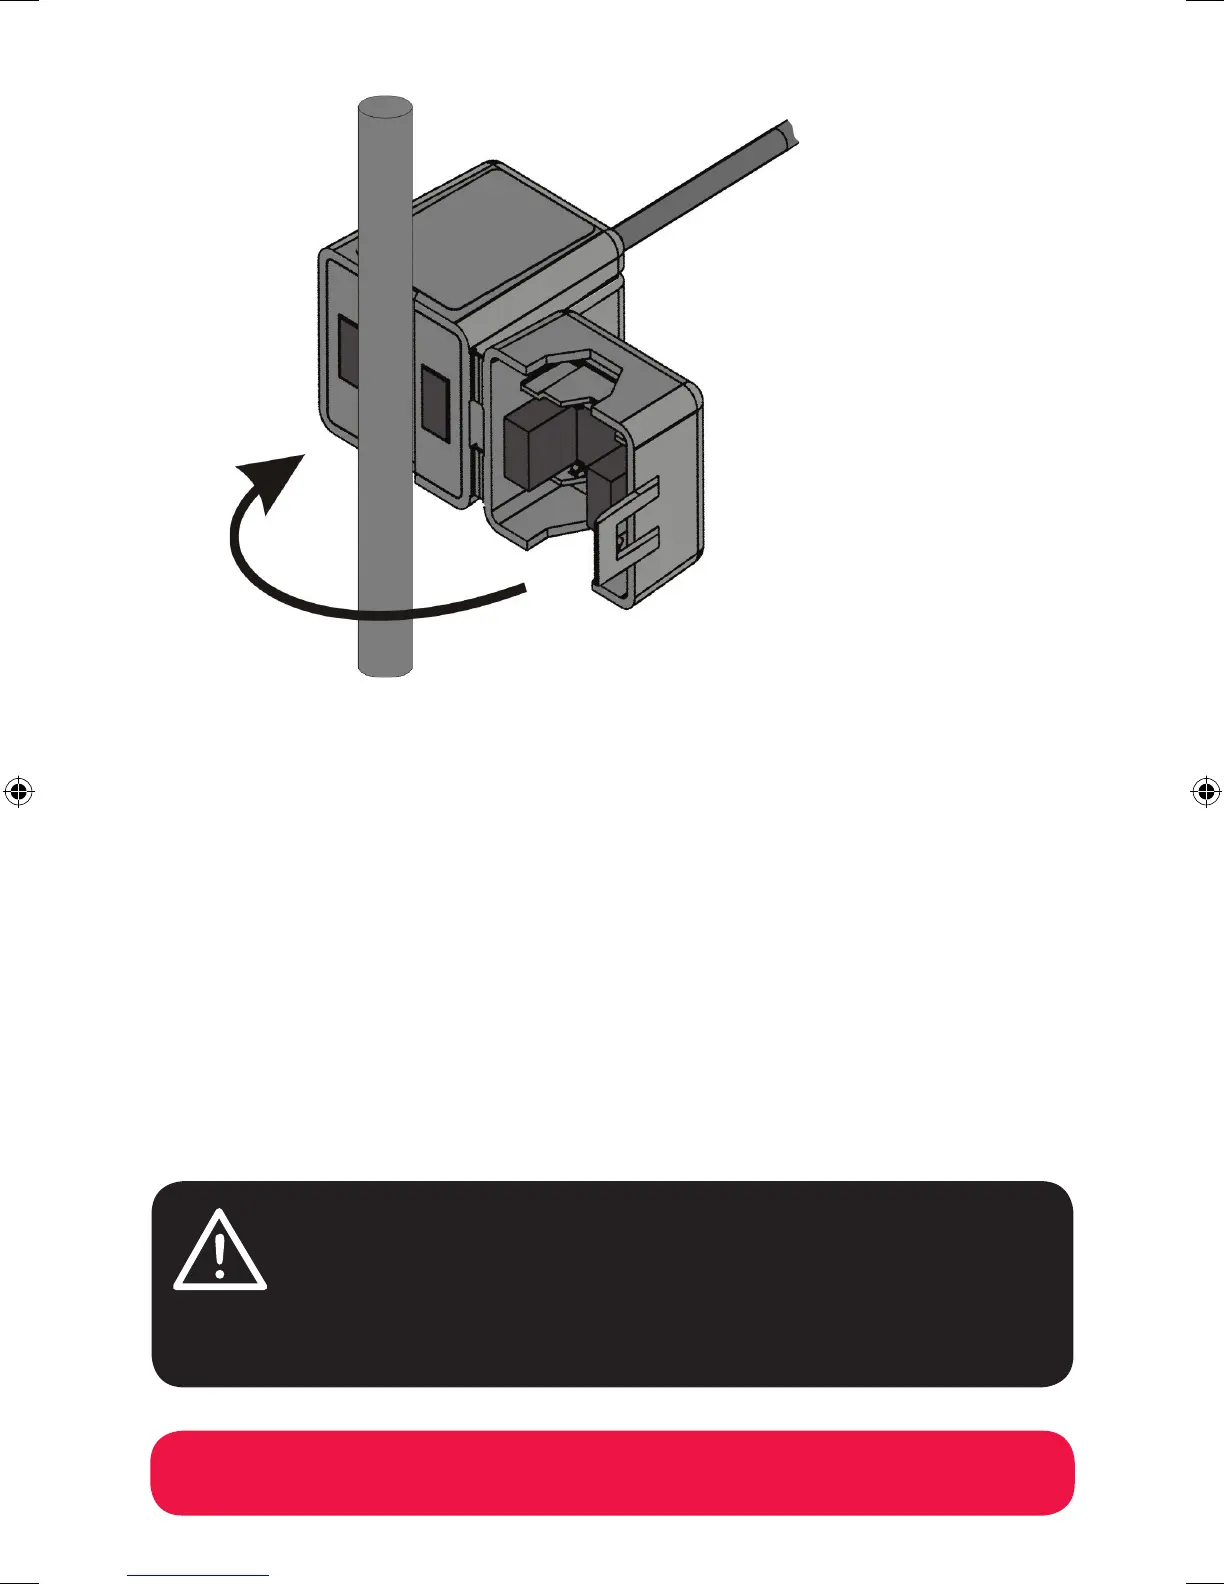
Step 10 - Fitting the sensor
Clip the sensor around cable 4. You should hear a ‘click’ to indicate it has been tightly shut.
The face of the sensor must fit cleanly round the cable in order to provide a good reading.
If the display does not show any readings, you can try each cable until the display shows a
reading. However if the Communications Symbol is flashing, you may want to repeat Step 5
to Step 7 before fitting the sensor.
In the event that there is not enough cable access you MUST STOP the installation.
DO NOT PULL THE CABLE or try to force the sensor on, please contact the technical
support helpline on page 3.
Now plug the sensor into the base of the transmitter, and stand the transmitter in a secure
upright position near your meter. DO NOT IN ANY CIRCUMSTANCES drill fixing holes or
hammer nails into the wall near the meter, the cables or any other electrical equipment.
SAFETY REMINDER
NEVER TRY TO ATTACH THE SENSOR IF THERE IS DAMAGE TO THE
METER CABLES. DO NOT CUT, PULL OR TAMPER WITH ANY CABLES.
IF YOU HAVE ANY CONCERNS CONTACT THE TECHNICAL SUPPORT
HELPLINE ON PAGE 3.
RF10135 npm9738 Piccolo guide 01 12.indd 9 13/02/2012 15:58