9
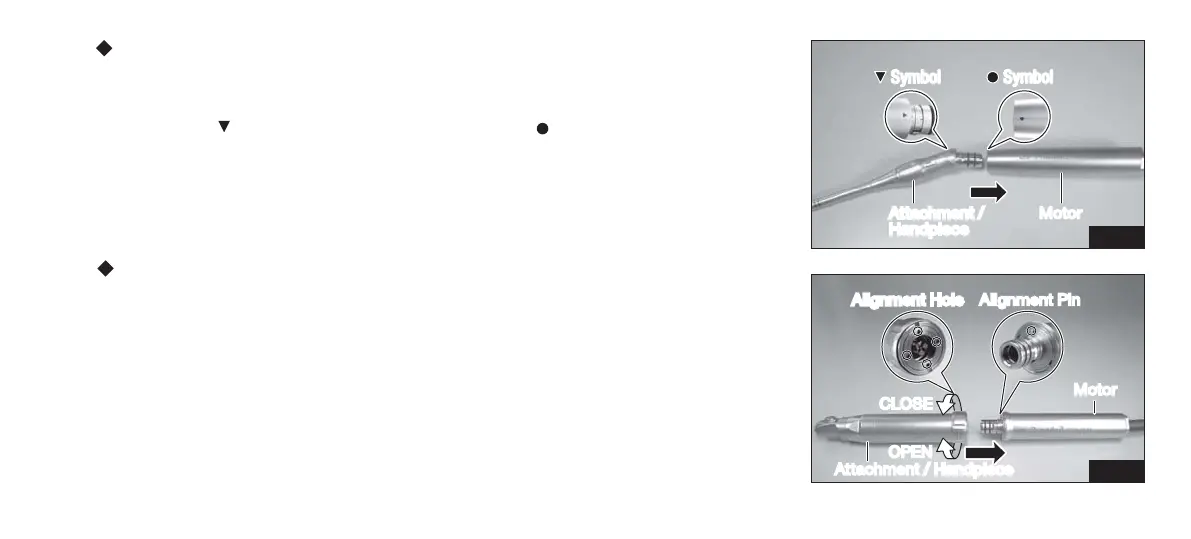
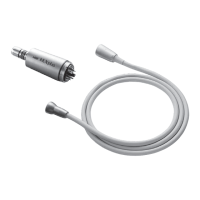
P200-SMH and P200-SMH-HS Attachments/Handpieces
<Mounting>
1) Push the Attachment/Handpiece into the Motor straight.
2) Align the '
' Symbol of the Attachment/Handpiece and ' ' Symbol of the
Motor (Fig. 3), then push the Attachment/Handpiece in until it clicks to connect firmly.
<Removing>
Pull out the Attachment/Handpiece from the Motor straight.
P200-BMH and P200-BMH-HS Attachments/Handpieces
<Mounting>
1) Push the Attachment/Handpiece into the Motor straight.
2) Rotate the Attachment/Handpiece rightward or leftward so that the Alignment Pin of the Motor
(Fig. 4) matches the hole of the Attachment/Handpiece with a clicking sound to connect firmly.
3) Tighten the Removal Ring of the Attachment/Handpiece manually to fix it firmly.
<Removing>
Loosen the Removal Ring and pull out the Attachment/Handpiece from the Motor straight.
Fig. 3
Fig. 4
Attachment /
Handpiece
Motor
Symbol
Symbol
CLOSE
OPEN
Attachment / Handpiece
Motor
Alignment Hole Alignment Pin