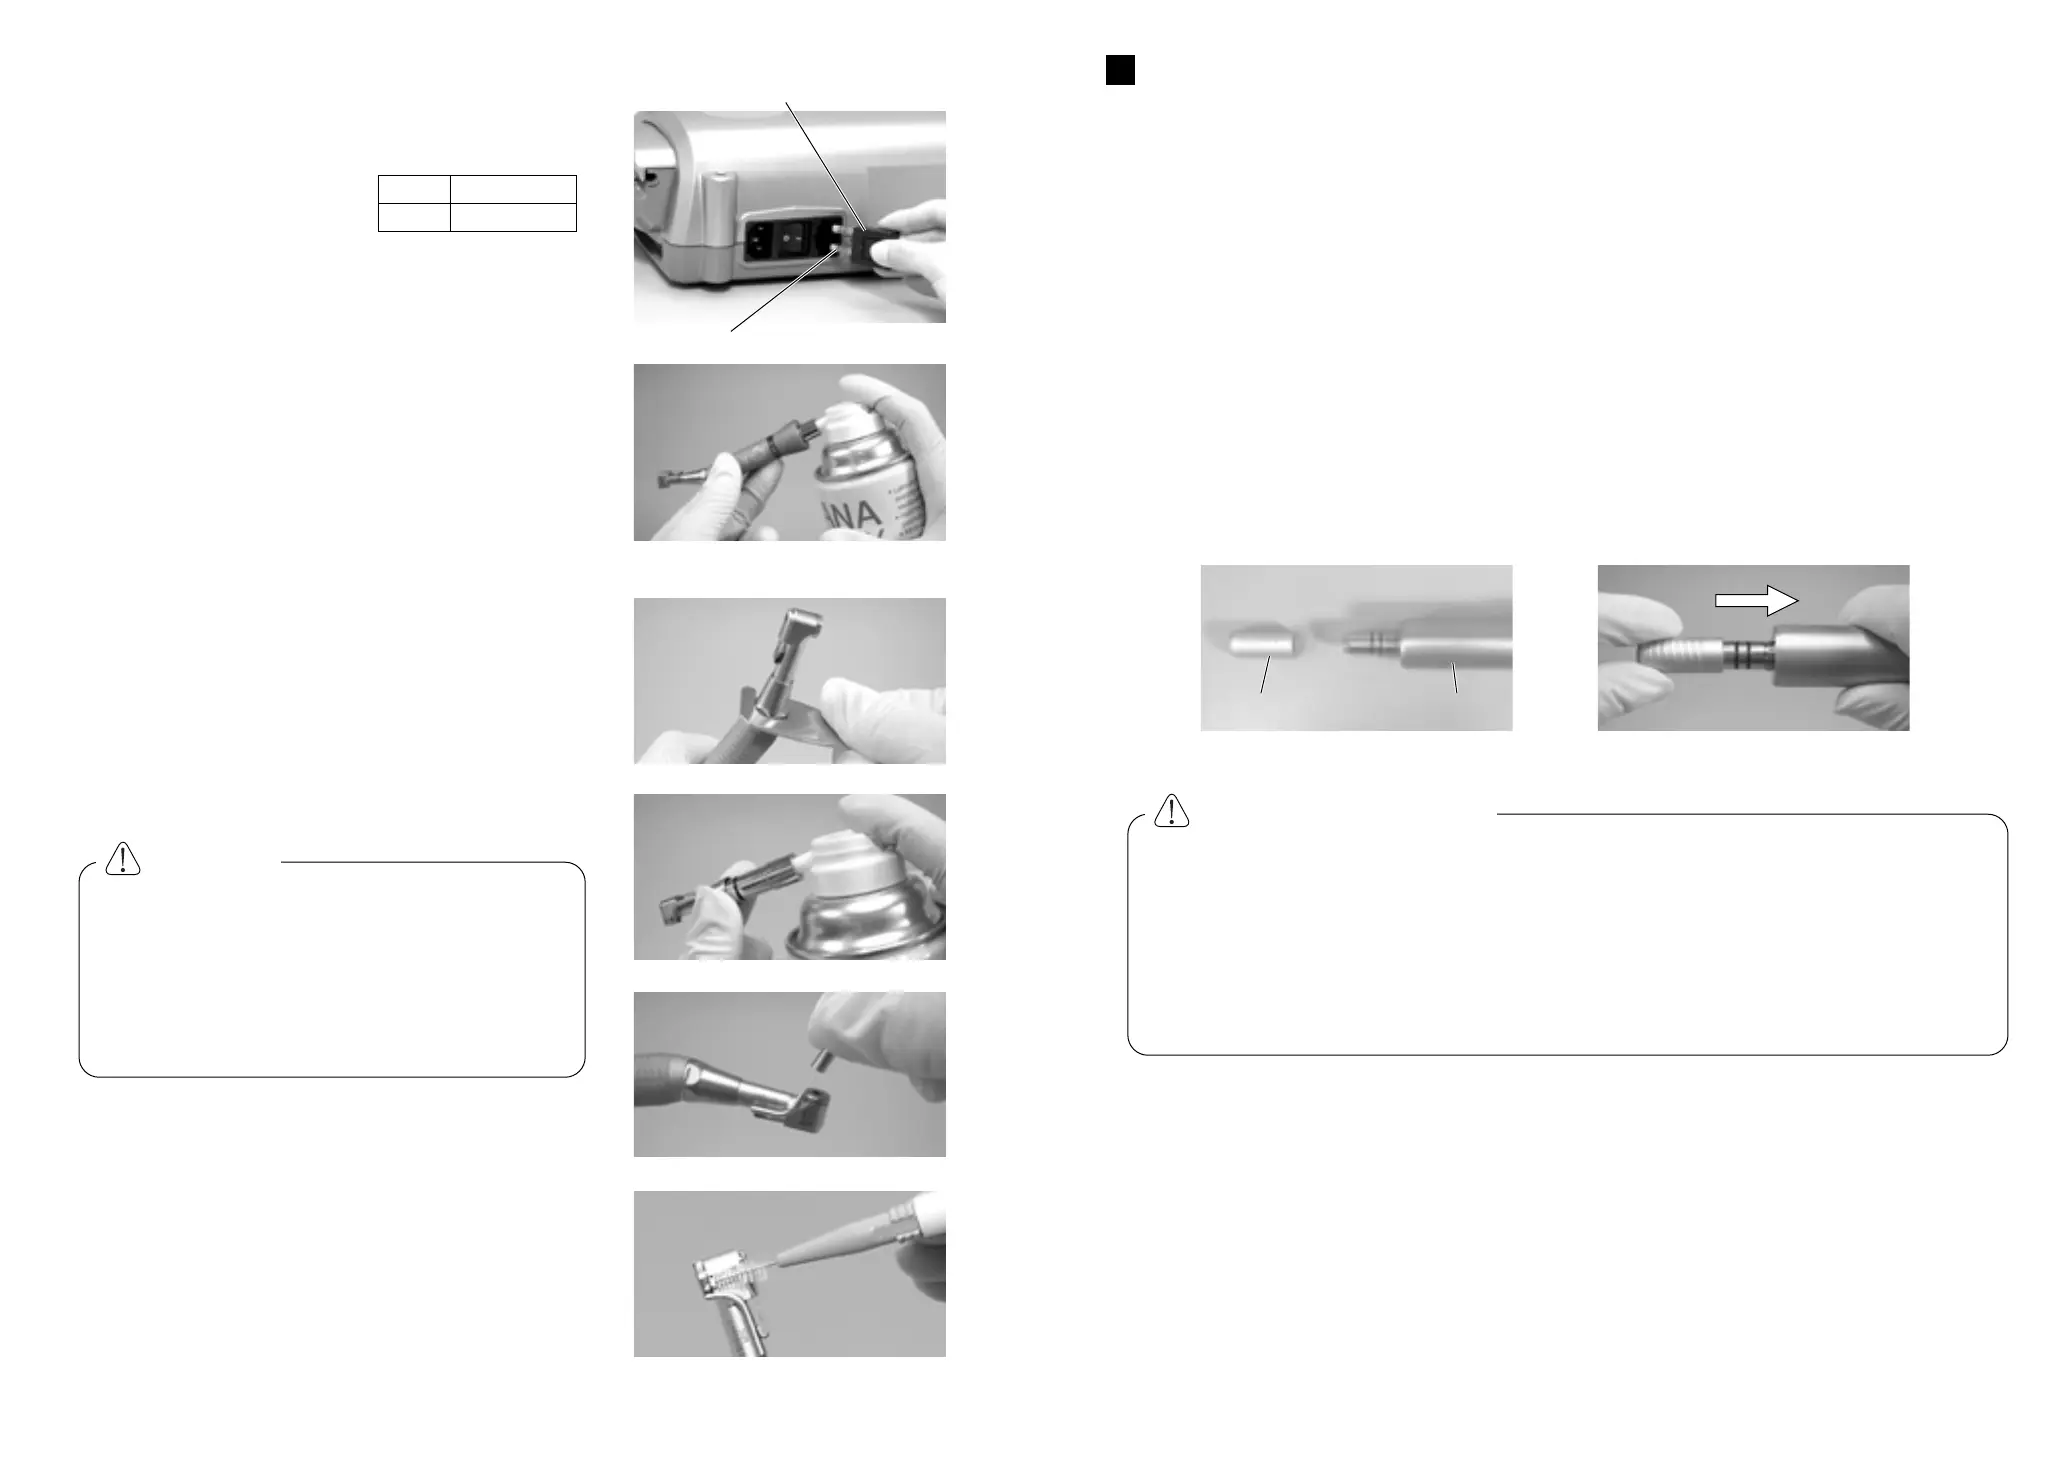
120V
230V
T3.15AL 250V
T1.6AL 250V
The following items are autoclavable.
• Handpiece
• Micromotor with cord
• Motor handpiece cradle
• Internal coolant nozzle
• Irrigation tube clamp
• Tube holder
• Autoclave plug for micromotor
[ Autoclaving ]
a Remove blood and debris from the handpiece.
s Clean inside the handpiece, by using the spray lubricant (refer to "7. Care and Maintenance").
Do not attempt to spray lubricant into the micromotor.
Attach the micromotor autoclave plug to the micromotor.
d Place the handpiece in an autoclave pouch (not included in the package) and seal it.
f Autoclave for 20 min. at 121˚C (250˚F), or 15 min. at 132˚C (270˚F).
7-3 Replacement of the fuse
If the control unit does not function, check the fuses.
To access the fuse box simply squeeze the fuse box
lock located on the side of the control unit (Fig.18). If
the lock is too tight use a
pointed tool to squeeze the
lock.
7-4
Maintenance of the Control Unit and Foot Control
If blood or saline solution is stained on the Control
Unit or Foot Control, remove the power code, wipe
off the Unit or Foot Control with the cloth water
squeezed dry, and wipe off with the alcohol-
absorbed cloth.
7-5
Maintenance of the handpiece attachment
After each operation, immerse the head in clean,
warm water and repeat run-stop of the motor four or
five times to rinse out blood or saline solution from
the handpiece head. If the handpiece exterior is
heavily stained, wash off with water, and dry with a
soft cloth. Do not immerse the entire handpiece in
water and prevent water from entering from back
end of the handpiece.
[ Using a Spray Lubricant ]
As shown in Fig.19, insert the spray lubricant can E-
Type nozzle into the back of the handpiece. Spray
the lubricant into the handpiece 2-3 times for 2-3
seconds each time.
If the handpiece head is excessively stained with
blood or debris then remove the head by unscrewing
the nut with the supplied wrench (Fig.20). Attach the
specific head lubrication nozzle onto the spray
lubricant can and spray directly into the head to
wash away blood and debris. (Fig.21)
If the coolant nozzle is clogged use the Nozzle
cleaning fine wire supplied. Push it into the nozzle to
unclog it. (Fig.22)
When debris or dirt accumulates around the coolant
nozzle use the cleaning brush supplied (Fig.23).
Sterilization
8
!3!2
CAUTION
• Hold the handpiece and the spray can
securely or the handpiece may eject
from your hand due to the high pressure
of the spray.
• Shake the spray can a few times to mix
well the lubricant and the propellant.
• Hold the spray can upright for spraying.
Caution for autoclaving
• Clean and lubricate the handpiece before autoclaving. Autoclaving a
handpiece stained with blood or debris could cause damage to the
handpiece.
• Do not lubricate the micromotor.
• Do not use the autoclave drying cycle if the temperature at this cycle could
exceed 135˚C (275˚F).
• The Irrigation Tube is a single use disposable type and cannot be
autoclaved.
Fig.18
Fig.19
Fig.20
Fig.21
Fig.22
Fig.23
Fuse
Fuse box
Fig.24 Fig.25
Autoclave Plug Motor