EasyManuals Logo

NTI ENVIROMUX Series Installation Manual

NTI ENVIROMUX Series
11 pages
To Next Page IconTo Next Page
To Previous Page IconTo Previous Page
Page #3 background imageLoading...
Page #3 background image
3
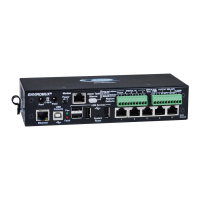
2. To mount a single Expander in a rack (E-DI16DOR16-V2R), attach the rack mounting ears to the ear brackets using the
#6-32 x 1/4” screws provided. Tighten all screws securely.
3. Install 4 cage nuts (provided) to the rack in locations that line up with the holes in the mounting ears on the Expander.
4. Secure the Expander to the rack using the four #10-32x3/4” screws (not included). Be sure to tighten all mounting screws
securely.
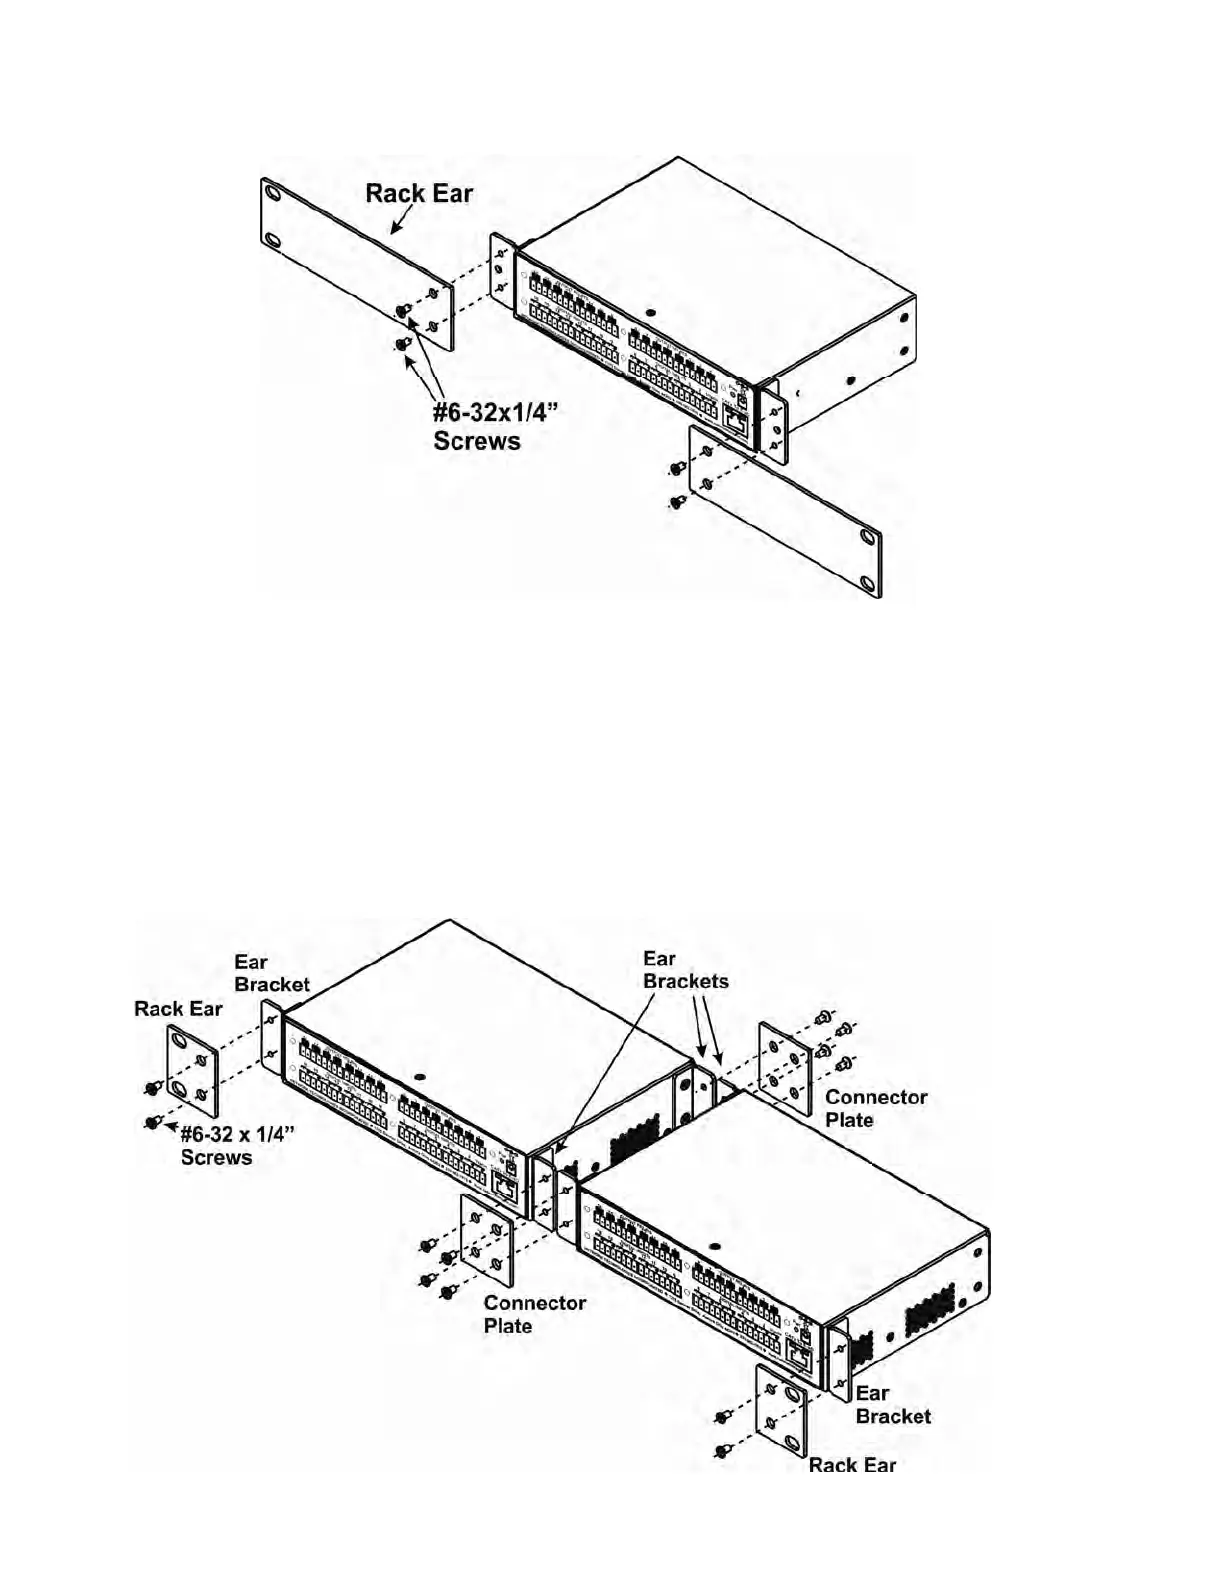
Dual-Expander mounting
To mount a dual Expander in a rack (E-DI16DOR16-V22R), attach the rack ears to the far left side of the left Expander and right
side of the right Expander using the #6-32 x 1/4” screws provided. Install ear brackets in the rear where the two cases will meet.
Then install connector plates to join the two Expanders in the front and rear.

Other manuals for NTI ENVIROMUX Series

Questions and Answers:

Question and Answer IconNeed help?

Do you have a question about the NTI ENVIROMUX Series and is the answer not in the manual?

NTI ENVIROMUX Series Specifications

General IconGeneral
Product TypeEnvironmental Monitoring System
Temperature Range-40°C to 85°C
Power Supply12V DC or 24V AC
Network InterfaceEthernet 10/100 Mbps
Alarm NotificationsEmail, SNMP
Sensor Types SupportedTemperature, Humidity, Water, Airflow
Power12V DC or 24V AC
Operating Temperature-40°C to 85°C
MountingWall or Rack Mount
Communication InterfacesEthernet
Data LoggingYes
ComplianceCE, RoHS

Related product manuals