Trinity Lx │Installation and Operation Instructions Lx Series
12
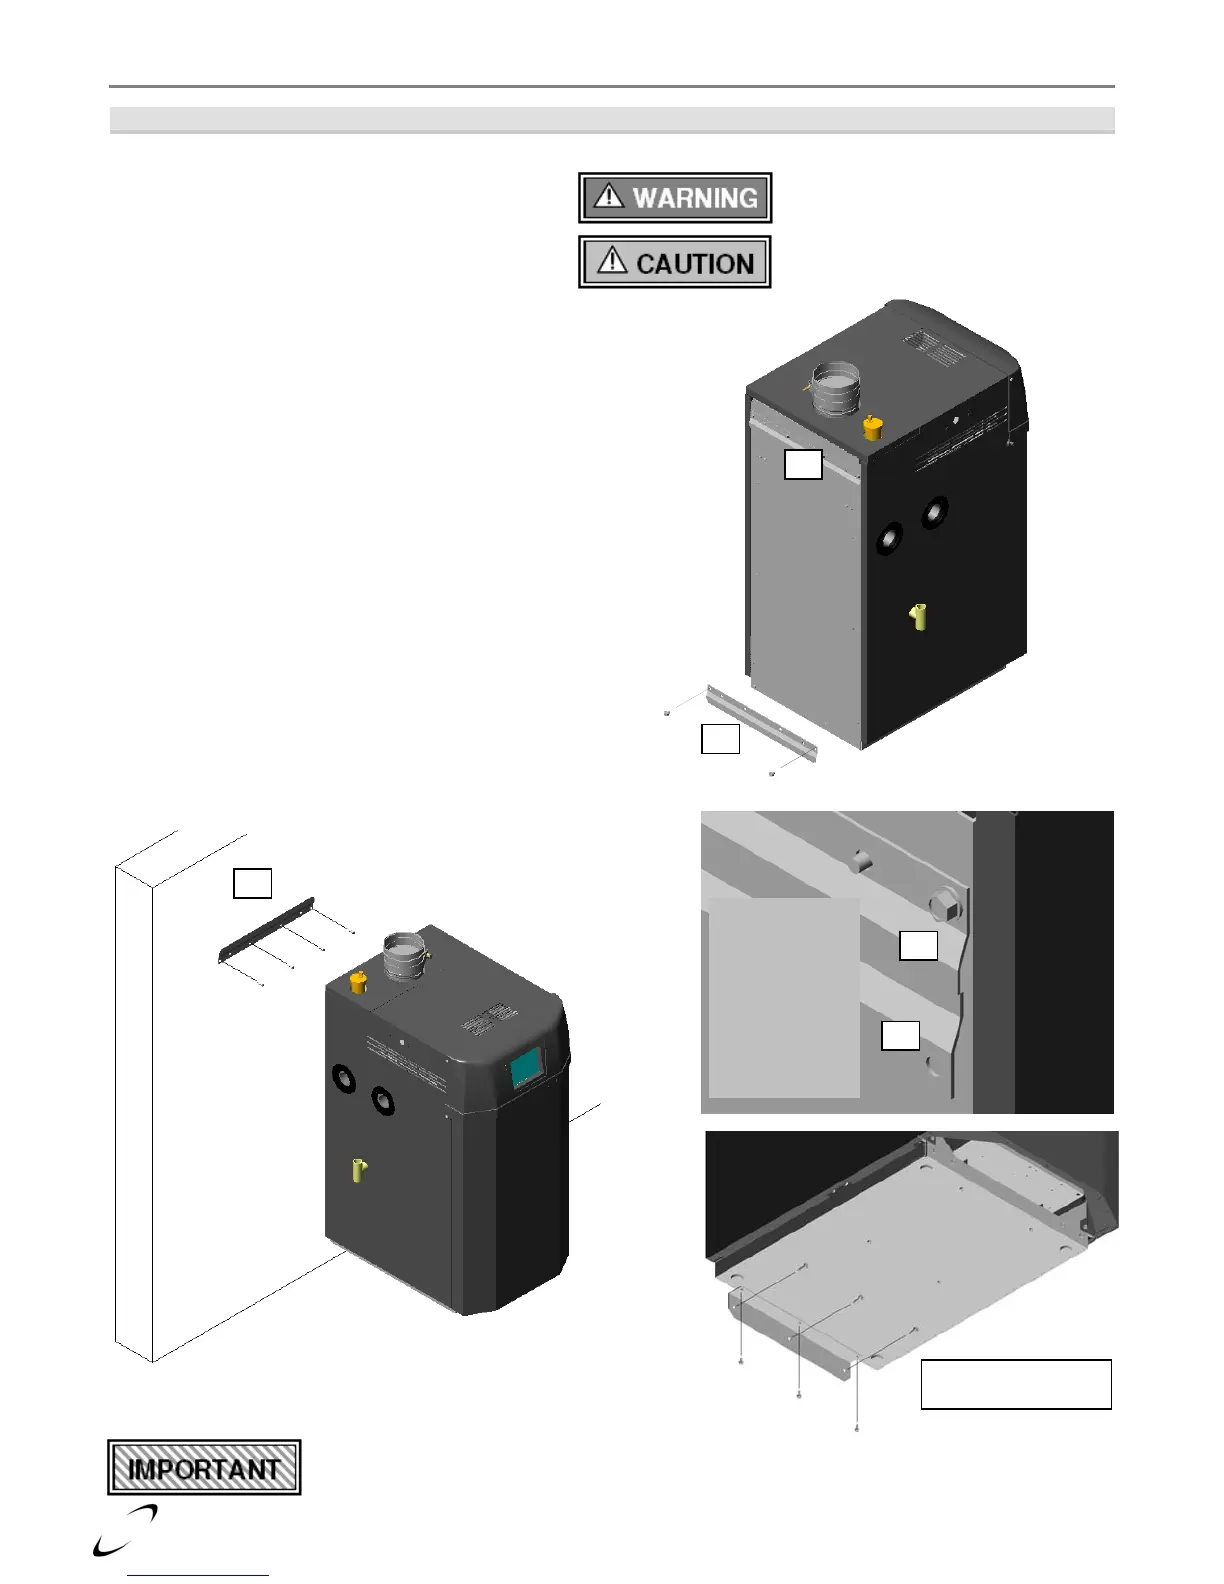
Figure 3-2(b) Lx300-400 Models
Wall Mounting Installations
n While leaving the upper bracket intact (A),
remove the wall mount bracket attached to the
Failure to follow instructions may
result in fire, serious injury, or death.
This unit requires two people to lift it
or damage and injury may result.
bottom-back of the appliance (B). Save the
mounting hardware for Step 4.
o
Secure the wall mount bracket, removed from
the bottom of the boiler in Step 1, to a solid
wall using field supplied lag screws (anchors
when mounting to a concrete wall) that are
adequate to support the weight of the appliance
(refer to Table 2-1 Specifications). Ensure the
wall mount bracket is mounted level and flush
to the wall with mounting holes on the bottom,
flange pointed upward and angled away from
the wall.
p Mount the appliance to the wall by aligning the
upper bracket (A) with the wall mount bracket
(B). Slide the upper bracket down over the
wall mount bracket until it hooks.
q Once the appliance is resting securely on the
upper bracket, secure the bottom bracket to the
underside of the appliance using the mounting
hardware removed in Step 1; then, anchor the
bottom bracket to the wall as shown.
Water Heaters require "Mandatory Wall Mounting Protection". Refer to Section 1.0 in
Appendix C, "Water Heater Applications: Plumbing & Wiring Instructions".
p
o
Ensure that the
upper bracket
on the back of
the appliance
(A) slides down
over the wall
mount bracket
(B) and rests
securely on it.
q
A
B
B
n
B
A
Bottom Bracket is in
Lx Installation Kit Box