Lx Series Installation and Operation Instructions │Trinity Lx
23
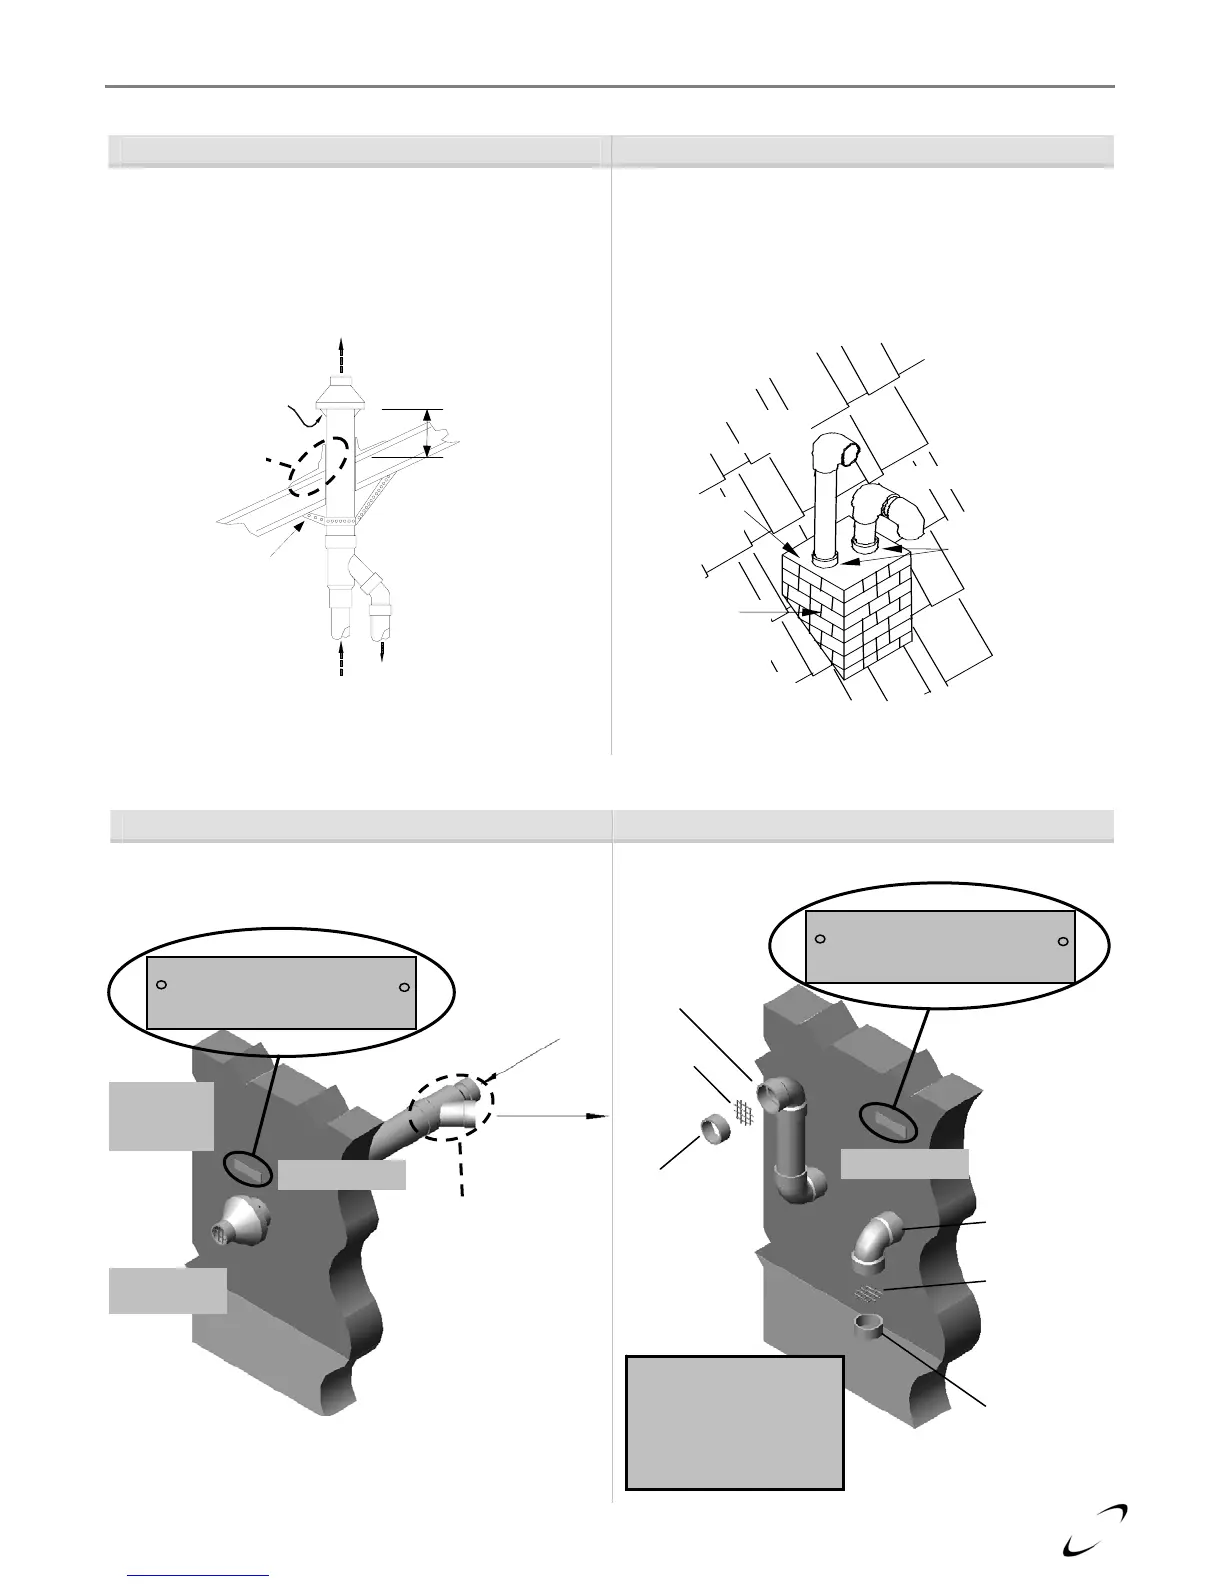
Labeling and Identification – Roof Terminations
Figure 4-10 All Models Figure 4-11 All Models
Concentric Vent Roof Top Termination Two-Pipe Roof Top Termination
To prevent water leakage, install adequate roof
weather seal flashing (not included) around roof
penetration as shown.
Two-pipe terminations typically penetrate the roof
surface. An alternative is to use an existing chimney
as a chase way. See Figure 4-22 for more details.
Labeling and Identification – Wall Terminations
Figure 4-12 All Models Figure 4-13 All Models
Concentric Vent Wall Termination (Optional Kit) Two-Pipe Wall Termination
Warning Plate
Exhaust
Vent
Vent
Screen
ent Screen
Insert vent screen into
socket joint of termination
elbow. Cement a short
piece of venting into the
socket to secure in place.
Venting
Vent
Screen
Gas Vent Directly Below
Keep Free of Obstructions
Combustion
Ai
-Inlet
Venting
Warning Plate
From
appliance
exhaust
To appliance
air-inlet
connection
Exhaust Vent
Outlet (center)
Gas Vent Directly Below
Keep Free of Obstructions
Concentric
“Y” Fitting
Combustion
Air-Inlet
(perimeter)
Support
(field
supplied)
To appliance
air-inlet
connection
From
appliance
exhaust
Ai
-Inlet
Roof weather
seal flashing
(field supplied)
24” [610 mm]
from terminal
end cap vanes
Exhaust Vent
Exhaust
Vent
Ai
-Inlet
Chimney
Cap
Existing
Chimney
(used as a
chase way)
Flashing