2
Quickstart Guide (English)
Introduction
Box Contents
NS7 III
2 Platter Assemblies
• Aluminum Platter
• Slipmat
• Vinyl
• 45 RPM Adapter (attached)
Spindle Screw
Allen Wrench
Display Unit
Display USB Cable
Display Power Cable
Serato DJ™ Software (download)
USB Cable
Power Cable
Quickstart Guide
User Guide (download)
Safety & Warranty Manual
Important: Download the full NS7 III User Guide from numark.com.
Support
For the latest information about this product (system requirements, compatibility information, etc.)
and product registration, visit numark.com.
For additional product support, visit numark.com/support.
Setup
Before getting started:
• Read the Safety & Warranty Manual before using NS7 III.
• Make sure all items listed in Introduction > Box Contents are included.
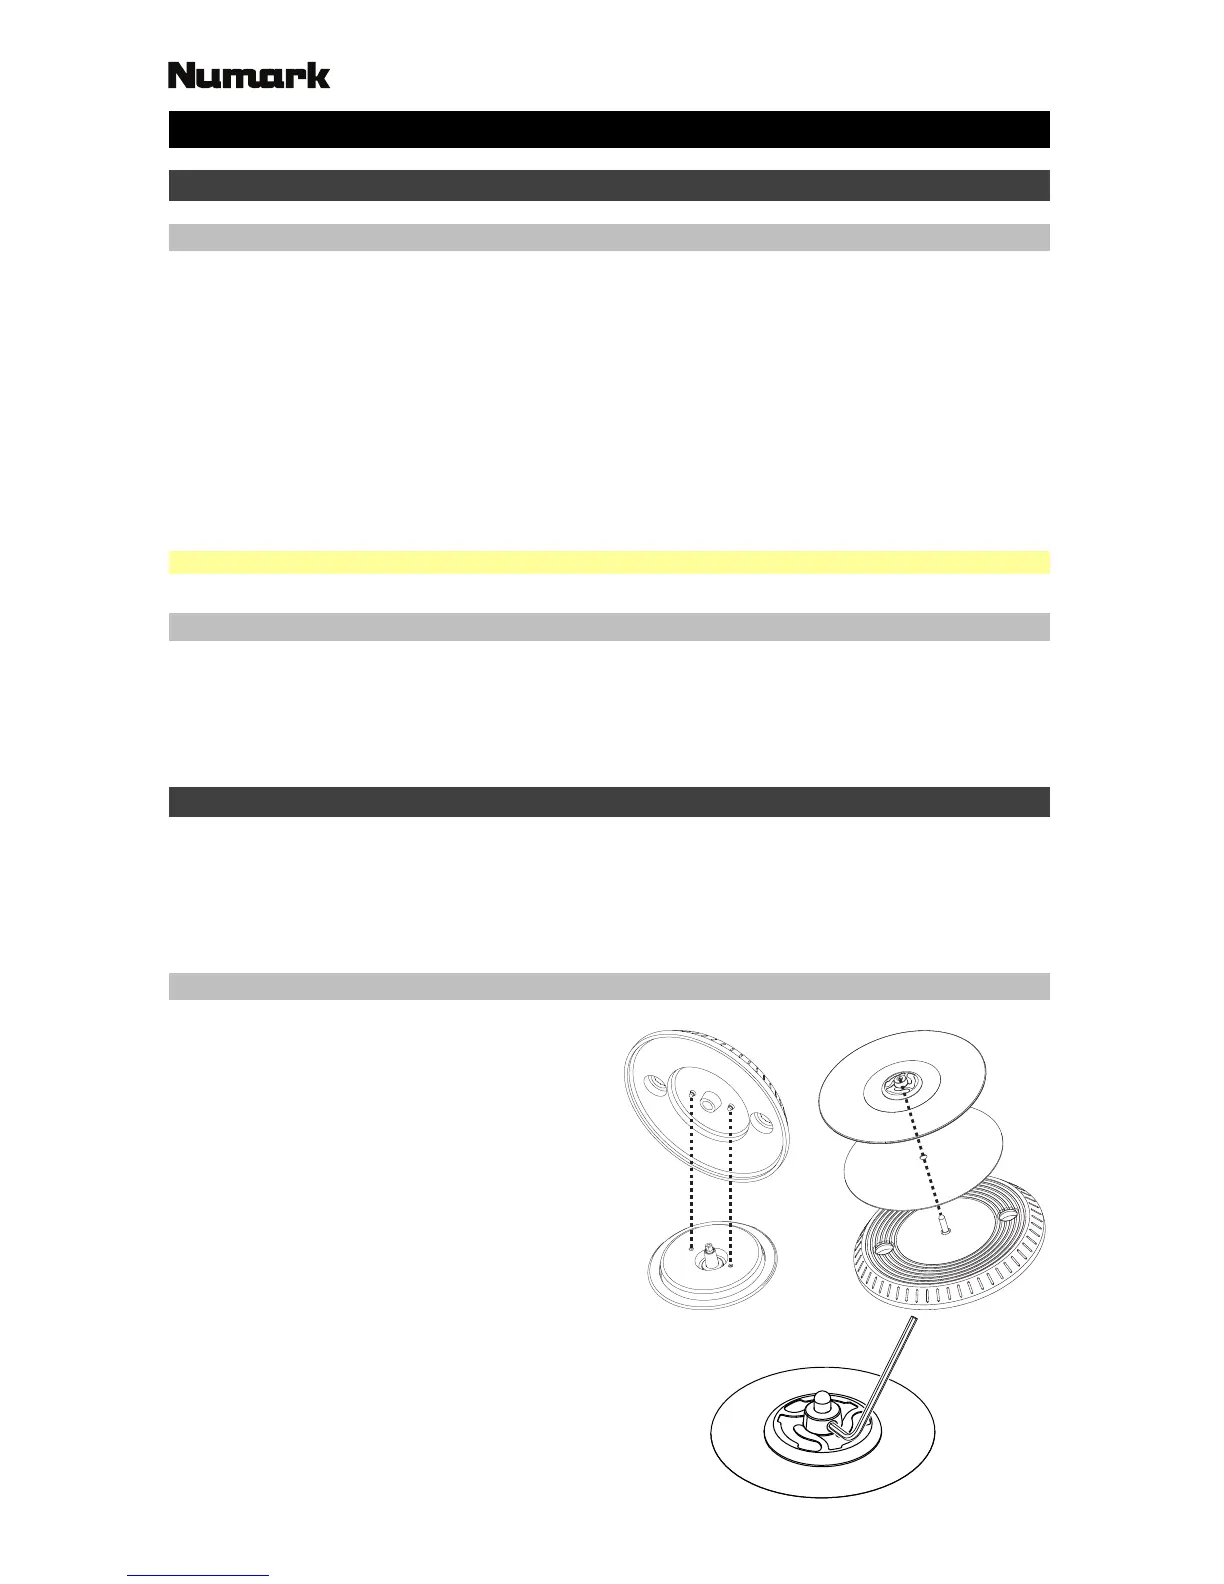
1. Assemble the Platters
1. Remove NS7 III from the packaging. Remove
the two platter assemblies from package
(underneath NS7 III). Place NS7 III on a flat,
stable surface for operation. Ensure unit has
adequate air flow to all ventilation ports
(especially if installed in a case).
2. Place the platter onto NS7 III by aligning the
pins in the bottom of the platter with the
holes in NS7 III’s motor.
3. Place the slipmat onto the platter, then place
the vinyl over the slipmat.
4. Line up the notch in the spindle with the
screw in the vinyl’s 45 RPM adapter. Use the
allen wrench (included) to tighten the screw,
locking the adapter to the spindle.
Step 2 Step 3
Step 4