3
2. Attach the Display Unit
1. With the screens facing up and slightly toward you, place the display unit over the two brackets
on the rear panel (which would typically hold a laptop computer stand). Make sure the two
brackets are securely inserted into the holes under the display unit.
2. Using the small display USB cable (included), connect the “NS7” USB port on the display unit to
the USB port on NS7 III’s rear panel.
3. Using the small display power cable (included), connect the display power input (DC In) to the
display power output (DC Out) on NS7 III’s rear panel.
3. Install the Drivers and Software
Drivers (Windows users only): Download and install the latest drivers from numark.com.
Software: Download and install the latest version of Serato DJ from serato.com.
4. Connect and Start DJing!
Follow this sequence of steps whenever you use NS7 III:
1. Make sure all devices are off and all faders and gain knobs are set to “zero.”
2. Connect input sources (microphones, turntables, CD players, etc.) to NS7 III.
3. Connect output devices (headphones, power amplifiers, sub-mixer, recorders, etc.) to NS7 III.
4. Plug all devices into power sources, and turn on devices in proper order:
• When starting a session, turn on (1) input sources, (2) NS7 III and display unit, (3) output devices.
• When ending a session, turn off (1) output devices, (2) NS7 III and display unit, (3) input sources.
5. Using a standard USB cable (included), connect the “To PC” USB port on NS7 III’s display unit
to your computer.
6. Open Serato DJ and go! For more information on how to use Serato DJ with NS7 III, visit
serato.com/dj/support and select Numark NS7 III.
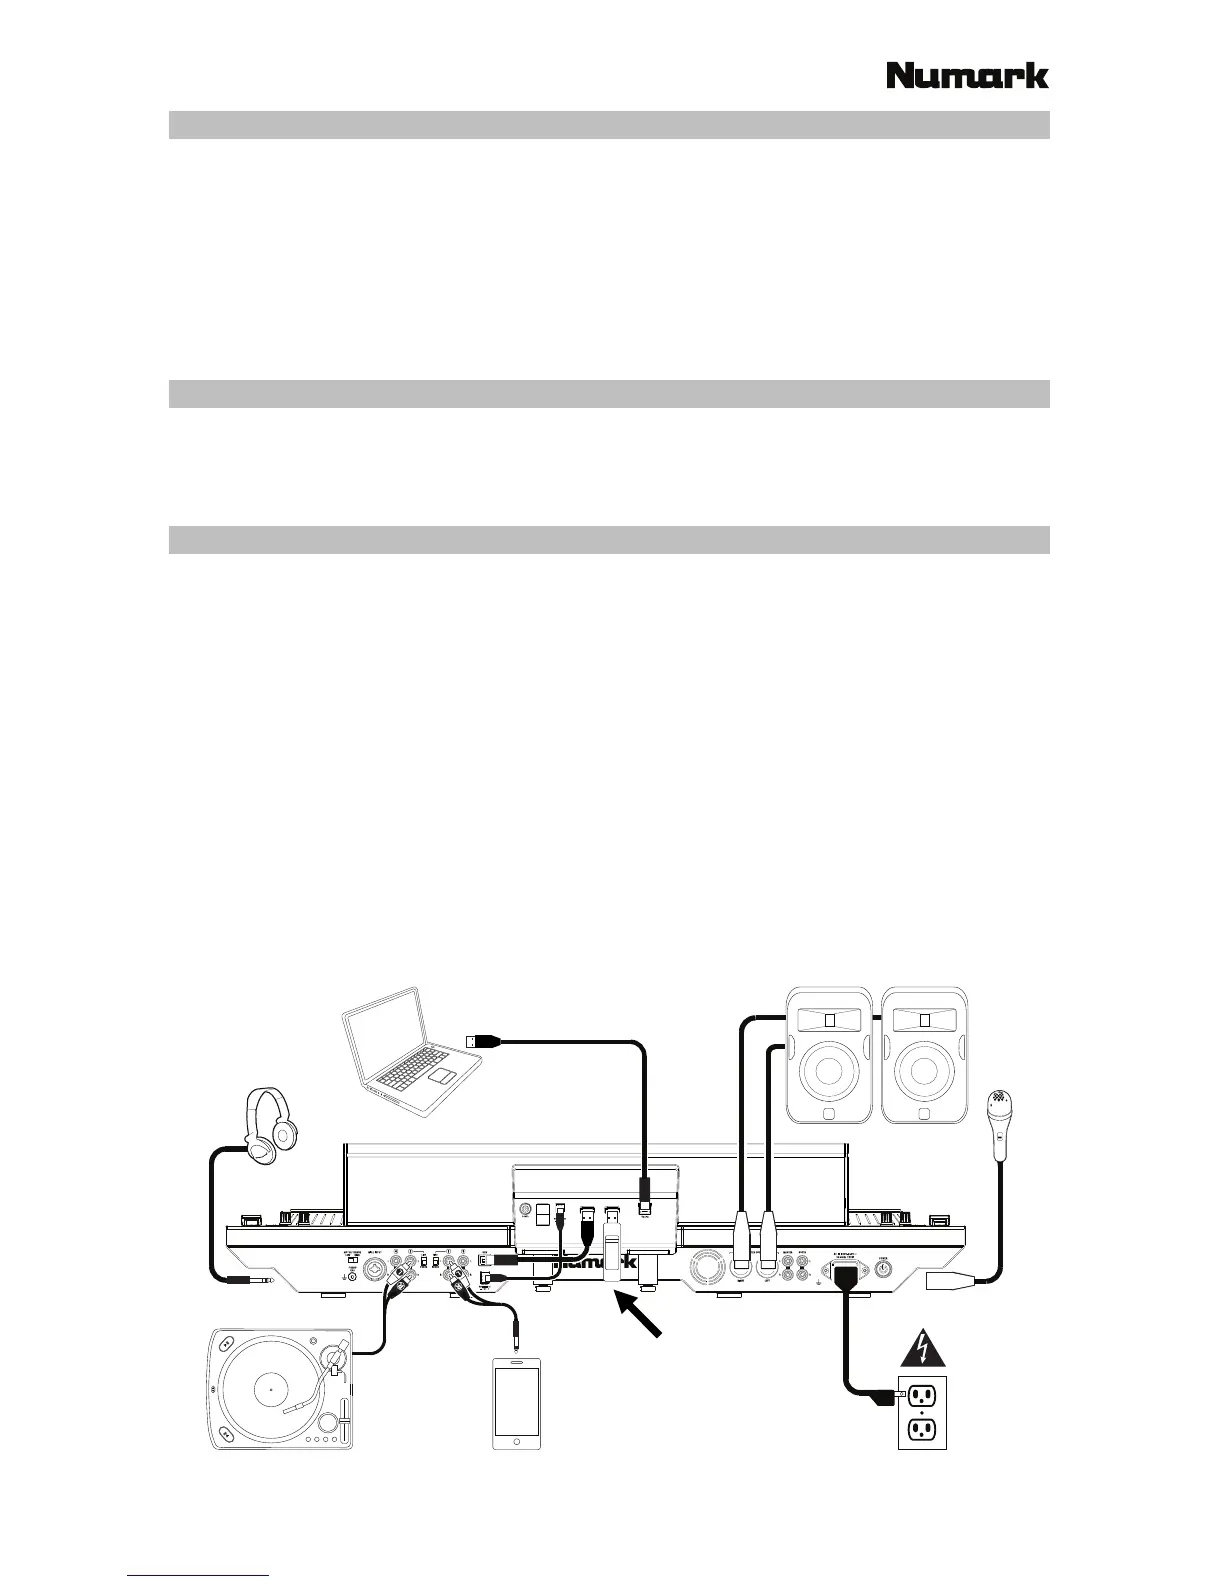
Connection Diagram (example):
00.0%
Any items shown here but not mentioned in Introduction > Box Contents are sold separately.
Computer
Headphones
(on front panel)
Turntable
Smartphone,
tablet, etc.
Power
Loudspeakers
Microphone
(on front panel)
USB thumb drive