8
Effects Controls
51. FX 1, FX 2, FX 3: These buttons have different functions on each Deck depending on the current
FX Mode. See the User Guide for more information.
52. FX 1 Knob, FX 2 Knob, FX 3 Knob: These knobs have different functions on each Deck
depending on the current FX Mode. See the User Guide for more information.
53. Beat / Mode: Tap this button repeatedly at the desired tempo to set the rate of the effects’ low-
frequency oscillators (LFOs). Press and hold this button to reset Beat Multiplier to the Deck’s
BPM. Press and hold Shift and then press this button to switch between Single-FX Mode and
Multi-FX Mode.
54. Beat Knob: Turn this knob to set the Time Division for the selected effects.
55. FX Assign: Use these buttons to apply Effect A and/or B to the corresponding channel. You can
apply Effect A and/or B to the entire Program Mix by using the FX Send buttons below the
Master Volume knob. (Each effect can be applied to any or all of the four channels and/or the
Program Mix.)
56. Channel Filter: Turn this knob to adjust the filter on the corresponding channel. The type of filter
it adjusts will depend on the Filter Mode button.
57. Filter Mode: Press this button to change the Filter Mode (off, Filter Roll Mode, or Filter FX
Mode), which affects the Channel Filter knobs. See the User Guide for more information.
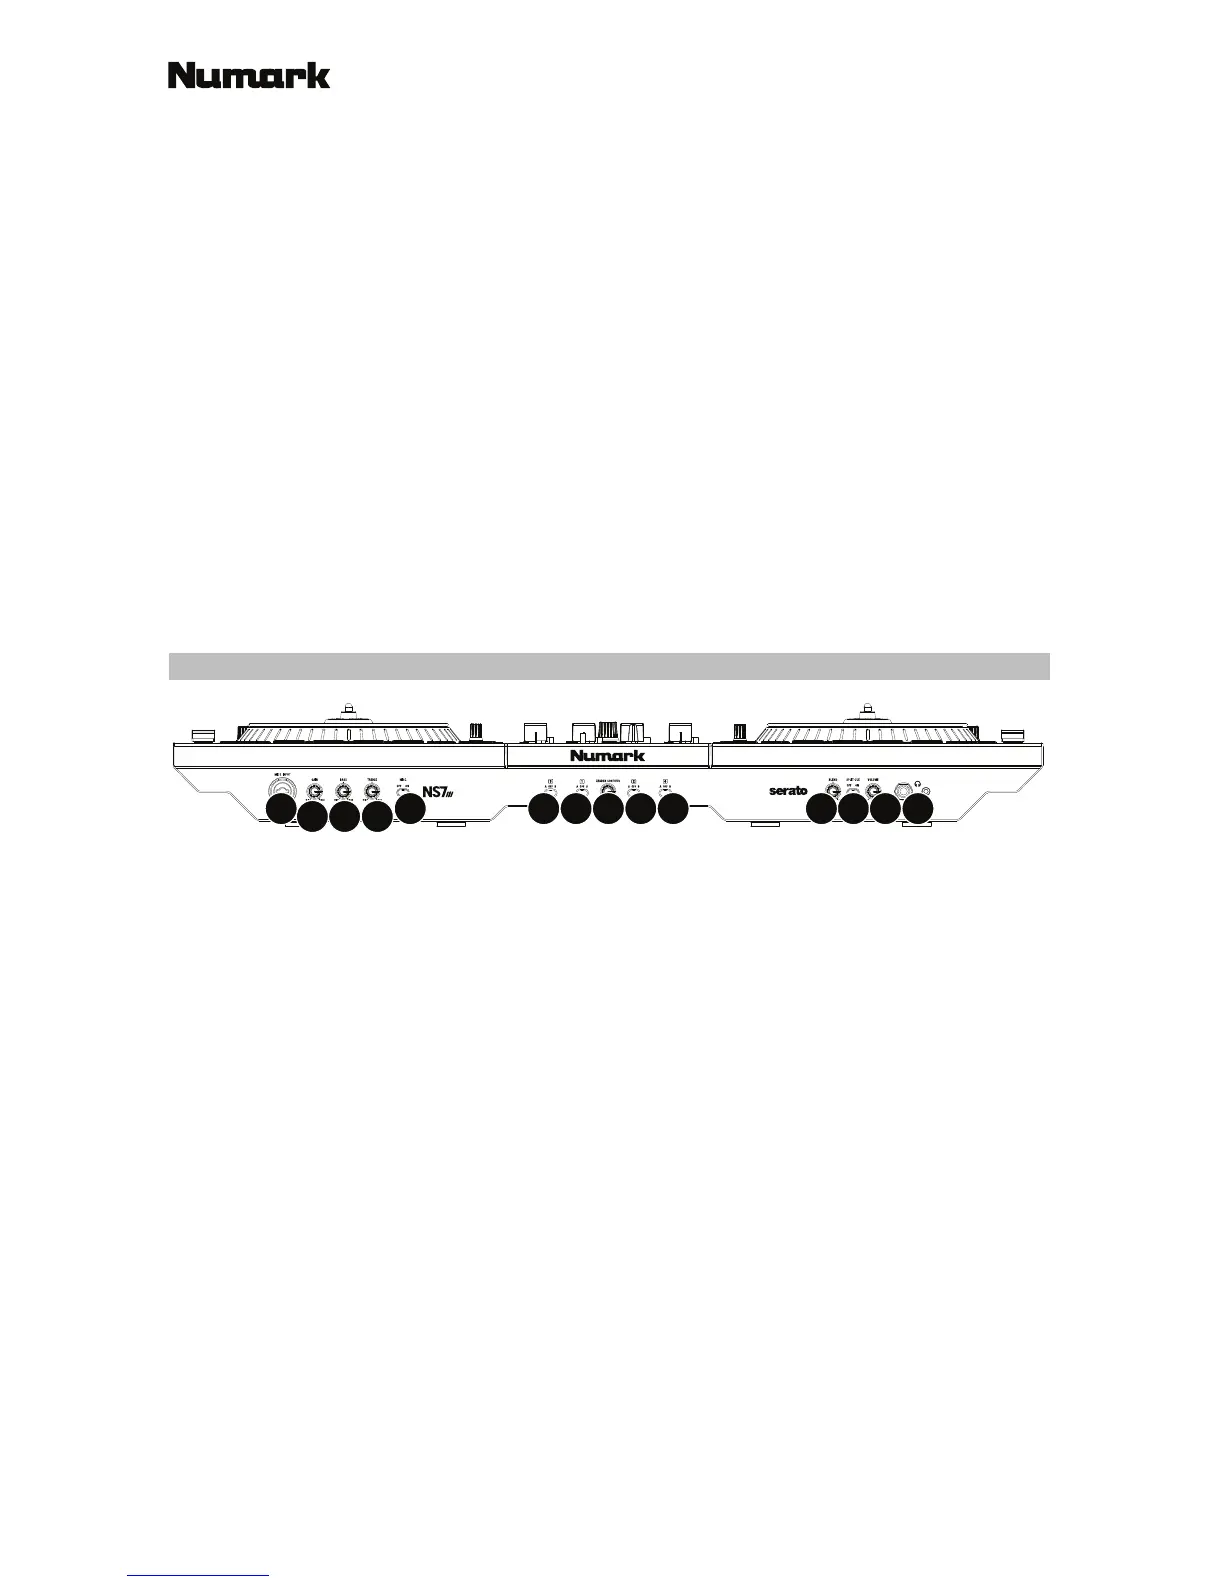
Front Panel
12345555
7
8
9
6
10 11
1. Headphones (1/4”, 1/8”) (6.35 mm, 3.5 mm): Connect your 1/4” or 1/8” (6.35 mm or 3.5 mm)
headphones to this output for cueing and mix monitoring.
2. Headphone Volume: Adjusts the volume level of the headphone output.
3. Split Cue: When this switch is in the on position, the headphone audio will be “split” such that
all channels sent to Cue are mixed to mono and applied to the left headphone channel and the
Program mix is mixed to mono and applied to the right channel. When the switch is in the off
position, Cue and Program audio will be “blended” together.
4. Cue Blend: Turn to mix between Cue and Program in the Headphone channel. When all the way
to the left, only channels routed to Cue will be heard. When all the way to the right, only the
Program mix will be heard.
5. Crossfader Assign: Routes the audio playing on the corresponding channel to either side of the
crossfader (A or B), or bypasses the crossfader and sends the audio directly to the Program Mix
(center, Off).
6. Crossfader Slope: Adjusts the slope of the crossfader curve. Turn the knob to the left for a
smooth fade (mixing) or to the right for a sharp cut (scratching). The center position is a typical
setting for club performances.
7. Mic 1 Input (1/4” / 6.35 mm): Connect a 1/4” (6.35 mm) microphone to this input. This input’s
audio signal is routed directly to the Program Mix and Cue Mix.
8. Mic 1 On/Off: When set to on, the Mic 1 Input is active, and its audio signal is routed directly to
the Program Mix and Cue Mix. When set to off, the Mic 1 Input is disabled.
9. Mic Gain: Adjusts the gain of the microphone channel.
10. Mic Bass: Adjusts the low (bass) frequencies of the audio signal coming from the microphone input.
11. Mic Treble: Adjusts the high (treble) frequencies of the audio signal coming from the microphone
input.