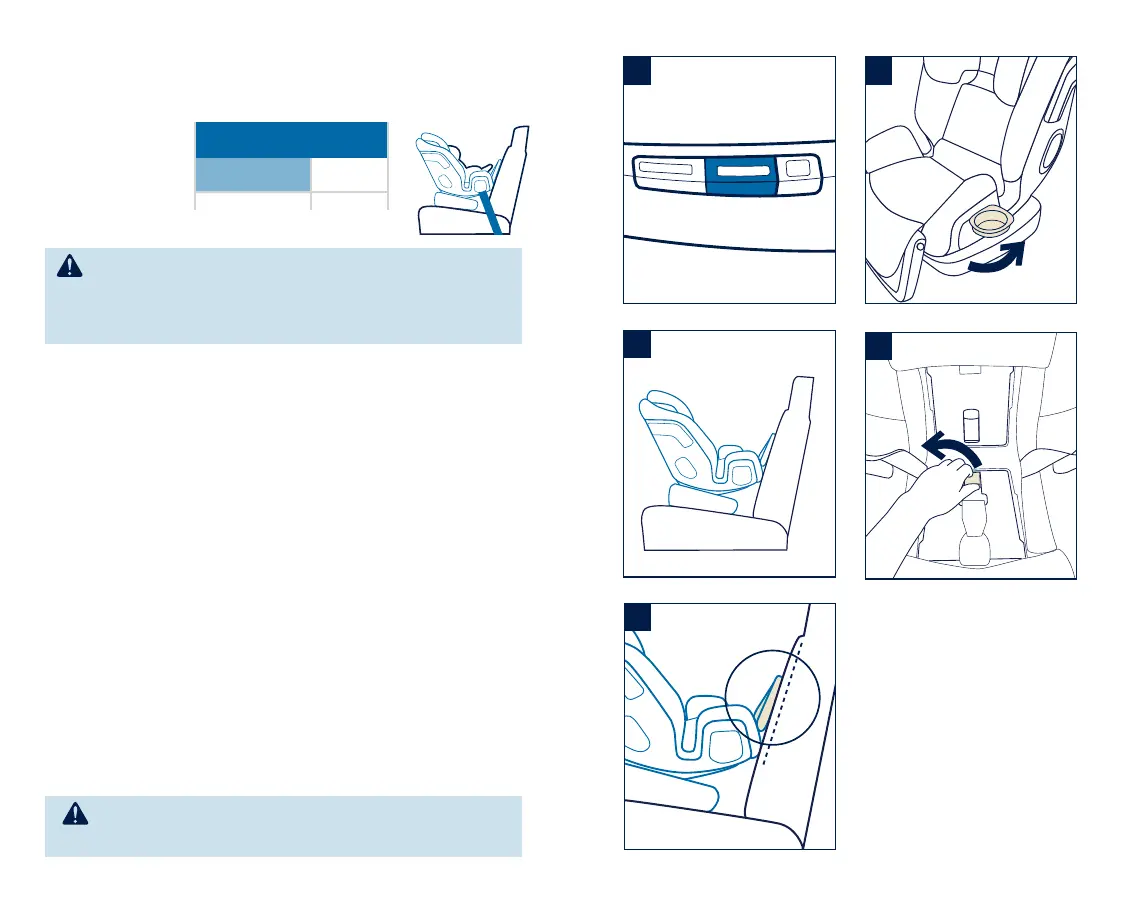
Rear Facing Installation
recommended until at least 2 years old (5–50 lb)
5
(2.3 kg)
35
(15.8 kg)
50
(22.6 kg)
Rear Facing
with vehicle belt
with lower anchor belt
Rear Facing Setup
Store tether strap under tether strap cover.
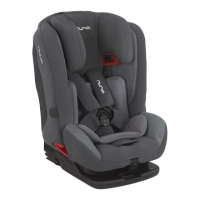
1 - Select rear facing recline position 1–4 (BLUE) (p.30).
2 - Place child restraint rear facing in a compatible
vehicle seat (p.12).
3 - Move leg rest to required installation position
(p.32). The leg rest MUST be used in rear facing
mode. The angle of the leg rest should match
the angle of the vehicle seat back.
In Lap Belt Only installation (p.48), the leg rest
CANNOT be extended.
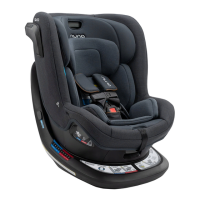
4 - Raise cup holders to access rear facing belt path.
Loosen and unbuckle harness and retain with
magnetic buckle tongue holders (p.22). Remove
infant insert and lift lower seat cover.
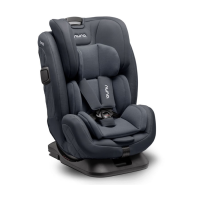
5 - Open rear facing True Tension
™
door (p.34).
Complete installation using your vehicle’s lap/
shoulder belt (p.44), the lower anchor belt
(p.46), or a compatible vehicle lap belt (p.48).
4
3 2
1
1
2
3
4
1
2
ALWAYS use the shoulder, hip, and crotch pads
in rear facing mode. Use infant insert with infants
5–11 lb (2.3–5 kg) to improve the recline angle for
smaller infants.
WARNING: DO NOT install with both the
vehicle seat belt and lower anchor belt.
42 EXEC
™
instructions 43EXEC
™
instructions
3
4
5