EasyManua.ls Logo

Nuna PIPA LITE R User Manual

Nuna PIPA LITE R
33 pages
To Next Page IconTo Next Page
Page #1 background imageLoading...
Page #1 background image
NUNA PIPA LITE R
Type: Rear-facing-only; must be used
with base in vehicle.
Last date made: Current
First made: 2020
Weight limits: 4 to 32 lbs.
Harness: 5 point harness
Harness: Shoulder straps are attached to a splitter plate behind seat. Pull
strap end in front of seat to tighten harness. Push button at lower front of
seat and pull on shoulder straps to loosen.
Harness slots: There are three sets of slots. To change shoulder strap slot
height, remove straps from splitter plate on back and rethread through
desired slots, then reattach to splitter plate. Harness straps must be
between child restraint and attachment bar (diagram 1).
Crotch strap: Adjustable. There are two slots; length is also adjustable.
Crotch strap is sewn to a metal anchor which must lie flat against
underside of seat. Use position closest to, but not under, child. To change
position, turn metal anchor sideways, feed through slot, and insert into
desired slot. To shorten length for smaller child, feed metal anchor down
through inner slot and up through outer slot (diagram 2).
Angle adjustment: Recline adjustment button and indicator are
located on both sides of the base (diagram 3). To adjust, push button
all the way down and slide installed carrier or top of base into desired
position. Use positions 1 or 2 for child weighing 4 to 20 lbs. and
positions 3 or 4 for child weighing 21 to 32 lbs. Recline button must
pop back up to indicate recline is locked.
Belt path: If lower connectors are not in use, leave connectors
rotated in place on side of base (diagram 4). Do not install restraint
using inflatable safety belt.
SEE PAGE 2
Important: This information sheet is not a substitute for complete manufacturers directions and current recall list.
SafetyBeltSafe U.S.A., P.O. Box 553, Altadena CA 91003 (310) 318-5111 (800)745-SAFE ©SafetyBeltSafe U.S.A. #450 06/21
P. 1 of 3
2
1
3
4
Question and Answer IconNeed help?

Do you have a question about the Nuna PIPA LITE R and is the answer not in the manual?

Nuna PIPA LITE R Specifications

General IconGeneral
Weight Capacity4 to 32 lbs
Height CapacityUp to 32 inches
Harness5-point harness
MaterialAerospace aluminum
Safety FeaturesSide impact protection
Car Seat Base IncludedNo
Recline PositionsMultiple
CompatibilityCompatible with strollers

Summary

Harness System

Base Installation Features

LATCH System Installation

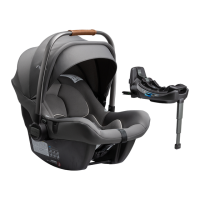
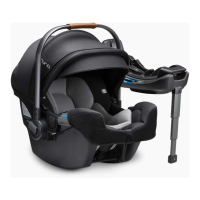
Details how to install the base using LATCH connectors.

LATCH and Handle Operation

LATCH System Continuation

Continues installation details for the LATCH system.

Usage Requirements and Warnings

Child Usage Requirements

Specifies weight and height limits for child use.

General Safety Warnings

Critical safety advice for users and children.

Specific Hazard Warnings

Strangulation Hazard

Warning about harness strap entanglement risks.

Suffocation Hazard

Warning about using soft surfaces for the infant carrier.

Fall Hazard

Warning about placing carrier on elevated surfaces.

Crash Safety Guidelines

Car Seat Replacement After Crash

Guidance on replacing seats after moderate or severe impacts.

Vehicle Compatibility

Vehicle Belt Installation Details

Incompatible Vehicle Belts

Lists belts that cannot be used for installation.

PIPA™ lite r Parts List

PIPA RELX™ Base Parts List

Head and Body Support

Harness Adjustment

Harness Tightening Procedure

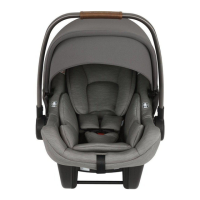
How to ensure a snug harness fit for the child.

Harness Height Adjustment

Steps to change shoulder strap height positions.

Harness and Handle Adjustments

Securing Child in Restraint

Buckling Harness Straps

Steps to secure the child with the harness buckles.

Child Security Checks

Harness Tightening Verification

Ensuring the harness is snug and flat.

Chest Clip Positioning

Correct placement of the chest clip at armpit level.

Final Security Checklist

Summary of checks for proper child restraint securement.

Stability Leg Operation

Extending Stability Leg

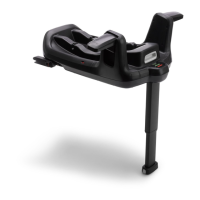
Adjusting leg for proper floor contact and indicator.

PIPA RELX™ Base Installation (Rigid Latch)

Connecting Latch Anchors

Attaching the base to vehicle anchor bars.

PIPA RELX™ Base Installation (Rigid Latch) - Continued

Checking Latch Connection Security

Verifying secure attachment of LATCH connectors.

PIPA RELX™ Base Installation (Vehicle Belt)

Routing Vehicle Belts

Instructions for routing lap and shoulder belts.

Attaching Restraint and Recline Adjustment

Recline, Release, and Uninstall Procedures

Related product manuals