Using Lower Anchor Belt
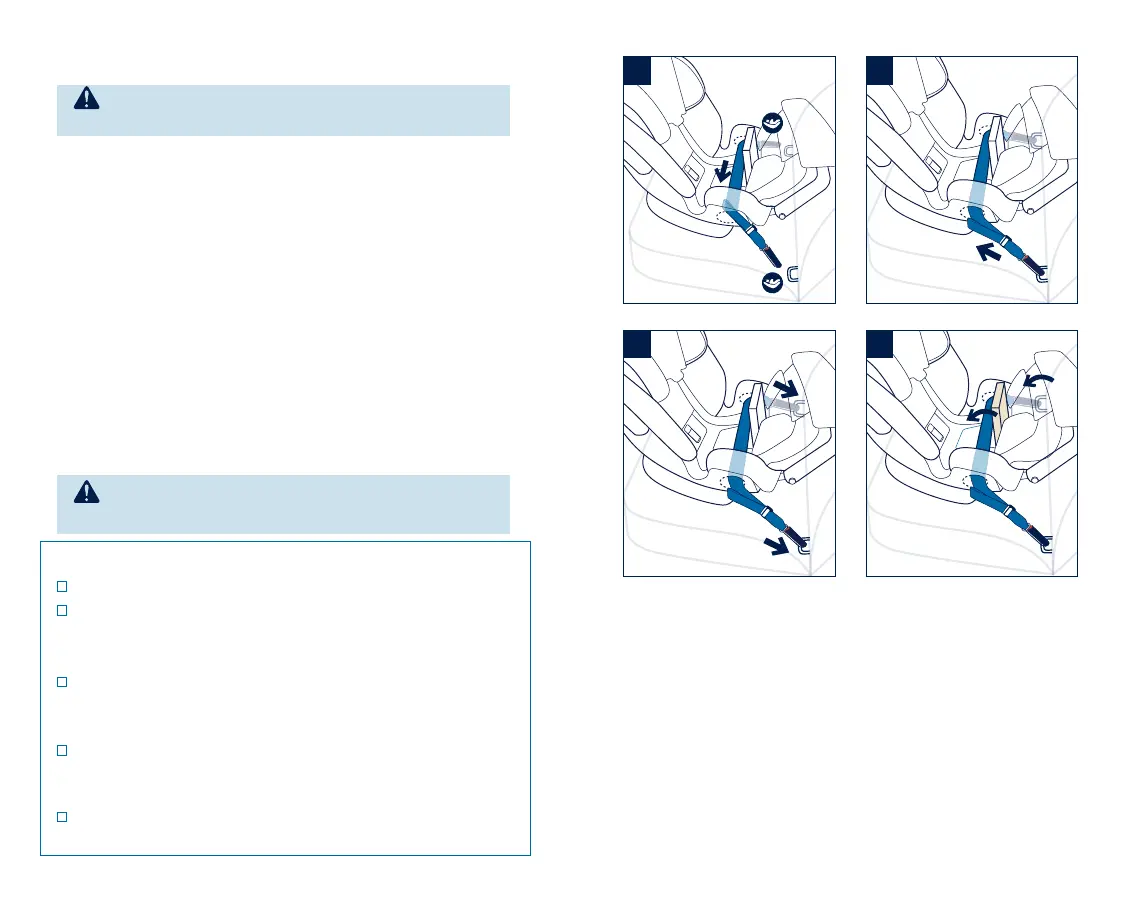
1
- Remove lower anchor belt from storage
compartment (p.36) and route through BLUE
rear facing belt path under cup holder. Belt
MUST be routed under True Tension
™
door.
2 - Lengthen lower anchor belt as necessary and
attach to lower anchor points in vehicle.
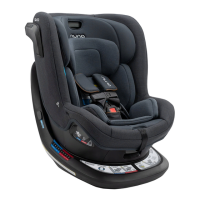
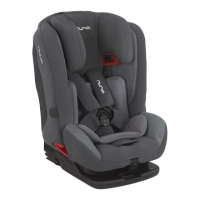
3 - Remove all slack from lower anchor belt by
pulling loop at end of belt.
4 - Close True Tension
™
door and replace seat cover
and infant insert (if used).
To open True Tension
™
door, release lower anchors
and lift door release button. If needed, slightly push
child restraint against vehicle seat to relieve tension
on lower anchor belt before releasing lower anchors.
Check Installation
Seat is in rear facing recline position.
Leg rest is locked and making contact with the
vehicle seat, positioned at the same angle as the
vehicle seat back.
Seat is securely installed. Hold seat near rear-
facing belt path and move seat in all directions.
Seat should move less than 1 inch.
Tether strap is not used for rear facing installation
and must be secured in storage location on back
of child restraint.
Cup holders may be placed in any position after
installation.
WARNING: Do not install by this method for
a child weighing more than 35 lb (15.8 kg).
WARNING: Check that child restraint is
securely installed before each use.
46
EXEC
™
instructions
1
2
3
4
47
EXEC
™
instructions