51
• Insert the key in the lock.
•Turn the Front panel opening key counter-
clockwise.
• Open the Front panel.
Fig. 42
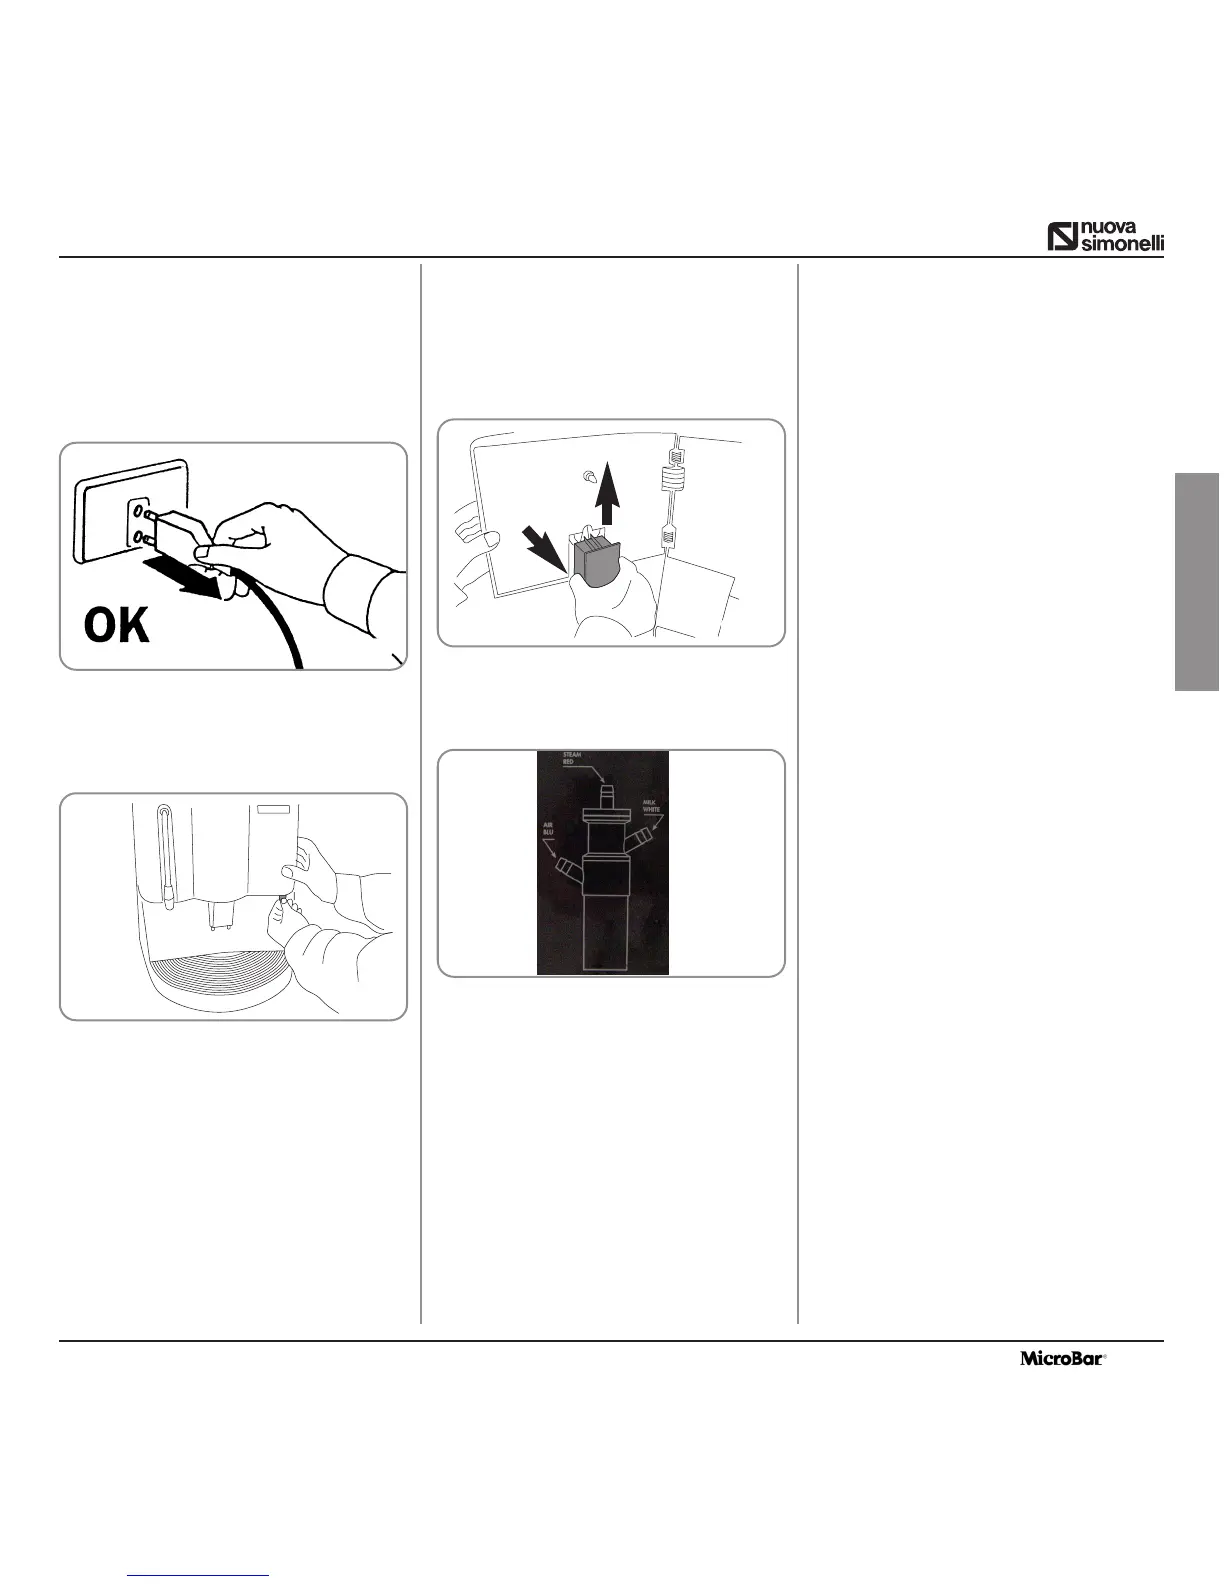
IMPORTANT: Proceed with caution
• Extract the whole delivery unit including the
milk foamer, pulling it towards you.
• Extract the milk foamer from the delivery
group by sliding it upwards.
• Disconnect all the tubes attached to it.
• Disassemble the milk foamer and wash it
carefully.
Fig. 44
Fig. 43
1
2
NOTE:If the pause between one cappuccino
and another is over one hour long, it is
advisable to wash the milk foamer by fis-
hing the milk suction tube in hot water
rather than in milk.
•To reassemble proceed inversely, attaching
the milk foamer tubes properly.
NOTE:Follow the instructions applied on the
label on the inside of the front door too.
• Set the machine to the “O” energy level.
Fig. 41
9.11 CLEANING THE MILK
FOAMER
NOTE:To make the reassembling procedure
easier, an explanatory label has been
attached to the front door.
• Clean the drop collector (see paragraph
THE DROP COLLECTING TRAY GRID)
ENGLISH