Page 11 of 22
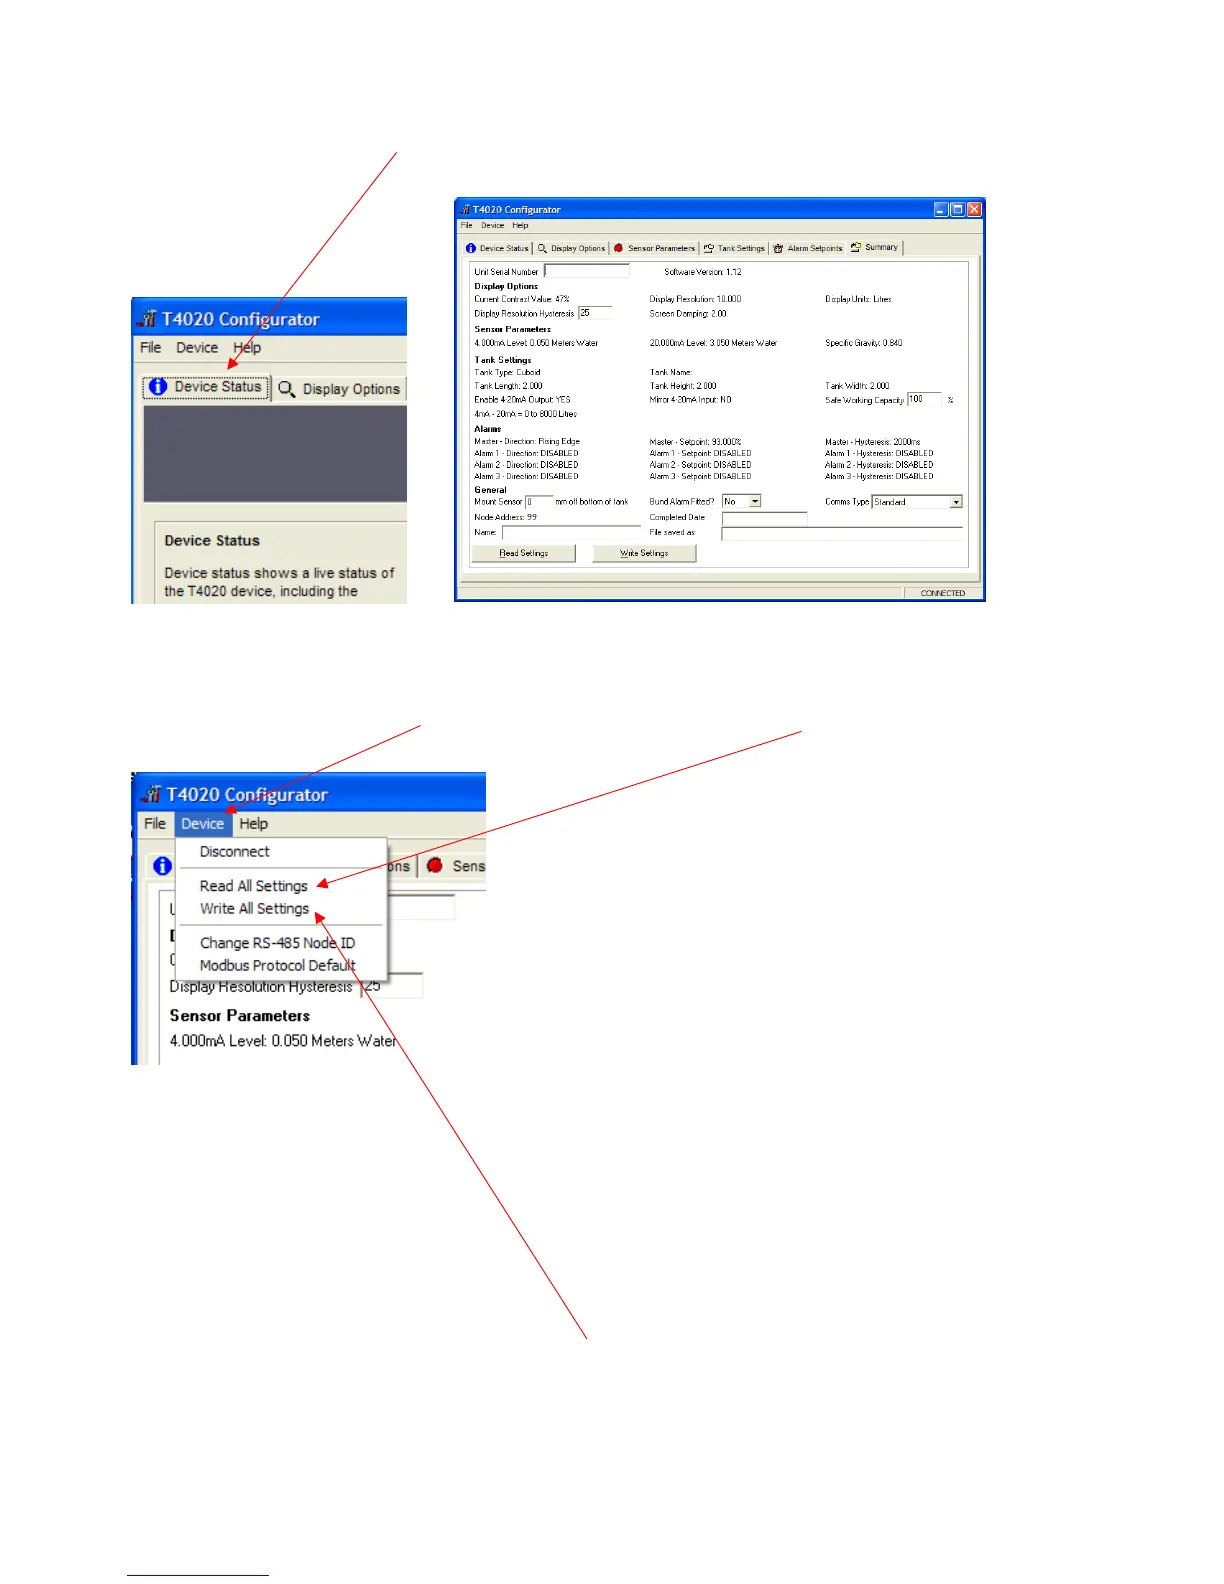
Next step is to Access the T5020 additional settings and Summary Screen, press the Ctrl, and letter H keys
simultaneously, and click on Device Status Tab.
This will bring up the summary screen of what has been programmed into the unit as shown above
The Summary page. Click on the Device tab at the top of the screen and click Read All settings. This will
display all the settings that has been programmed. Next stage is to enter the final information on this screen.
Unit Serial Number: This is the serial number on the label of the front of the unit.
Safe Working Capacity: If the unit is a T5020, the Safe Working Capacity can be set to say 97%. In this case
the Alarms are based on the Safe Working Capacity value, so 10,000 litre tank has SWC of 9,700 litres. An
Alarm set at 95% will be 95% of 9,700 litres, not of 10,000.
Mount Sensor: 50 mm off the bottom of the tank.
Bund Alarm: If fitted, click YES, if not, Click NO.
Comms Type: Generally, set to Standard.
Name, Who, setup the unit, Date when setup and a File Saved as Name. XXXXXXXX.tls
Click the File tab at the top of the screen and then “Save As”. When this screen is complete, click the Device
tab at the top of the screen again and then Write All Settings.
ONLY READ AND WRITE SETTING FROM THE DEVICE TAB AT THE TOP OF THE PAGE.
If you have selected ‘Non-Standard’ as the tank type and put in a strapping table, you may have to “Write All
Settings” Twice. Click on Disconnect. Remove the programming lead. This completes the calibration.
Result, you should have a fully calibrated working Gauge, with 4-20 mA proportional to Litres, and either a
Standard or Modbus RS485 output.