147
Transmitter Battery Installation (continued) -
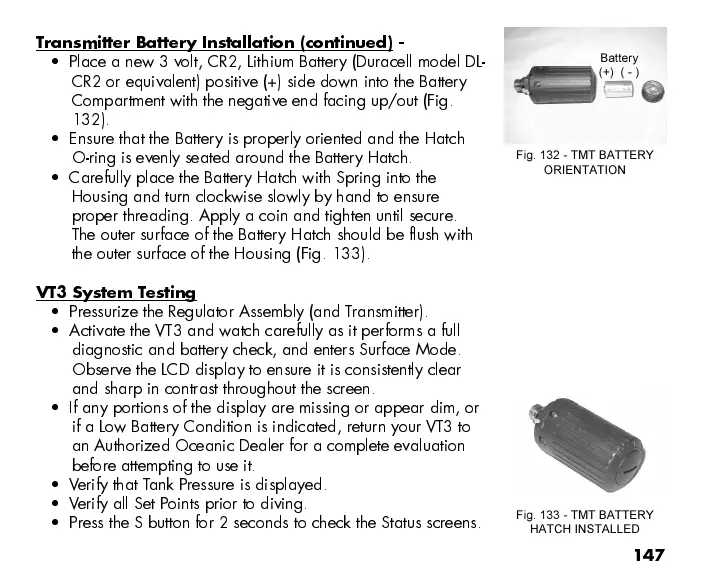
Place a new 3 volt, CR2, Lithium Battery (Duracell model DL-
CR2 or equivalent) positive (+) side down into the Battery
Compartment with the negative end facing up/out (Fig.
132).
Ensure that the Battery is properly oriented and the Hatch
O-ring is evenly seated around the Battery Hatch.
Carefully place the Battery Hatch with Spring into the
Housing and turn clockwise slowly by hand to ensure
proper threading. Apply a coin and tighten until secure.
The outer surface of the Battery Hatch should be flush with
the outer surface of the Housing (Fig. 133).
VT3 System Testing
Pressurize the Regulator Assembly (and T ransmitter).
Activate the VT3 and watch carefully as it performs a full
diagnostic and battery check, and enters Surface Mode.
Observe the LCD display to ensure it is consistently clear
and sharp in contrast throughout the screen.
If any portions of the display are missing or appear dim, or
if a Low Battery Condition is indicated, return your VT3 to
an Authorized Oceanic Dealer for a complete evaluation
before attempting to use it.
Verify that Tank Pressure is displayed.
Verify all Set Points prior to diving.
Press the S button for 2 seconds to check the Status screens.
Fig. 132 - TMT BATTERY
ORIENTATION
Battery
(+) ( - )
Fig. 133 - TMT BATTERY
HATCH INSTALLED