EasyManua.ls Logo

Oki B840 - User Manual

Oki B840
11 pages
Print Icon
To Next Page IconTo Next Page
Loading...
How to remove
Jammed Paper
Rev.1
B840/ES8140
Question and Answer IconNeed help?

Do you have a question about the Oki B840 and is the answer not in the manual?

Summary

Paper Jams

Error Codes and Location

Clearing Jams in Multi Purpose Tray (Codes 372, 380, 390, 391, 400)

Steps to clear paper jams from the Multi Purpose Tray for specific error codes.

Clearing Jams Near Printer Exit (Code 382)

Procedure to remove paper jams located near the printer's output exit.

Clearing Internal Printer Jams (Codes 381, 382, 383, 385, 389)

Instructions for clearing paper jams from inside the printer for various error codes.

Clearing Duplex Unit Jams (Codes 370, 371, 373)

Guide to removing paper jams from the duplex unit.

Clearing Tray 2;3 Jams (Codes 392, 393)

Steps to clear paper jams from paper trays 2 and 3.

Turning Off the Printer

Printing a Menu Map

Overview

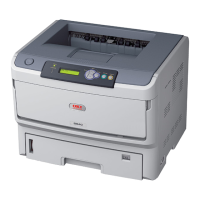
This document provides instructions for removing jammed paper from the OKI B840/ES8140 printer. It serves as a guide for users to quickly and simply clear paper jams and restore normal printer operations.

Function Description:

The OKI B840/ES8140 is a printer designed for various printing tasks. Like many printers, it can occasionally experience paper jams due to misfeeding from a paper tray or at any point along the paper path. When a jam occurs, the printer immediately stops, and an Alert LED on the Status Panel illuminates, displaying an error code to indicate the location of the jam. This manual details the steps to address these jams based on the specific error code displayed.

Important Technical Specifications (Inferred from the document):

  • Printer Model: B840/ES8140
  • Error Reporting: The printer features a Status Panel with an Alert LED and a display that shows specific error codes (e.g., 370, 371, 372, 373, 380, 381, 382, 383, 385, 389, 390, 391, 392, 393, 400) to pinpoint the jam location.
  • Paper Handling: The printer supports multiple paper trays, including a Multi Purpose Tray, Tray 2, and Tray 3, as well as a Duplex Unit for double-sided printing.
  • Internal Components: Key internal components involved in paper handling and jam clearing include the Multi Purpose Tray, Duplex Unit, Inside Printer (including fuser unit, image drum, toner cartridge, and transfer roller), and Paper Exit.
  • Safety Features: The printer includes warnings regarding hot fuser components and static-sensitive devices, emphasizing the importance of careful handling during maintenance. It also advises against disassembling the printer due to potential hazards like smoke emission and electric shock.

Usage Features:

  • Error Code Display: The printer's control panel displays specific error codes, allowing users to identify the general area of a paper jam.
  • Interactive Panel: The control panel includes buttons like MENU, BACK, ENTER, ON LINE, and CANCEL, used for navigation and confirming actions, such as shutting down the printer or printing a menu map.
  • Manual Jam Clearing: The printer is designed for user-friendly manual jam clearing, with clearly indicated release levers, handles, and dials (often blue) to facilitate access to jammed paper.
  • Automatic Ejection (in some cases): For certain error codes (e.g., 400), jammed paper may be ejected automatically, or the error message can be cleared by simply opening and closing the front cover.
  • Menu Map Printing: Users can print a "Menu Map" from the printer's information menu to check printer option installation, menu settings, and consumable usage, which can be useful after clearing a jam or for general troubleshooting.

Maintenance Features:

  • Step-by-step Jam Removal: The manual provides detailed, illustrated, step-by-step instructions for clearing jams from various locations:
    • Multi Purpose Tray (Error Codes 372, 380, 390, 391 & 400): Involves opening the tray, pushing a blue handle, opening the front cover, turning a blue dial, and carefully pulling out jammed paper.
    • Paper Exit (Error Code 382): Requires pressing a release button to open the top cover and slowly pulling out jammed paper from the exit. Users are warned against forcibly pulling paper towards the back to avoid fuser unit damage.
    • Inside Printer (Error Codes 381, 382, 383, 385 & 389): This more involved process includes opening the top cover, touching a screw to remove static electricity, removing the image drum and toner cartridge, covering the toner cartridge, and carefully pulling out jammed paper from various internal points, including the fuser unit and transfer roller. It also details how to release the fuser unit levers and remove the transfer roller.
    • Duplex Unit (Error Codes 370, 371 & 373): Involves pinching and lifting a jam release lever, pulling out jammed paper, and potentially removing the duplex unit and cassette cover.
    • Paper Tray 2/Tray 3 (Error Codes 392 & 393): Requires pulling out the paper cassette tray, removing jammed paper, opening the Multi Purpose Tray, pushing a blue handle, opening the front cover, turning a blue dial, and slowly pulling out jammed paper.
  • Post-Jam Procedures: After clearing jams, especially from the fuser unit, users are advised to print a Menu Map or blank pages repeatedly to use up any unfused toner.
  • Component Handling Warnings: The manual includes critical warnings about handling delicate components:
    • Fuser Unit: Emphasizes that the fuser can be very hot if the printer has been recently powered on. Users should handle it with extreme care, holding it only by its designated handle, and wait at least 10 minutes for it to cool if in doubt.
    • Image Drum: The green surface of the image drum is delicate and light-sensitive. Users are warned not to touch it or expose it to normal room light for more than 5 minutes. If it needs to be out of the printer longer, it should be wrapped in a black plastic bag and never exposed to direct sunlight or very bright room lighting.
    • Static Sensitive Devices: A caution advises handling static-sensitive devices with care.
  • Printer Shutdown Procedure: A specific procedure for turning off the printer is provided, involving holding the BACK button, pressing ENTER to initiate shutdown, and then pressing the OFF (O) side of the power switch. This is crucial to prevent damage to the printer.
  • Cleaning: Users are instructed to wipe off any toner clinging to the transparent film under the image drum with soft tissue paper.

Oki B840 Specifications

General IconGeneral
BrandOki
ModelB840
CategoryAll in One Printer
LanguageEnglish

Related product manuals