Remove the remaining ducts (Magenta – Cyan – Black, in that order).
NOTE: There are only 5 screws in each of the remaining ducts – the left rear screw is not present
on these ducts!
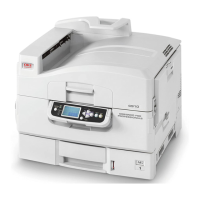
With the ducts removed, you will see the
duct support tray. There are 5 screws that
will be removed.
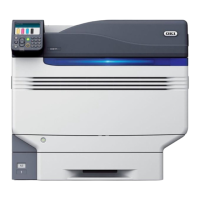
NOTE: Screw in left front corner is also
grounding for the Op Panel cables, as
This screw goes through the ground /
locking collar for one of the Op Panel
Cables. Do Not Forget to reattach this
collar during reassembly.
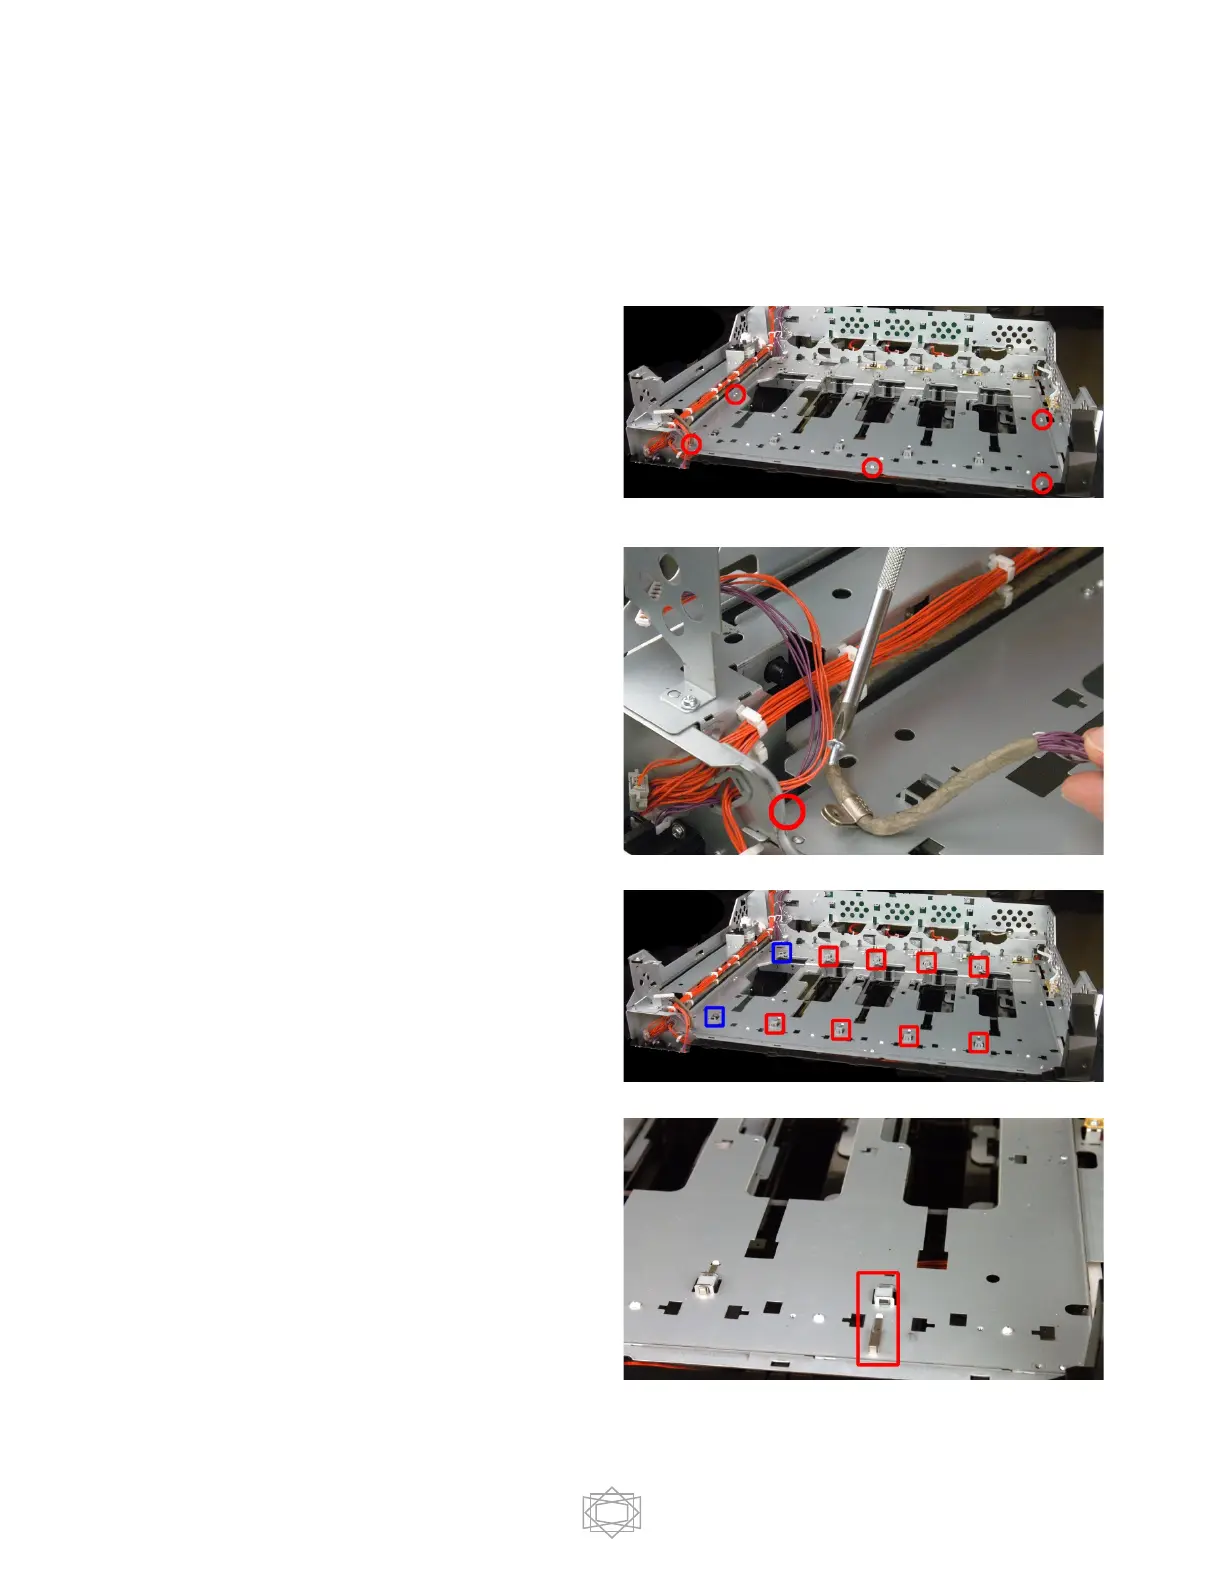
There are 10 (C941 Only) or 8 duct support
tray clips that are removed by sliding them
out. The C911 and C931 clips are outlined
in red while the C941 additional 2 clips are
outlined in blue.
To remove the clips, slide them towards
the front of the printer.
NOTE: Do Not Lose these clips – they
secure the LED Mounting brackets and are
critical!

 Loading...