35 - English
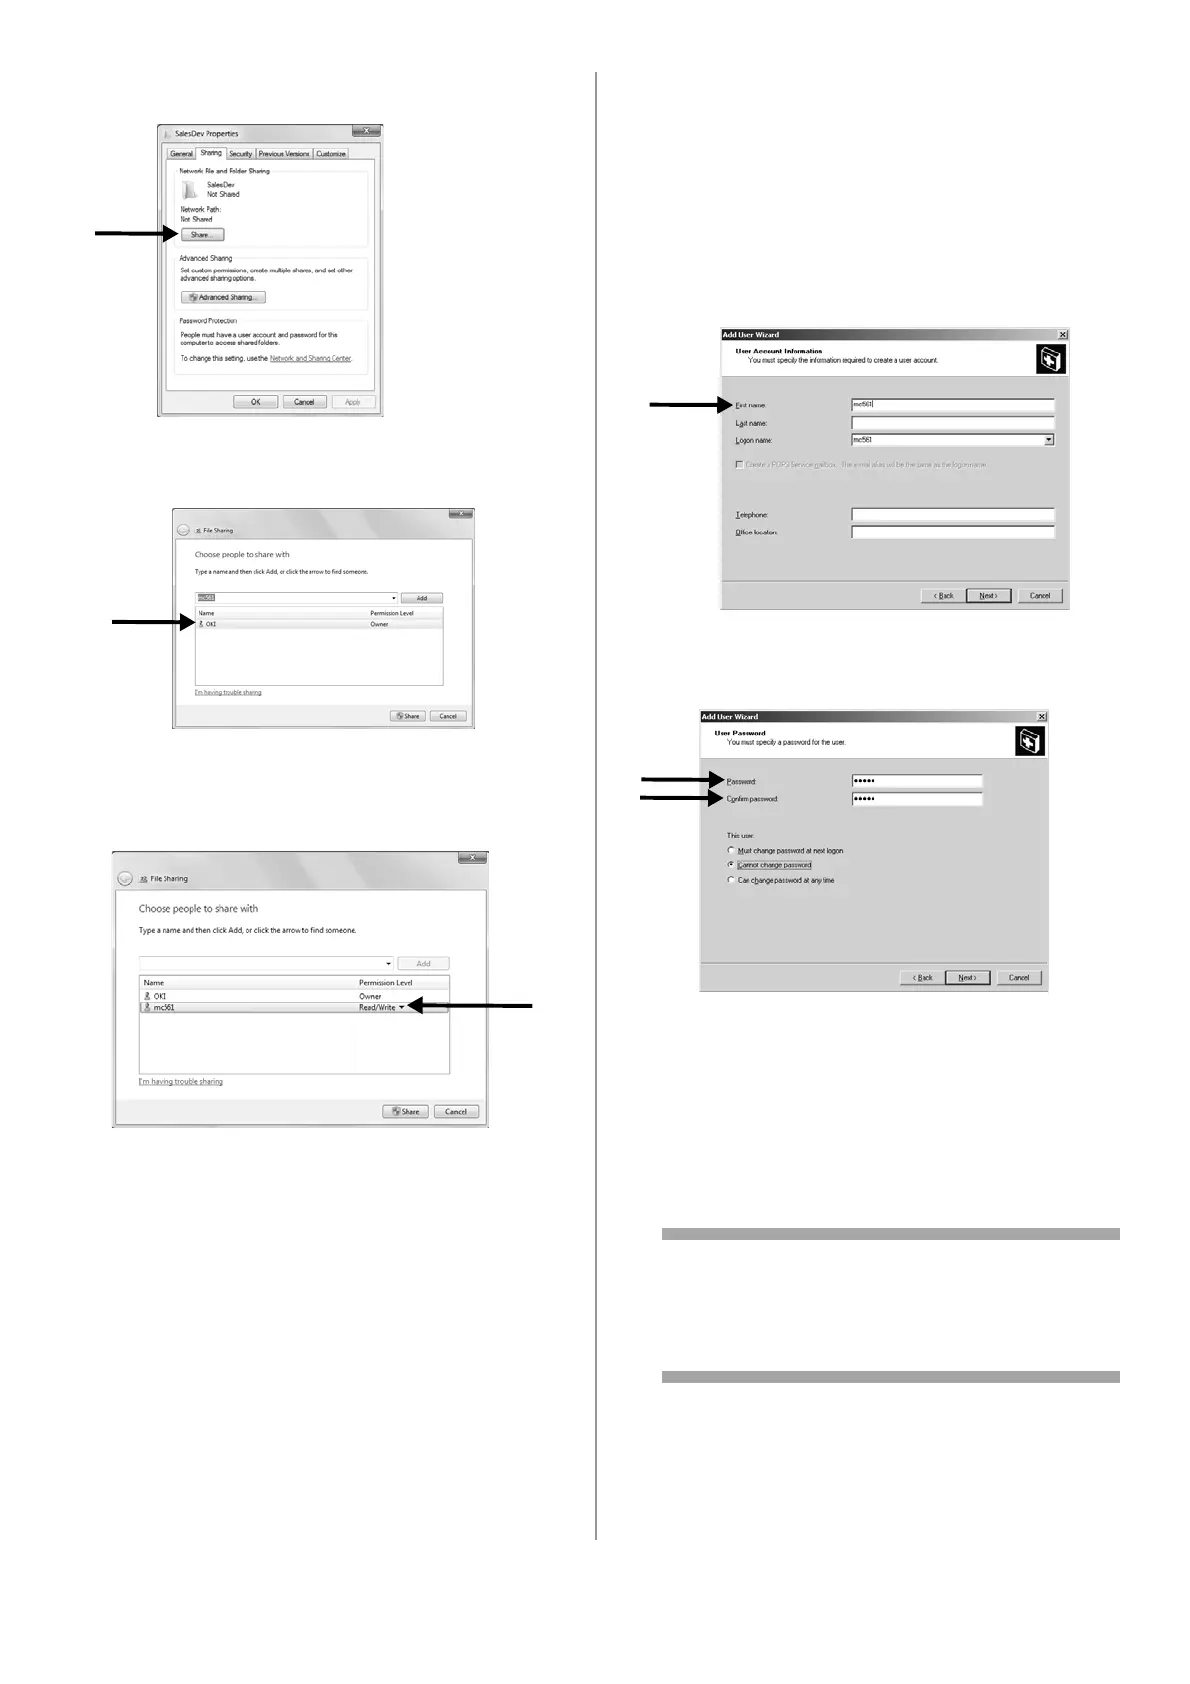
12 Select the [Sharing] tab and then click
[Share].
13 Select the user account created in step 5 from
the drop down box, and then click [Add].
14 Select the user added in the previous step
and select the permission level, then click
[Share].
15 Click [Done].
16 Click [Advanced Sharing] on the [Sharing]
tab.
17 Click [Permissions].
18 Select the user added in step 13 and select
the [Allow] check box for [Full Control], then
click [OK].
19 Close the folder’s property dialog box.
20 Create a profile to complete the setup for
Scan To Network PC. See “Profiles for Scan To
Network PC” on page 38.
For Windows Server 2003
1 Click [Start] > [Administrative Tools] >
[Server Management].
2 Click [Users].
3 Select [Add a user].
4 Enter the value of C-2 in the [First name] text
box and then click [Next].
5 Enter the value of C-3 in [Password] and
[Confirm password].
6 Select the [Cannot change password] and
then click [Next].
7 Click [Finish].
8 Click [Close].
9 Create a new folder on the computer with the
name entered on line C-5.
Note
It is recommended to create a folder in the
local drive, not on the desktop or [My
Documents].
10 Right-click the folder created in the step
above, and then select [Sharing and
Security].